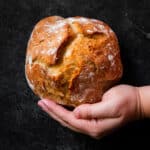
Description
This easy small batch crusty bread is perfect as a quick side dish for two or three people!
Ingredients
- 1 teaspoon active dry yeast (4 grams)
- 1 teaspoon honey (6 grams)
- 2/3 cups warm water (150 grams)
- 1 teaspoon kosher salt (4 grams)
- 1 to 1 2/3 cups All-Purpose Flour (200 grams), plus extra for dusting (see recipe notes)
Instructions
MIX THE DOUGH AND FIRST RISE (1 HOUR)
- Combine yeast, honey, and warm water in a large mixing bowl.
- Let the yeast proof for about 5 minutes, until the mixture looks nice and foamy.
- Add flour to bowl. Mix with a sturdy spatula until the dough starts to come together, then add salt and mix well, until no dry flour remains. Dough should be slightly loose, shaggy, and a bit sticky!
- Cover bowl with a clean towel. Let rise 1 hour or until doubled in size.
SHAPE THE DOUGH & FINAL RISE (30 MINUTES)
- When dough has risen, lightly flour a large cutting board.
- Tip dough out onto the board. Don’t punch the dough down - handle it gently to preserve all those air bubbles! If the dough is sticking to the bowl, run your hand under cold water (to prevent sticking) and gently pull the dough onto the cutting board.
- Shape your dough into a round loaf by gently pulling each edge into the center like you’re folding an envelope. Fold the dough in towards the center several times, until the dough stiffens and begins to resist your folds. When that happens, flip the dough over and gently pull it towards you, across the cutting board, so that the loaf tightens a bit.
- Dust a small mixing bowl with flour (I like to line my bowl with a linen napkin to help distribute the flour more evenly) and place your loaf into the bowl seam-side down. Cover with a clean towel and let rise for another 30 minutes while you heat the oven.
HEAT THE OVEN
- While bread proofs, place an empty dutch oven (with the lid on) in your oven and heat to 460° F.
BAKE! (30 MINUTES)
- When the oven is hot, tip your loaf - seam side UP this time - onto a piece of parchment paper.
- Use oven mitts to pull out the hot Dutch oven and remove the lid. Use the parchment paper to carefully lift your loaf into the pot, then use your oven mitts to return the Dutch oven lid and then slide the pot back into your hot oven.
- Cook bread for 22 minutes.
- After 22 minutes, carefully remove the lid from your dutch oven. The bread should be crusty and lightly browned. Continue baking, uncovered, for another 5-10 minutes to deepen the color.
- Transfer bread to a cooling rack and let cool at least 30 minutes (and ideally a few hours) before slicing. Enjoy!
Notes
Equipment. We have tested this recipe in Le Creuset, Staub, Marquette Castings, and Challenger Breadware Dutch ovens. Be sure your Dutch oven is safe at high temperatures, and as always, please check the care instructions on your own equipment before baking.
Ingredients. For best results, use a high-quality flour for this recipe: We recommend King Arthur Flour and Bob's Red Mill flour. This recipe was developed with Diamond Crystal Kosher Salt, which is colloquially known as the "least salty salt." If you need to use table salt or another fine salt and you are measuring by volume with a teaspoon, reduce the amount of salt by 1/4 teaspoon (if you're measuring by weight, don't worry about what brand of salt you're using - just follow the gram measurements!) If you don't have honey, use sugar in its place.
Please use a kitchen scale! Measuring flour with cups is notoriously unreliable, so please use a kitchen scale and follow our gram measurements if you can! If you don't have a scale, measure your flour with the scoop-and-level method to be as accurate as possible. (We have a whole write-up about this flour measuring conundrum in our online course!)
This is a slightly sticky dough - it won't pull into a smooth ball as you mix it, and it will be a bit sticky and shaggy. Don't worry - it will smooth out as it rises! If the dough is sticking too much while you're shaping it, add another dusting of flour.
Do I need a proofing basket? If you've made our Easy Crusty French Bread before, you know that we love using a proofing basket to help the bread hold its shape during its final rise! With this small loaf, a 9-inch proofing basket is often too big, so we prefer using a small mixing bowl (about 6 inches across) to help this loaf hold its shape more effectively.
Love this recipe? Check out our Roasted Garlic and Rosemary Bread or our Easy Asiago Bread next! And if you're ready to level up your bread game (and get our best recipes without the ads!) check out our Everyday Artisan Bread course.