

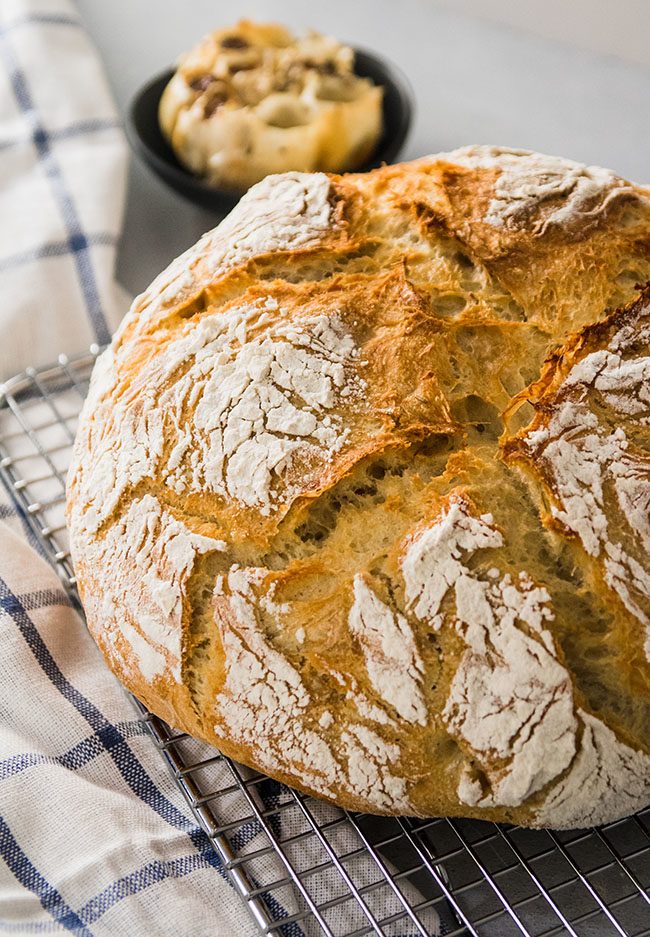
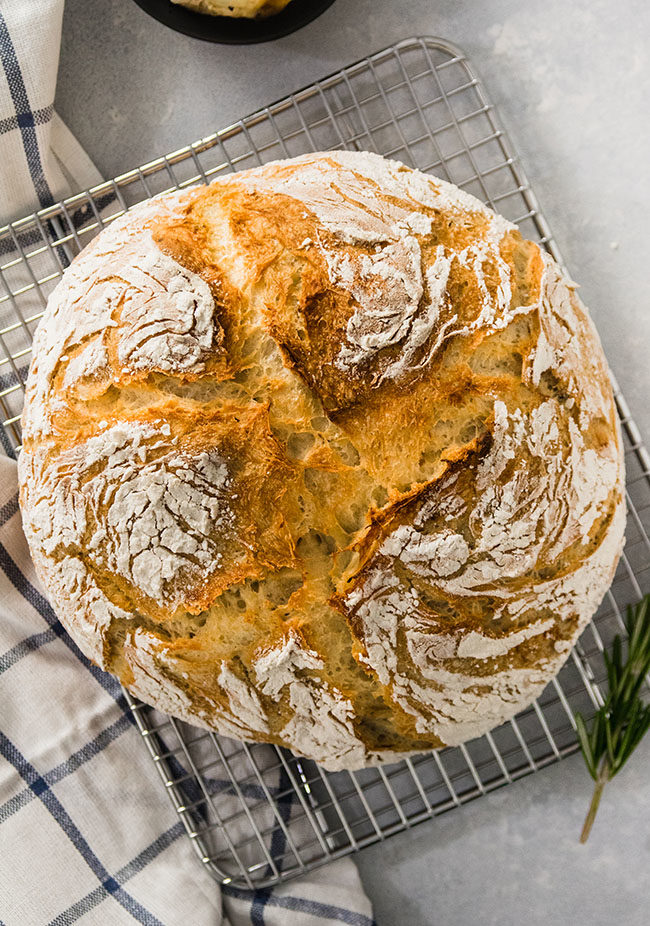
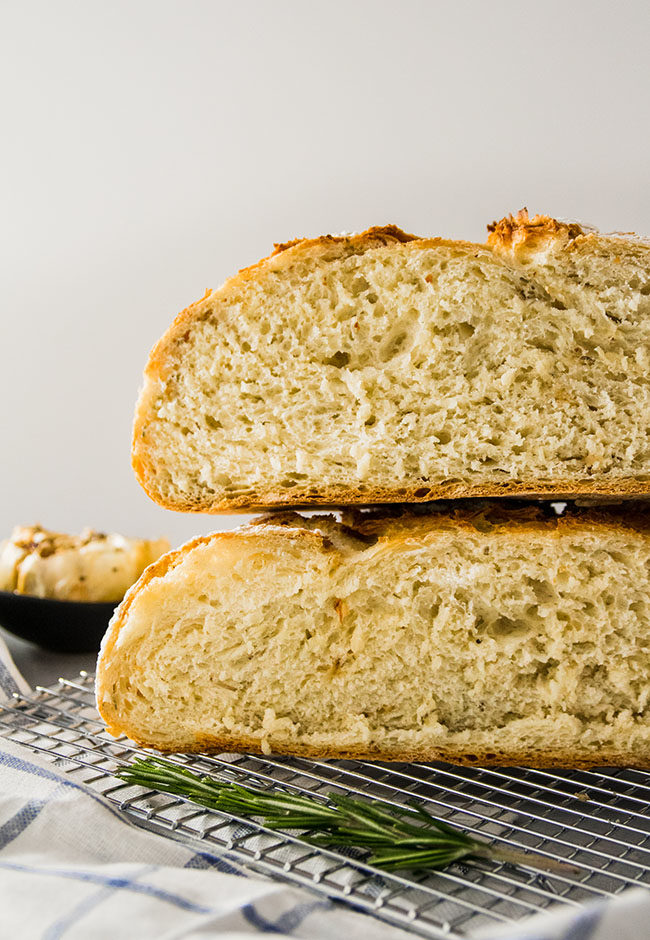
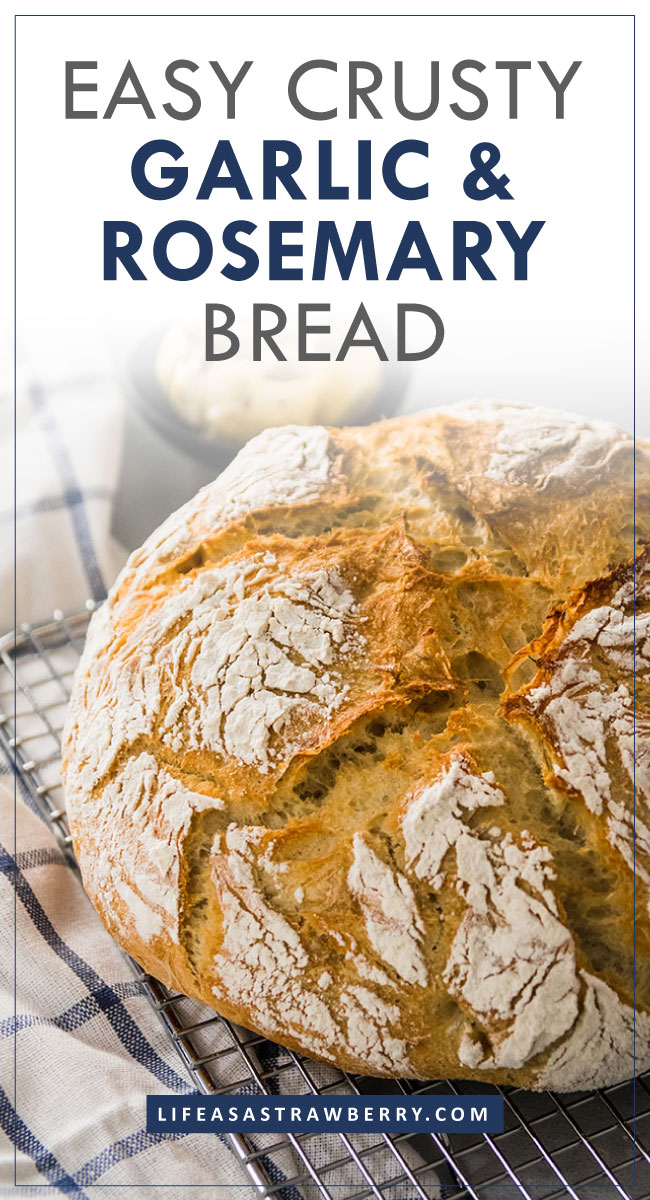
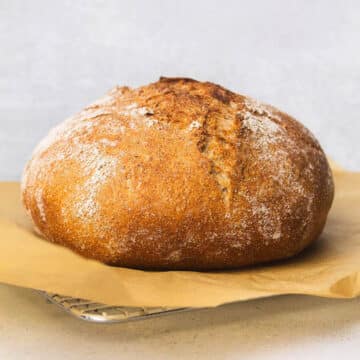
This easy crusty bread with roasted garlic and rosemary is ready in just a few hours - no overnight rise necessary! No stand mixer required. Baked in a dutch oven for a crunchy, crispy exterior and soft interior.

I present to youuuuuu: one of the most-requested recipes EVER on Life As A Strawberry. We're taking our fan favorite Easy Crusty Bread recipe and amping it up with plenty of roasted garlic and fresh rosemary (*swoooooon*)
Here's what you need to know about this easy bread recipe:
- SIMPLE is the name of the game here, folks. This bread is easy to work with and very forgiving - you don't need to be an experienced baker to rock this recipe! YOU GOT THIS.
- We use our favorite Dutch oven bread technique here to get a nice, crusty bread with a soft interior. (No Dutch oven? No problem - just keep reading!)
- This riff on our basic crusty bread is packed with flavor and easy to customize! This recipe is written for roasted garlic and fresh rosemary, but it's also good with dried rosemary, fresh or dried thyme, some fresh ground black pepper, or a handful of shredded parmesan or asiago cheese mixed right into the dough.
If you've made our favorite crusty french bread before, you'll recognize the Dutch oven technique here - but trust me when I tell you that this roasted garlic + rosemary situation takes things to a WHOLE. NEW. LEVEL.
Also, BONUS: This bread is ready in just over three hours (or less if you use pre-made or store-bought roasted garlic!) No waiting for an overnight rise, and no kneading necessary. (You don't even need a stand mixer!)
Here's a quick timeline for this homemade bread:
- Roast the garlic - 40 mins.
- Mix the dough – 15 mins.
- Let it rise – 1 hour
- Shape the loaf – 5 mins.
- Rise again – 30 mins.
- Bake – 40-50 mins.
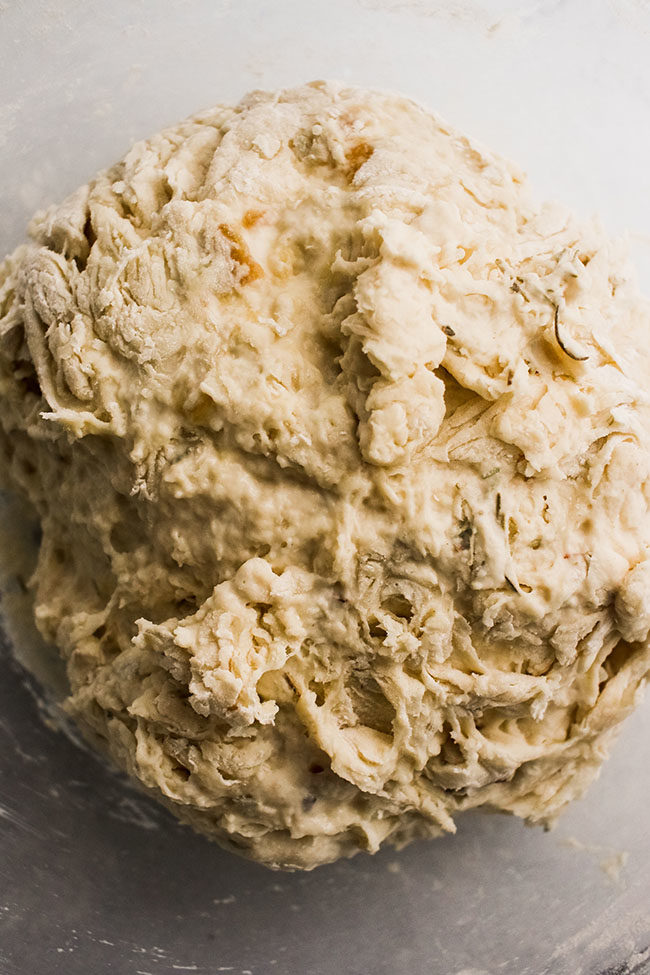
PS - Don't worry if the dough looks a little loose or sticky at first. This is a slacker (wetter) dough than many people might be used to, but that’s what makes it so light and chewy! As with any recipe, though, don’t be afraid to trust your instincts – sometimes you need to adjust the amount of flour or a rise time to compensate for different variables in your kitchen. These photos should give you a general idea of what you’re looking for (and there’s also a helpful technique video here!)
How to bake this bread without a Dutch oven:
The benefit of a Dutch oven is that its heavy lid helps trap steam inside the pot while the bread bakes. Steam in the pot (or in the oven!) = a nice, crispy crust. Fortunately, there are a few ways to achieve the same crispy crust without a Dutch oven:
- Use a tall oven-safe baking dish with a cookie sheet on top. A deep casserole dish or oven-safe pot is a great substitute for a Dutch oven. I've used a roasting pan, casserole dishes, and even a stainless steel stock pot when a Dutch oven isn't available. No need to preheat your dish with this method - just place the bread in a room-temperature pot or baking dish, cover with a cookie sheet to help trap some steam, and bake as directed.
- Bake bread in a cast iron skillet and add a second pan full of water to the oven to help create steam. Fill a small cast iron skillet with water and place it on the lower-most rack of your oven. Preheat a second cast iron skillet just like you would the Dutch oven. Bake your bread in this preheated skillet (I like an 8" or 9" skillet here) on the rack above the smaller pan with water.
- Use a pizza stone or baking steel. A pizza stone or baking steel is another easy way to achieve crusty bread at home. As with a cast iron skillet, you'll want to add a small cast iron skillet full of water to the lowermost oven rack and place your stone or steel above it.
PS - for more ideas on how to create steam in your home oven, check out this post from our friends at King Arthur Flour!
How to reheat your garlic rosemary bread:
Store a full loaf of bread uncovered on the counter (or loosely covered with a clean tea towel) for several hours. You can store a half-loaf cut side down on a cutting board for a few hours as well.
While plain ol' crusty bread can hang out on the counter for a day or two, the roasted garlic here won't keep well on the counter for an extended period of time. We recommend eating this bread within a few hours of baking and transferring any leftovers to the fridge or freezer.
Refresh day-old bread by popping it in a 350 degree Fahrenheit oven for 5-10 minutes or until just warmed through.
Once sliced, this bread will keep in an airtight container in the fridge for 2-3 days. The bread may dry out as it sits, but popping leftover slices into the toaster for a few minutes will crisp it right back up!
Video: How to make roasted garlic and rosemary bread
📖 Recipe
Crusty Roasted Garlic and Rosemary Bread
- Prep Time: 20 minutes
- Inactive Time: 2 hours
- Cook Time: 1 hour 20 minutes
- Total Time: 3 hours 40 minutes
- Yield: Makes 1 loaf 1x
- Category: Bread
- Cuisine: American
Description
An easy homemade crusty bread recipe with roasted garlic and fresh rosemary!
Ingredients
FOR THE ROASTED GARLIC:
- 1 head garlic
- 1 teaspoon olive oil
- salt to taste
FOR THE BREAD:
- 2 ¼ teaspoons active dry yeast
- 1 teaspoon honey or sugar
- 1 ¼ cups warm water (about a hundred degrees Fahrenheit)
- 1 ½ teaspoons Kosher salt
- 2 Tablespoons fresh chopped rosemary
- 8-10 roasted garlic cloves, roughly chopped
- 3 cups (360 grams) All-Purpose flour, plus extra for dusting
- 1 Tablespoon olive oil
Instructions
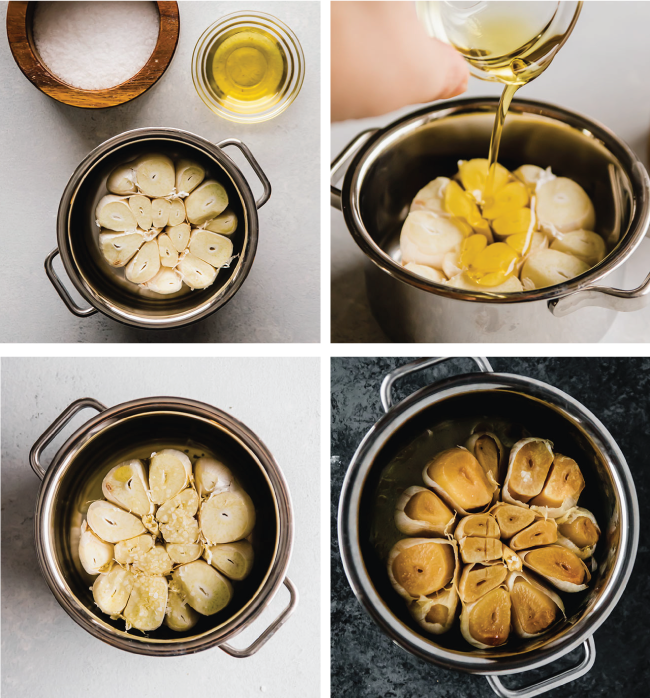
FOR THE ROASTED GARLIC:
- Heat oven to 400 degrees F.
- Trim the top off the head of garlic to expose the cloves inside.
- Place garlic in a small lidded baking dish.
- Drizzle garlic with olive oil and sprinkle with salt.
- Cover garlic and roast for 30-45 minutes or until cloves are soft and lightly browned. Remove from oven and set aside to cool.
FOR THE BREAD: Make the dough & first rise (1 Hour)
- Combine yeast, honey, and warm water in a large mixing bowl (you can also use a stand mixer fitted with a dough hook!) Let the yeast proof for about 5 minutes until the mixture is foamy.
- Add salt, rosemary, and chopped roasted garlic to the bowl.
- Add flour to bowl a bit at a time and stir with a wooden spoon or stiff spatula until all flour is incorporated and ingredients have just come together to form a slightly shaggy dough.
- Drizzle dough with olive oil and turn the dough over to coat all sides. Cover with a clean tea towel and let rise on the counter for about 1 hour or until dough has doubled in size.
Shape the dough and final rise (30 minutes)
- When dough has doubled in size, lightly flour a large cutting board.
- Tip the dough out of the bowl and onto the cutting board. DON'T PUNCH THE DOUGH DOWN! We want to preserve all those nice air bubbles.
- Pull each corner of the dough into the center of the loaf one at a time as if you're folding an envelope. Repeat this process 4-5 times until dough feels relatively stiff, then flip the dough over and lightly twist while pulling it towards you across the cutting board until you have a nice round loaf. (Watch our Easy Crusty French Bread video to see how we do this!)
- Flour a proofing basket or a small mixing bowl and place your loaf into it seam-side down. Cover with a clean tea towel and let rise for 30 minutes.
Heat the oven
- While your bread does its final rise, place an empty Dutch oven into your oven and heat to 450 degrees F.
Bake!
- When the oven is hot, you're ready to go! Use oven mitts to pull the Dutch oven out and remove the lid.
- Tip your bread dough gently out of the proofing basket back onto your floured cutting board. The seam side should face UP this time - that's what gives it a nice crackly look on top! You can tip the bread onto a piece of parchment paper here to make it easier to lift the bread in and out of your Dutch oven if you like.
- VERY CAREFULLY (no burning yourself!) place the bread seam side up into your hot Dutch oven.
- Put your oven mitts back on, place the lid onto your Dutch oven, and slide the whole thing back into your hot oven.
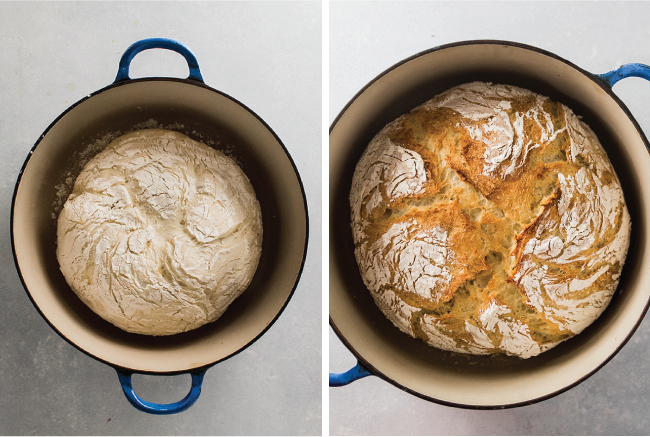
- Cook bread for 30 minutes.
- After 30 minutes, remove the lid from your Dutch oven. The bread should be crusty and lightly browned. Continue cooking, uncovered, for 10-20 minutes more until the bread has deepened in color and you have a beautiful browned crust.
- When the bread is done, use oven mitts to pull the pot out of your oven.
- Use a long spatula to lift the bread out of the Dutch oven and onto a cooling rack. Let cool for at least 20 minutes before cutting into it.
- Slice, slather with butter, and enjoy!
Notes
Measuring Flour. If possible, use a baking scale here to measure your flour by weight (in grams)! No baking scale? No worries - use the cup measurements, but make sure you measure your flour correctly by scooping and leveling.
Ingredients and Equipment. We love our 5 ½ quart Le Creuset Dutch oven here! We've also had great luck with this budget-friendly Dutch oven. If you're worried about the plastic knob on your Le Creuset melting or breaking at high heat, you can replace it with a metal knob for relatively cheap! As always, please check the care instructions on your equipment. King Arthur Flour is our go-to flour for all our baking needs.
Use a piece of parchment paper to make it easier to lift your loaf in and out of your hot Dutch oven.
No Dutch oven? No problem! Check out our favorite tried-and-true ways to bake crusty bread without a Dutch oven in this tutorial.
You can double this recipe if you like - just keep an eye on the bread as it bakes and know that you may have to extend the bake time! I generally find an extra 5-10 minutes of bake time with the lid on and an extra 5 minutes or so with the lid off is plenty for a double loaf.
Storage. Enjoy this bread within a few hours of baking and store any leftovers in the fridge or freezer once sliced. Refresh the leftovers by popping them in a 350 degree Fahrenheit oven for 5-10 minutes or until just warmed through. Once sliced, this bread will keep in an airtight container in the fridge for 2-3 days. The bread may dry out as it sits, but popping leftover slices into the toaster for a few minutes will crisp it right back up! Freeze sliced bread in an airtight container or airtight bag for 2-3 months and defrost as needed.
Additions and Substitutions. This recipe is very forgiving - mix it up however you like! Add more or less of the roasted garlic and fresh rosemary if you like. Use 1 Tablespoon dried rosemary in place of fresh. Use thyme (fresh or dried) in addition to or in place of the rosemary. Add ½ cup grated parmesan cheese if you like. Substitute ½ cup of wheat or rye flour for ½ cup of the all purpose flour if you like. Be sure to also check out our basic crusty bread and crusty asiago bread recipes!
Nutrition
- Serving Size:
- Calories: 277
- Sugar: 1.4 g
- Sodium: 395.2 mg
- Fat: 1.7 g
- Carbohydrates: 56.9 g
- Protein: 8.5 g
- Cholesterol: 0 mg


Taylor Nations
Super tasty bread! Very flavorful and great texture. I have been using it for avocado toast in the morning and it is deeeeeeeeeeee-lish.
Rhonda @ Life As A Strawberry
YUM for avocado toast!
Dawn
Love it 🙂
Rhonda @ Life As A Strawberry
So glad you love this!
Susan
I made for the first time yesterday and loved it. The crust was a little too dark, I have a new oven, think next time I will turn temp down to 425 after the Dutch oven is hot at 450. I used 1/2 bread flour and 1/2 all purpose. Served it with a Roasted Tomato, Pepper Bisque. Wonderful on a cold winter's night.
Sharon Johnson
I make this bread frequently. Can almond flour substitute all purpose flour?
Rhonda @ Life As A Strawberry
Almond flour and all-purpose flour behave differently—since almond flour lacks gluten, we don’t recommend a direct substitution. We haven’t tested this bread recipe with almond flour, so for best results, we suggest using a recipe created specifically for almond flour.
Erika
Can I use part bread flour and part all purpose flour?
Rhonda @ Life As A Strawberry
Yes that will work just fine.
Shan
I've made this a couple of times now. Turned out great both times.
The amount of rosemary called for has come to around one 0.5oz/14g package from the store, maybe a little less.
I don't bother proofing the yeast since I use instant, not active dry.
The second time I made it, I did let it sit in the fridge overnight after the first prove and slightly reduced the amount of yeast. (I debated sticking it in the fridge immediately as implied in another comment, but I decided to let it rise first). I took it out the next morning, let it sit on the counter for around an hour to warm up, then shaped it and let it rise in a banneton while the oven preheated.
Rhonda @ Life As A Strawberry
So happy this has become one of your go-to bread recipes!