

This post is part of our Cooking 101 Series. For more cupcake deep dives, be sure to also check out our tutorials on how to bake perfect cupcakes, how to frost a cupcake, and how to store and freeze cupcakes!
It's the final installment of my three-part series on cupcakes! Are you excited? I'm excited.

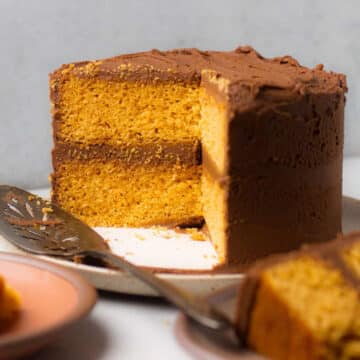
Pictured: Butterscotch Cupcakes
We learned how to bake great cupcakes in, learned how to pipe frosting, and now we're on to the main event - the decorations!
Decorating cupcakes is SO SUPER FUN, and the decoration will determine the level of "oohs" and "aahs" you get when people first see your cupcakes. The cake itself will wow them as soon as they take a bite, but it's whatever creation you've placed on top that will initially grab their attention.
I chose not to include any decorations involving fondant, gum paste, or modeling chocolate, because those techniques can be complicated and time-consuming. Also, most home cooks don't have those techniques in their repertoires.
My goal with this list was to offer quick, easy-to-make cupcake toppers that will wow a crowd without sucking up all of your free time.
Here are 14 of my favorite ways to top a cupcake with a "wow" factor!
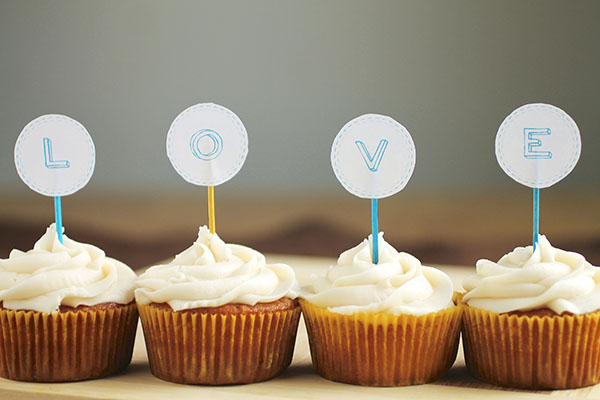
Pictured: Lemon Vanilla Cupcakes (With our free cupcake tag printable!)
1. CANDY
Candy is a quick and simple topping, but it still gives your cupcakes some character. Here, I've sliced mini reese's cups in half and placed them at an angle.
Other great candy toppers include M&Ms, Jelly Beans, or pieces of larger chocolate bars.
Pictured: Chocolate Stout Cupcakes
2. FLAGS AND PRINTED TAGS
Tags are my new favorite way to top a cupcake! They're cute and easy. Customize your own tags for a special event, or download the tags I created for these photos (for FREE!) by clicking here: Life As A Strawberry Cupcake Flags Printable.
Simply cut around the tag shapes, tape them to some colorful toothpicks, and pop them onto your cupcakes for a whimsical and artsy feel.
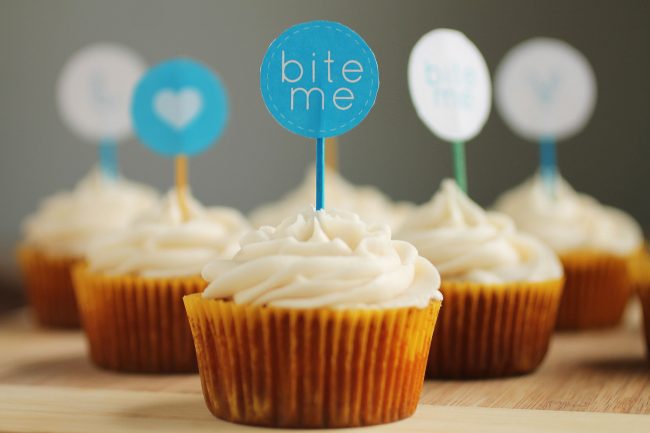
Pictured: Lemon Vanilla Cupcakes
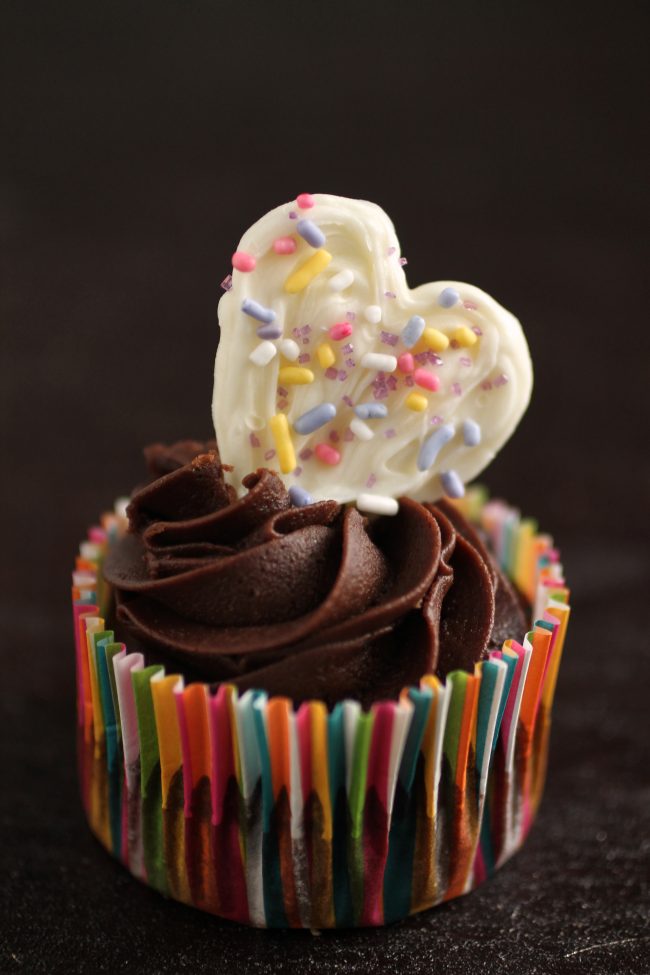
3. CHOCOLATE "DRAWINGS"
Melt some chocolate (I love using bittersweet or white chocolate chips for this!) over a double boiler and put it in a piping bag fitted with a small round tip (you could also use a ziploc bag and cut a small piece off one corner). Make sure the chocolate is still warm!
Pipe your designs or drawings directly on to a piece of wax paper, then let the chocolate set.
If you'd like, add some sprinkles to the melted chocolate after you've drawn your design for a fun effect! I used this white chocolate in the photos below. I like to let my chocolate "drawings" cool on the counter for a few hours, but if you're in a hurry, pop it in the fridge for half an hour or so!
When chocolate has hardened, gently peel your designs off of the wax paper and push them into your cupcake's frosting.
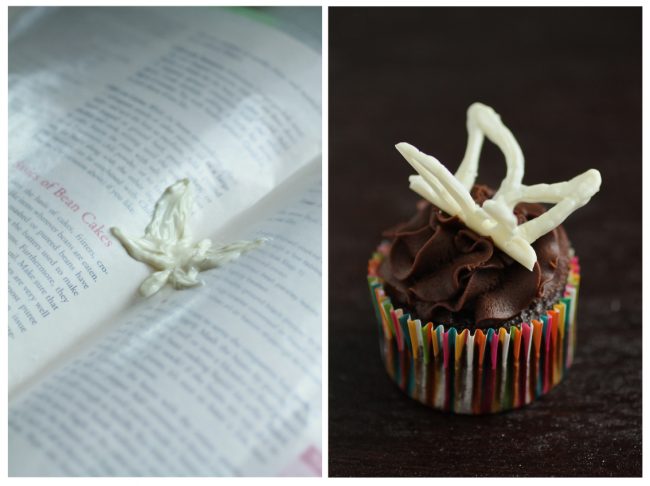
PS - Do you have a drawing you'd like to recreate in chocolate?
Just lay a piece of wax paper directly over the image and trace it with your melted chocolate.
If you'd like to create a curved chocolate piece, like the butterfly below, trace the figure in chocolate and fold the waxed paper into the spine of a book while it dries.
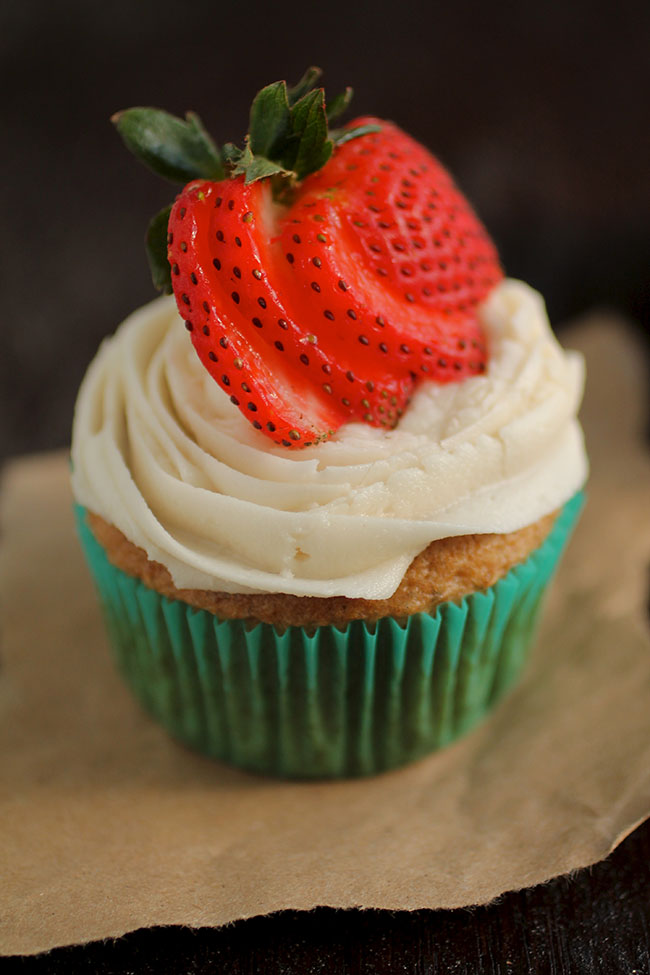
4. FRESH FRUIT
Fresh fruit is such a lovely way to top a cupcake. To slice a strawberry like you see in the photos here, lay it on a cutting board and slice several thin slices ALMOST all the way to the stem. Don't slice all the way to the stem or the berry won't hold together.
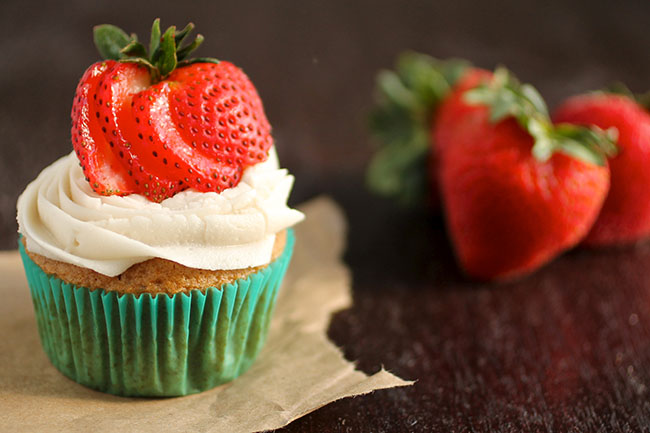
When you've sliced the berry, pull the pieces out in a sideways fan and place directly on the cupcake. Use any fruit you'd like - berries of any kind are always a hit in my house. I love using fruit that's a component in the cupcake recipe, too: if you're making applesauce cupcakes, garnish with a slice of apple. Making lemon-y cupcakes? Garnish with a slice of citrus!
A word of caution with any fruit (berries especially), though: don't put it on top of a cupcake until you're ready to eat. If a berry or other juicy fruit is in contact with the sugary frosting for too long, it will react with the sugar and begin to macerate, or soften and release some juice. The last thing you want is a sticky cupcake covered in fruit mush! Place fruit at the last possible moment to ensure a crisp, fresh bite.
Pictured: Pumpkin Ale Cupcakes
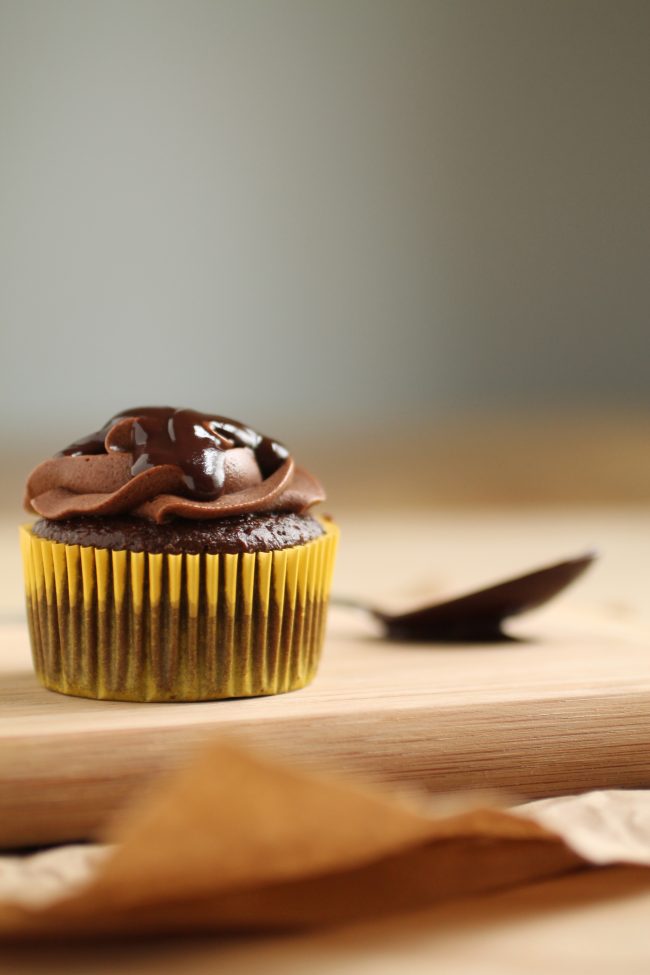
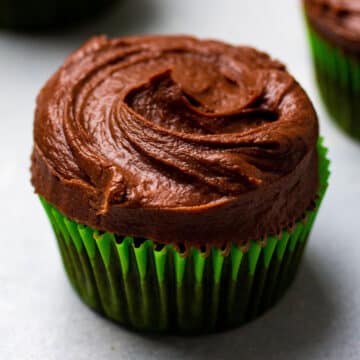
5. GANACHE
Ganache is a great choice if you're decorating a large number of cupcakes. You can spoon it quickly on top of frosting and not have to worry if it gets a little messy - it will just look artsy. To make a simple chocolate ganache, bring ¼ cup of milk to a simmer, then remove it from the heat and pour it over 1 cup of room temperature chocolate chips.
For a mint chocolate ganache, add ¼ teaspoon of mint extract as well, or switch it up and make a Chocolate Butterscotch Ganache. Stir the mixture until the milk has melted all of the chocolate and you're left with a smooth, glossy sauce. Let it cool on the counter for a few minutes so it will thicken - a thicker ganache gives you a bit more control over where it lands when you pour it over a cupcake.
You can dip the tops of cupcakes directly into the bowl of ganache for a smooth, glossy finish, or spoon a bit over frosted cupcakes (as seen below) for a fun drizzle-y effect.
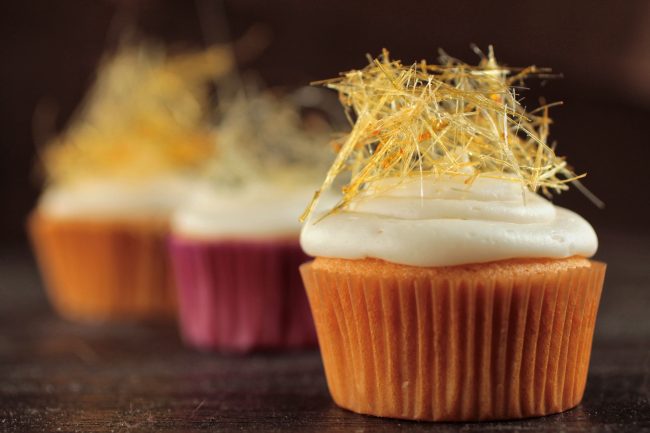
6. SUGAR CAGES
Caramel sugar cages look super fancy and complicated and intimidating. But I'll tell you a secret: they aren't that tough! You just need the right setup.
Whisk ½ cup water, 1 cup sugar, and ¼ tsp. cream of tartar together in a non-stick saucepan and bring to a simmer.
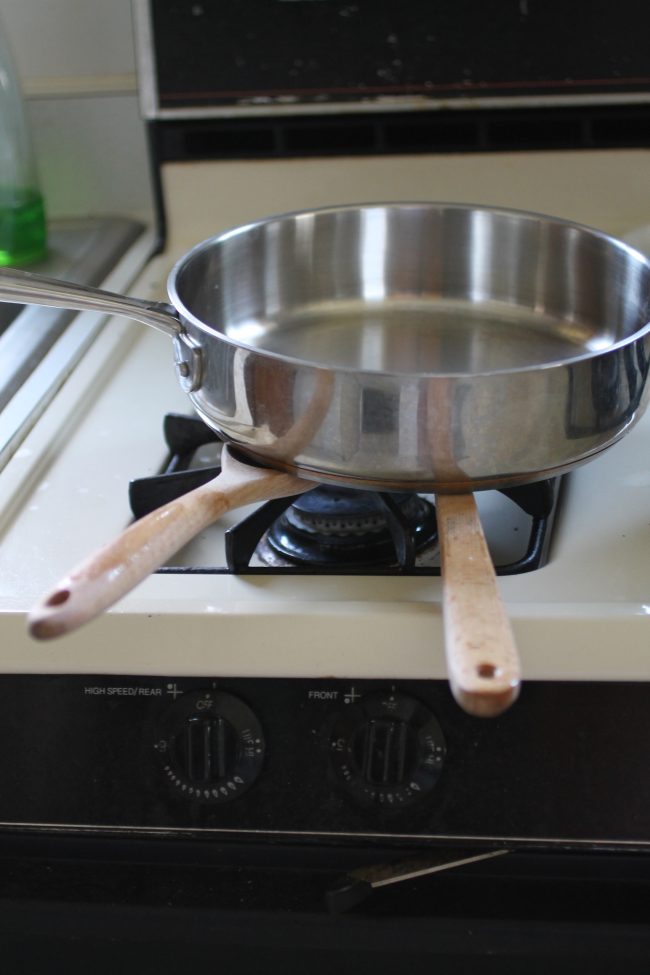
Keep an eye on it - you don't want the caramel to overcook because it will taste bitter. While the caramel heats up, spray a few large wooden spoons with non-stick cooking spray and pin them to a counter or stovetop with a heavy pan. You could also tape them down, but that takes a lot of effort. I also put a layer of paper towels on the floor under the handles to catch any rogue caramel that falls.
Here's what my setup usually looks like:
When the caramel hits 340 degrees Fahrenheit (check this with a candy thermometer!) and has turned a light golden color, it's ready!
Remove it from the heat and let cool until it's reached the consistency of thick corn syrup, about 5 minutes. Then take one spoonful of caramel at a time and drizzle it quickly back and forth over the spoon handles.
The caramel should fall in light strands, and it will solidify pretty quickly as it falls.
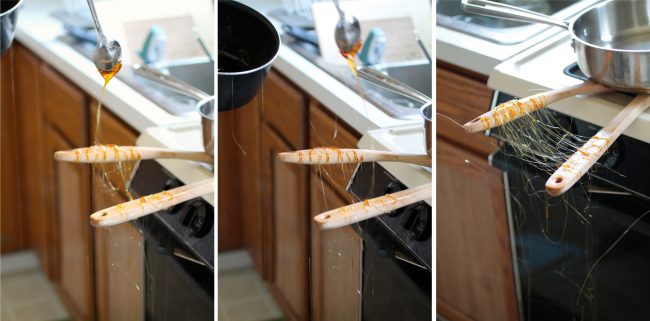
Spoon 4 or 5 spoonfuls of caramel across the spoon handles, then set the caramel aside and cup your hands at the lowest point of the caramel strands.
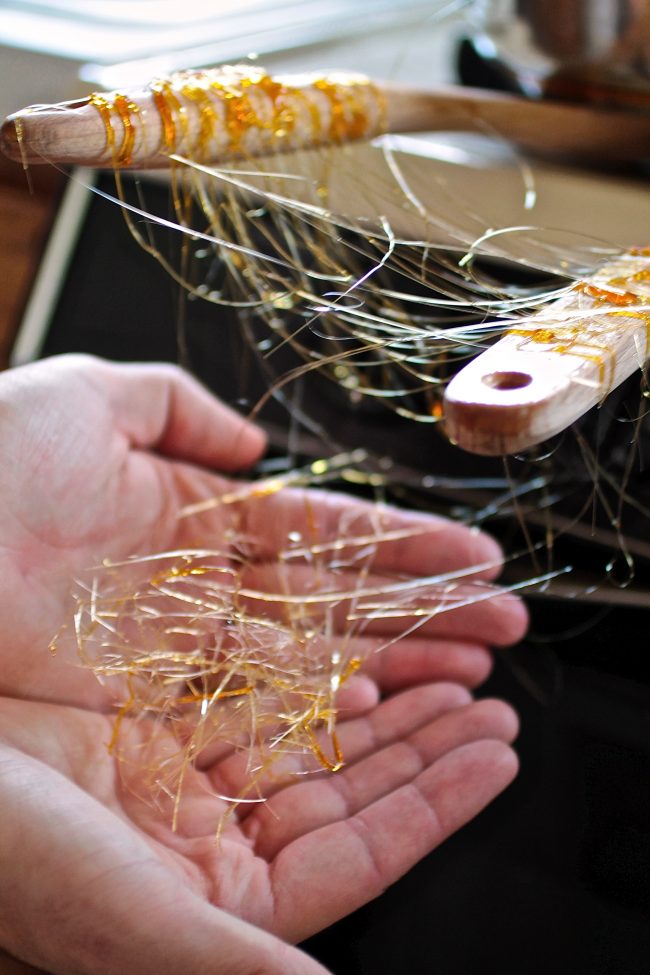
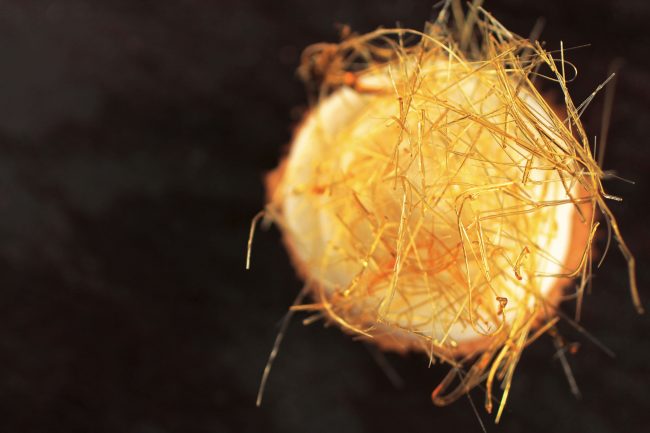
Gently pull the strands together with your hands into a ball and gather as much of the caramel together as you'd like for one cupcake topper, then pull the nest off of the strands and set it aside to cool.
It's important to collect the nests while the caramel is still warm - if it cools too much, it will snap into smithereens as you gather it into a nest. You want the caramel to gently bend into shape, not break!
You'll be able to get 1 or 2 nests out of 4-5 spoonfuls of caramel drizzle. When you've collected all the caramel from one round of drizzling, repeat the process!
If your caramel cools too much, you can heat it up briefly on the stovetop until it's back to the original consistency. When you're ready to decorate the cupcakes, gently press a nest into the cupcake's fresh frosting for an ethereal topper that is sure to impress.
PS - this was my husband's favorite out of all the cupcake toppings I made him taste test.
You can also use this caramel recipe for the pulled caramel ribbons (instructions are #13 on this list!)
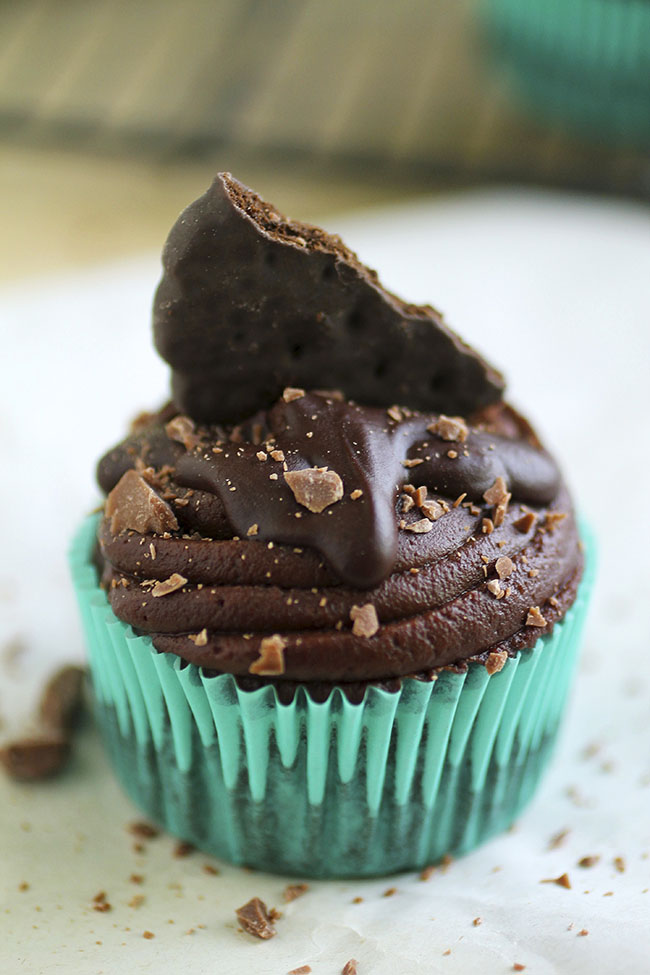
7. COOKIES
I love cookies! And I love cupcakes. So naturally, I combine the two of them whenever I can. Use a whole cookie as a topper or slice them in half for a different shape. I used Thin Mints here (YAY THIN MINTS) and also used a bit of chocolate ganache on top.
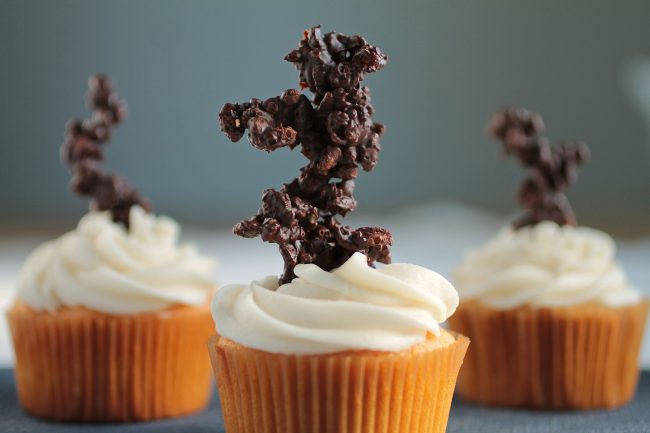
8. CHOCOLATE COVERED KRISPY TOWERS
These are so cool. And they are SO EASY! I think I might be in love.
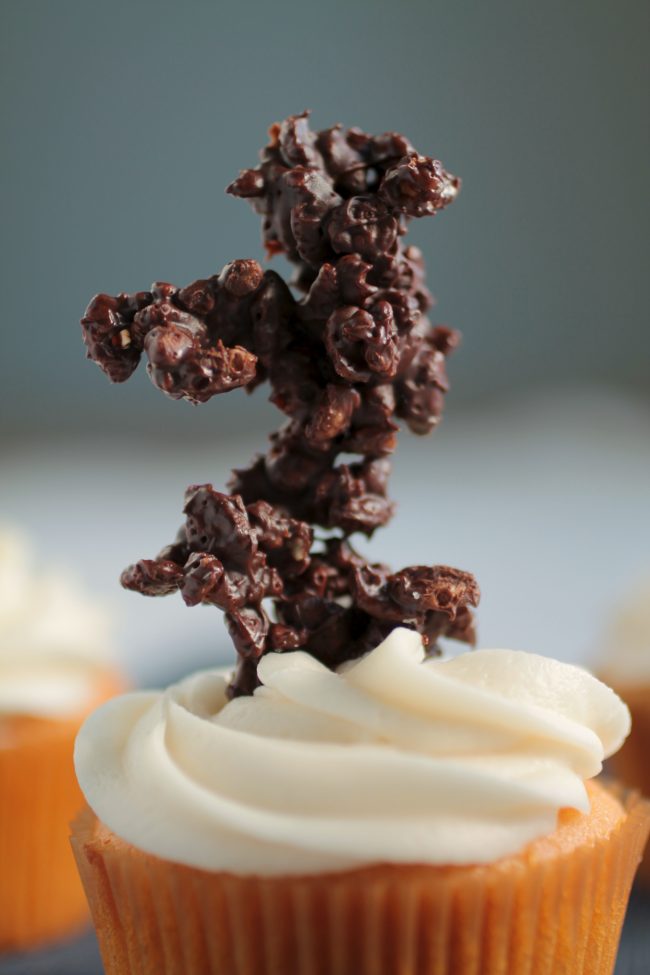
Melt 1 cup of semi-sweet chocolate over a double boiler, then stir in 1 cup of rice krispy cereal. Spread it out in a thin layer on a piece of wax paper.
Try to make sure that you have "branches" that are solidly connected, so that your towers will hold their shape when you break them apart later.
Let the chocolate sit on the counter for a few hours to harden or pop it in the fridge for 30 minutes or so, until chocolate has set.
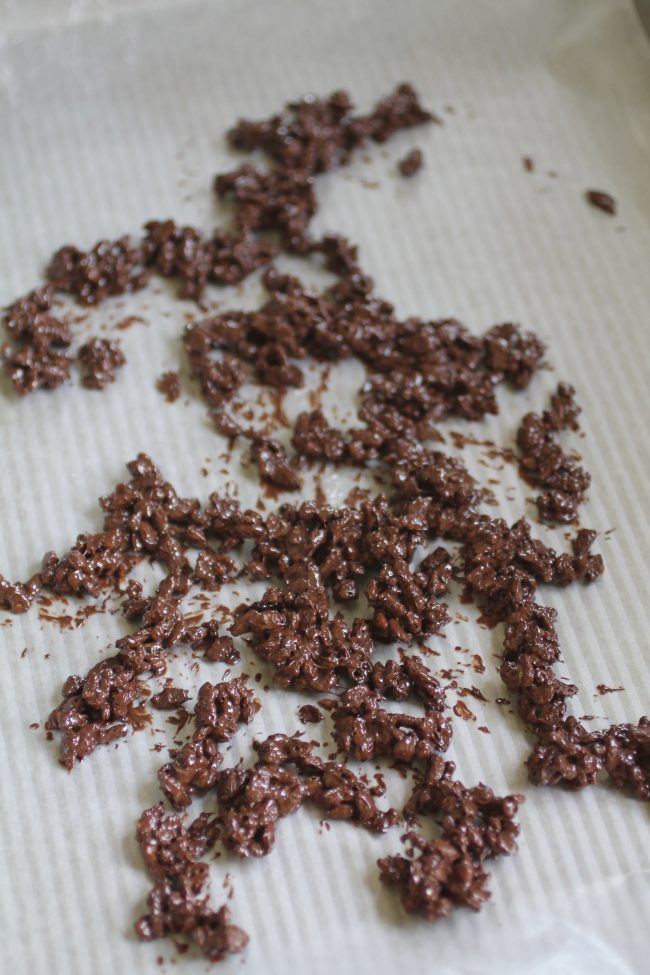
When chocolate has set, gently break it into 1 to 2 inch tall "towers." Sink these towers into fresh frosting and voila! You've got a pretty spiffy cupcake.
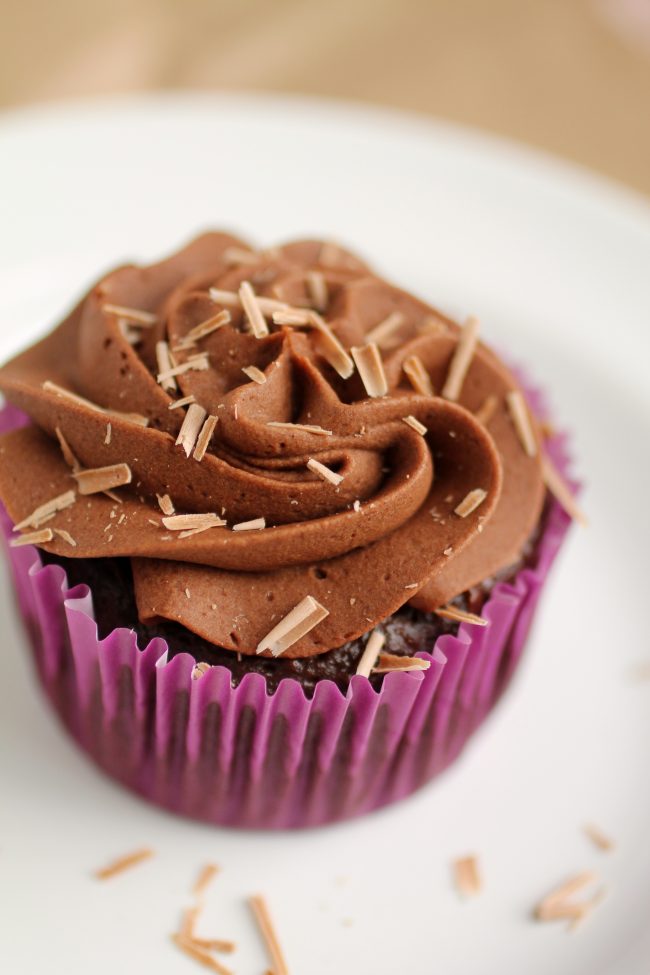
9. CHOCOLATE SHAVINGS
This is another simple topping trick that will give your cupcakes a serious "WOW" factor with very little effort. To make chocolate shavings, grate cold chocolate with a microplane while you hold it directly over a cupcake.
If you want more pronounced swirls, run a vegetable peeler down the side of a room-temperature chocolate bar to produce beautiful chocolate curls!
This photo used the vegetable peeler technique, though I peeled the chocolate in short strokes for small curls (rather than long strokes for larger curls).
I love using a microplane for large batches of cupcakes because I can line them all up and grate chocolate over them all very quickly. If I'm doing a smaller batch and want them to be a little fancier, I'll use the vegetable peeler method to get some thick curls of chocolate.
10. DRIZZLE-Y-NESS
Chocolate drizzle is another quick but beautiful way to enhance the appearance of your cupcakes. I like to use a variety of topping choices: here, I've melted some peanut butter chips and some semi-sweet chocolate chips for two contrasting colors of drizzle. Use any kind of chocolate you'd like, or experiment with butterscotch chips for a bit of pizzaz.
I like to use two kinds of drizzle, and I melt about ½ cup of each flavor over a double boiler (in separate bowls), then spoon the still-warm chocolate (or peanut butter or butterscotch) into ziploc bags, cut a small corner off, and drizzle each flavor in opposite directions over the cupcake to achieve an artsy look.
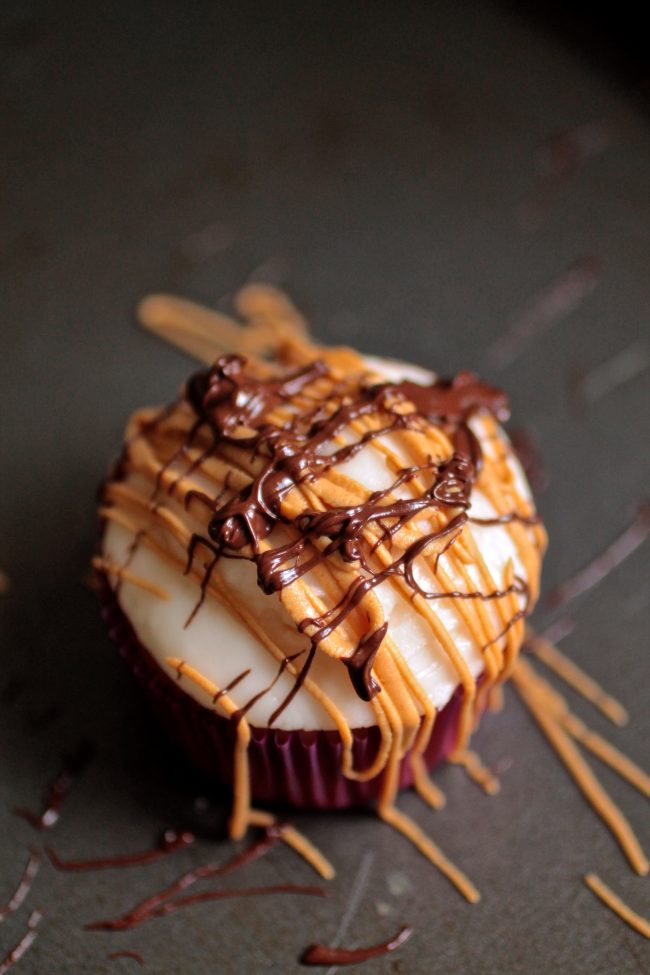
Pictured: Butterscotch Cupcakes with vanilla buttercream
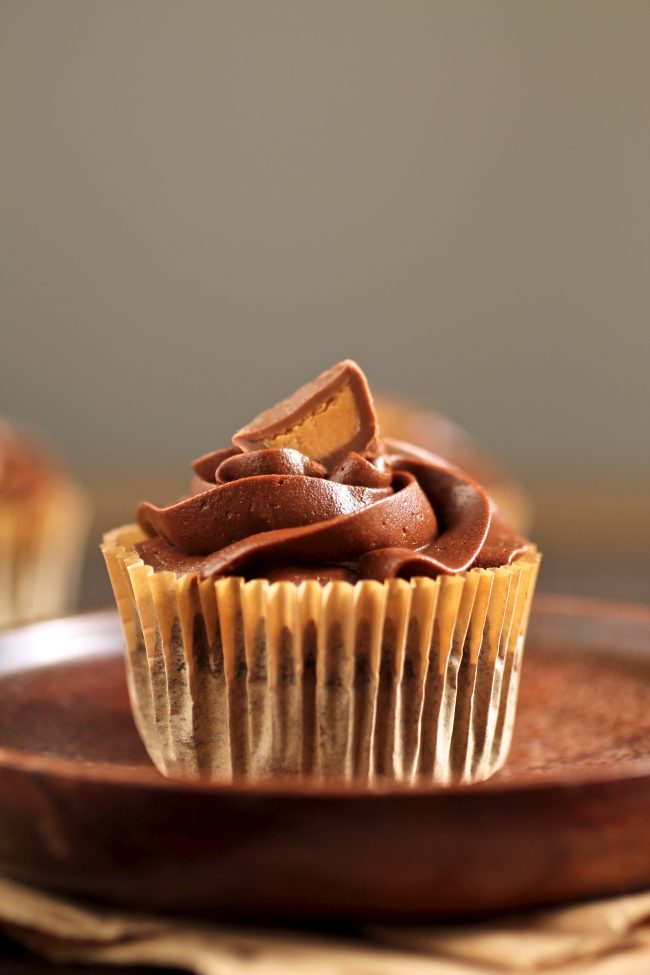
11. MINI "CUPCAKES"
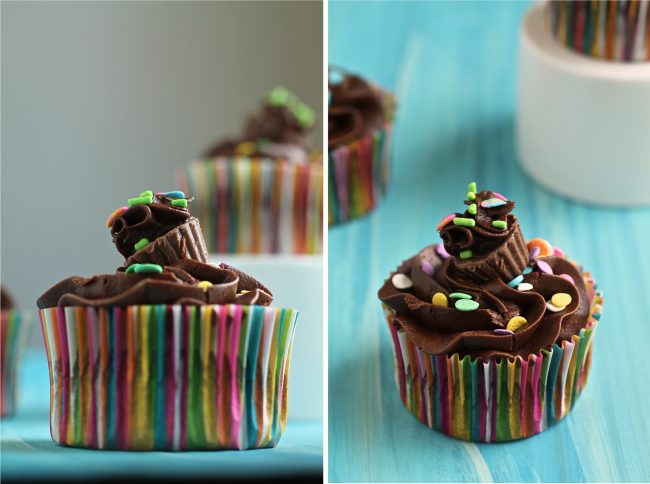
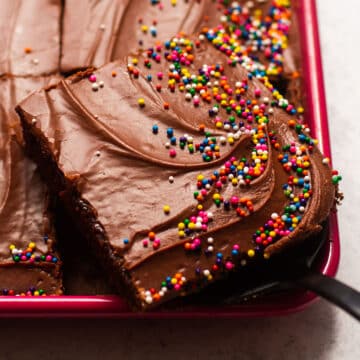
These toppings are so fun and whimsical. To create a "mini" cupcake, unwrap a peanut butter cup (or a mini peanut butter cup, which I used for these photos!) and frost it with a pastry bag and piping tip just like you did the real cupcakes. Add some sprinkles to the real cupcakes and the mini "cupcakes," and set each peanut butter cup on top of your frosting at an angle. How cute, right?
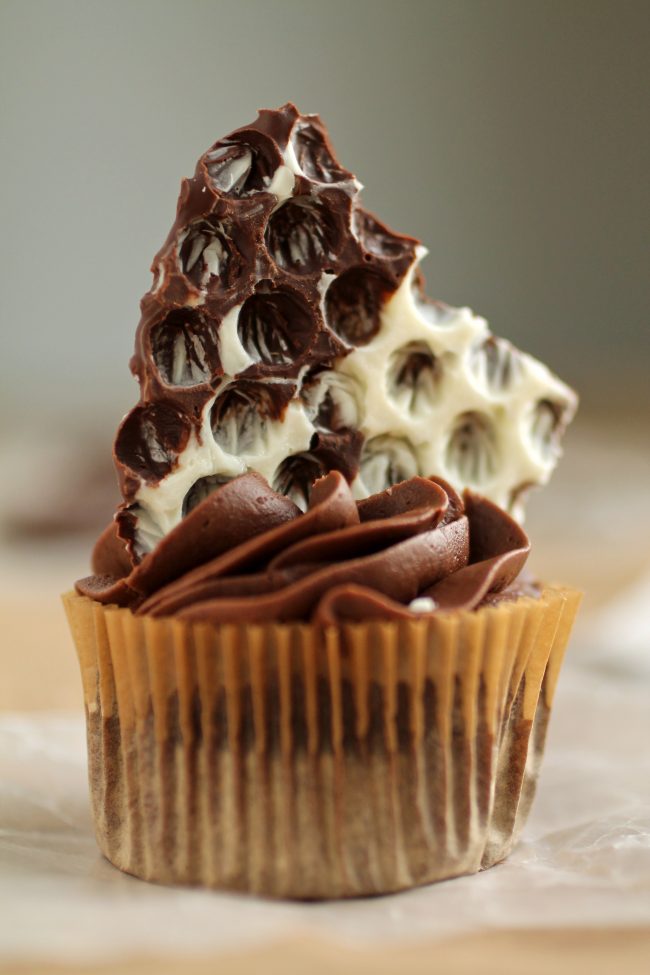
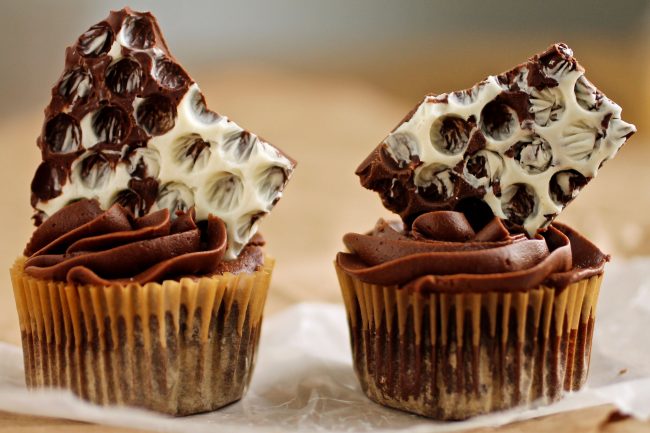
12. CHOCOLATE BUBBLE WRAP
I know I have a lot of favorite cupcake toppings...but here's another one. This is a new addition to my cupcake arsenal, and I am LOVING it. It's so unique and I love using both white and dark chocolate to create a marble-like product.
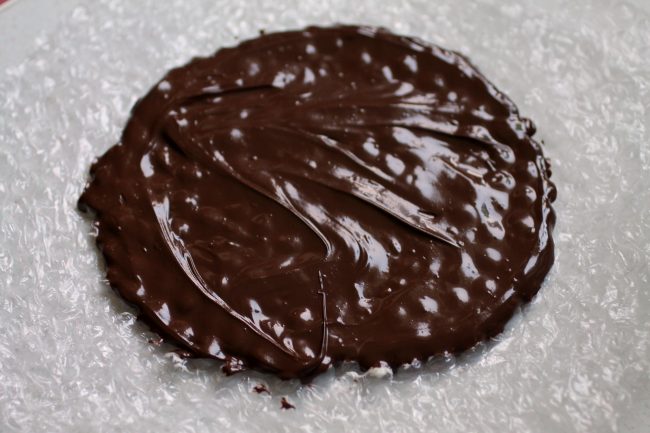
To make the chocolate bubble wrap, melt 1 cup each of semi-sweet and white chocolate in separate bowls over a double boiler. Let cool five minutes until chocolate is spreadable but not hot. Lay a piece of clean bubble wrap bubble-side up on the counter and cover it with a food-safe piece of waxed paper or plastic wrap. Spread the white chocolate over the covered bubble wrap and pop it in the freezer for five minutes to let it set a bit. Pull it out of the freezer and spread the semi-sweet chocolate right on top of the white chocolate, then let it set on the counter for a few hours or stick it in the fridge for about 45 minutes.
When the chocolate has set, peel the bubble wrap and food safe covering off of it and break it into chunks, then top each cupcake with a piece of chocolate bubble wrap!
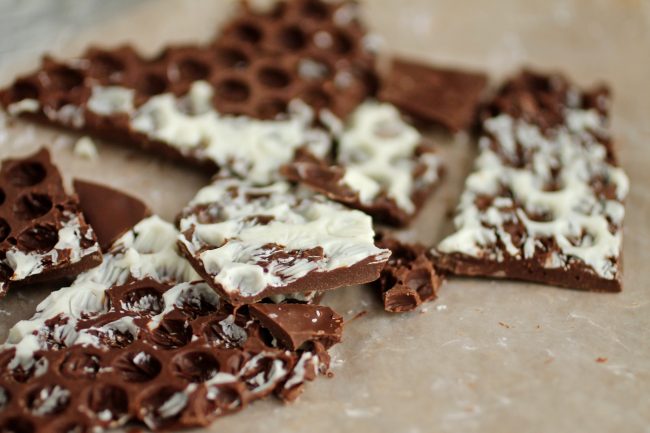
But seriously...this is super cool, right? (And also delicious....because it's CHOCOLATE).
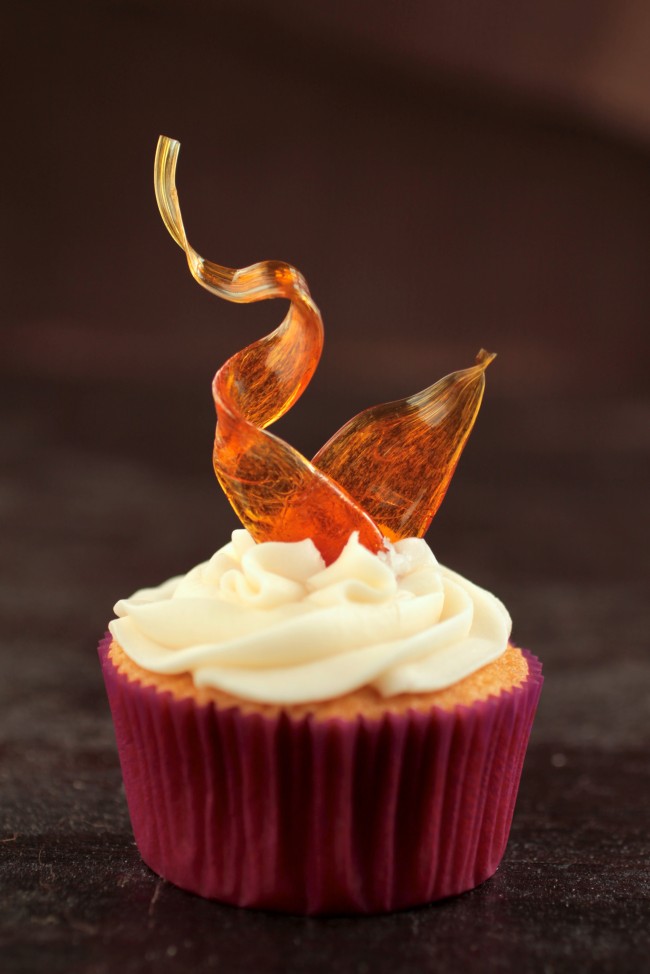
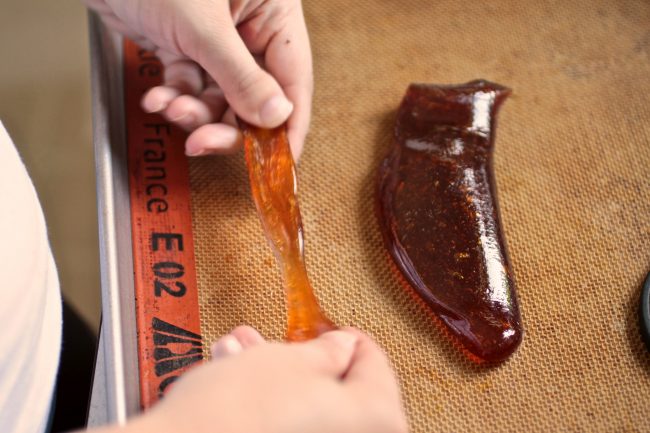
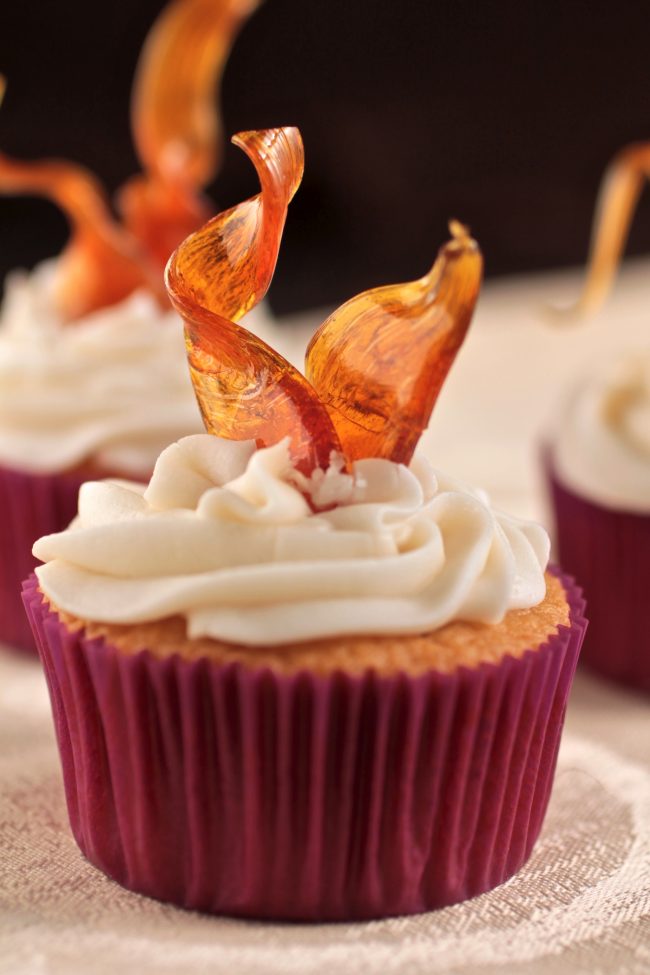
13. PULLED CARAMEL RIBBONS
Caramel ribbons take a bit of practice, but once you get the hang of them they're quick to make and they look SUPER fancy. Plus, the hard caramel tastes like a delicious lollipop. WIN.
As with the sugar nests above, whisk ½ cup water, 1 cup sugar, and ¼ tsp. cream of tartar together in a nonstick skillet and simmer until the mixture has reached 340-360 degrees Fahrenheit. But this time, remove the caramel from the heat and pour it onto a nonstick baking sheet (I love to use my Silpat for this).

Let the sugar cool for a minute or two until you can stand to touch the Silpat around it. It will be HOT, so if you don't have a lot of pain tolerance in your fingertips I recommend using rubber kitchen gloves to work with the sugar. Sugar burns are VERY VERY PAINFUL, so be extremely careful whenever you're working with sugar. To prepare the sugar for pulling, fold the Silpat in half and then pull it back to its normal orientation. The sugar will stick together as it cools.
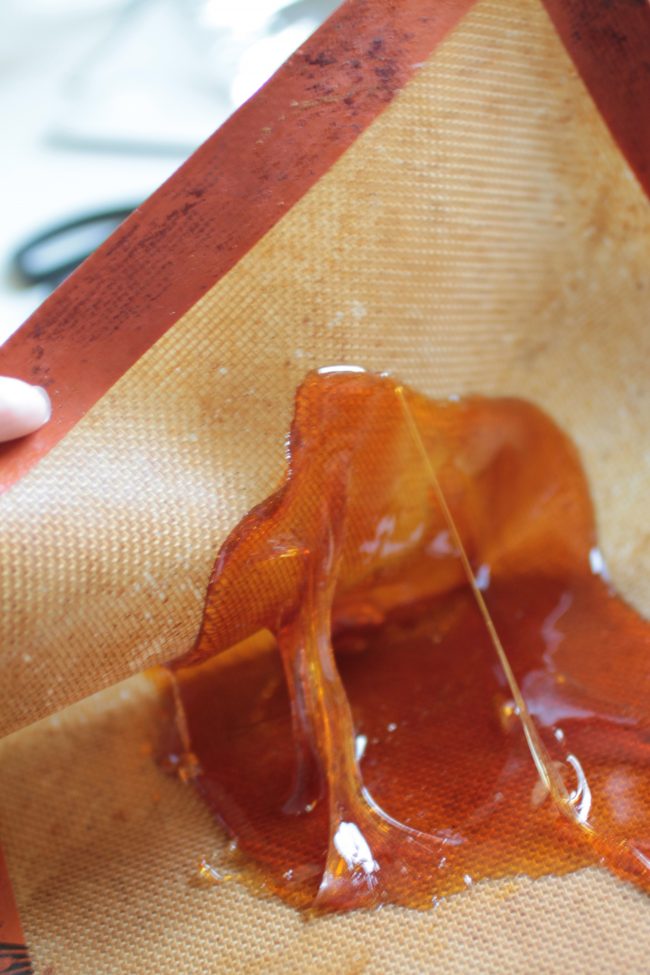
Keep folding and unfolding the Silpat over the sugar to work the sugar into a large lump, like so:
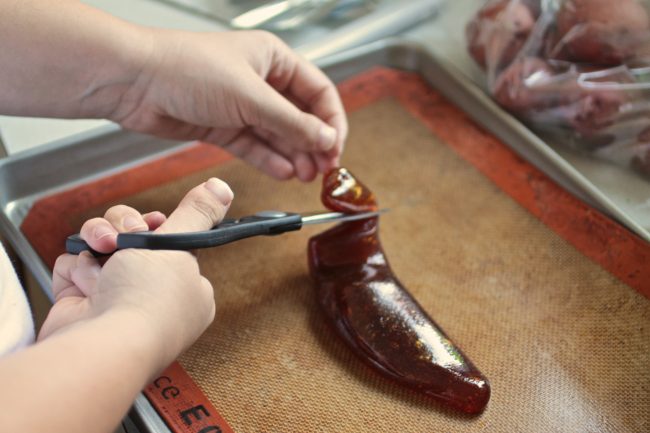
When you've formed your sugar lump, snip off a thick piece and carefully pull it from each side to form a smooth ribbon.
As you pull the ribbons, the sugar will start to harden, so you have to work quickly. Twist the ribbon as you go and use scissors to snip off 1" or 2" sections. Set the twisted pieces aside and continue working piece by piece from the larger lump. If the sugar gets too hard to work with, put the sugar lump in the oven at 250 degrees for 3-4 minutes until it is pliable again.
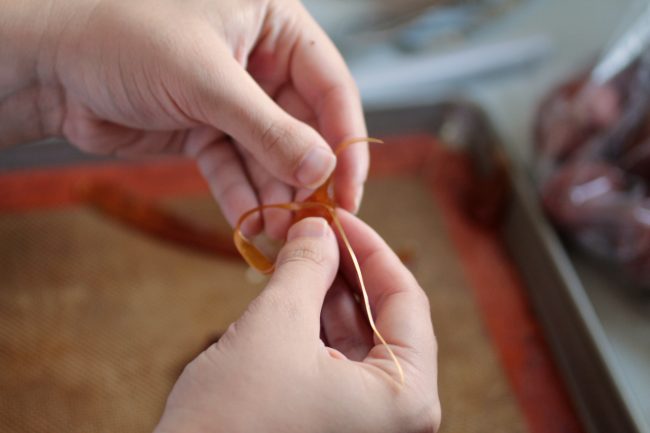
When you've pulled all of your sugar ribbons, stick one or two pieces into the center of each frosted cupcake. Ta-da! You're practically a professional cupcake-er. Cupcake decorator? Baker? Whatever. You're awesome.
14. MORE CUPCAKE!
And now the grand finale! Well, it's not really that grand. It's super simple, but this method still delivers some oomph to your finished cupcakes. I've had many days when I've made a huge assortment of cupcakes, frosted them, gone to put on a finishing touch, and OH WAIT! I'm out of EVERYTHING.
Whenever that happens, I slice up a few of my cupcakes and carve out fun shapes to top the rest of the batch. Use small cookie cutters or carve freehand with a paring knife for best results. To prepare your canvas, slice an unfrosted cupcake into 3 or 4 layers, like so:
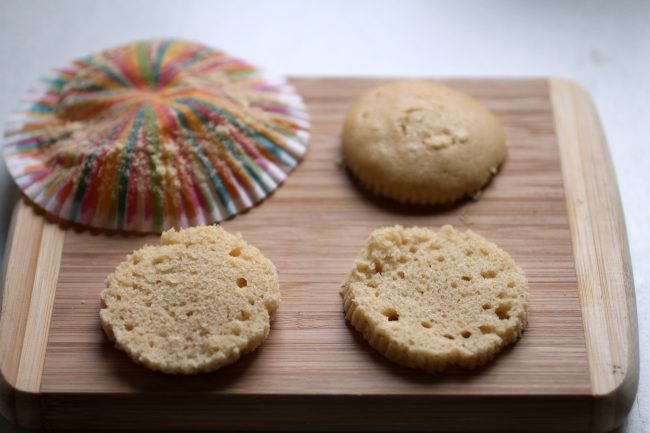
And then cut out some shapes. Throw those cupcake shapes on top of frosted cupcakes for a quick and simple upgrade to a professional-looking cupcake.

Still looking for cupcake decoration ideas? Here are some other techniques I use on the regular:
Chocolate Covered Pretzels
Sprinkles! Of course.
Fondant
Modeling Chocolate
Gum Paste
Lollipops
Professional-looking cupcakes aren't hard to master if you put in the time and effort. Have another favorite way to top a cupcake? Leave a comment to share your technique!

Pat Garza
Wow! I’m anxious to try the sugar designs! Thank you for explaining in a way that is so easy to understand, and for the pictures.
Many thanks for sharing,
Jackie @ Life As A Strawberry
Hi Pat - your welcome! Hope it turned out good!
Cheryl Holmes
I’m so happy I’ve found you!!
Question....why do my paper cups pull away from cupcakes? This especially happens after being frozen.
Thank you!
Jessie @ Life As A Strawberry
There are a bunch of reasons this could be happening, but I find it's usually either the fat content of the cake recipe or the cupcake liners themselves! The best advice I can give is just to keep experimenting until you find a perfect cake and liner combination - I love Wilton liners, but even those can stick more or less depending on the cake itself!
Nancy
Which decorating bag is best to decorate cupcakes? 12" or 16" I can't wait to try your ideas on my niece's cupcake for her bday... thanks for the great ideas
Mimi
I love everything here🍰🎂
Jackie @ Life As A Strawberry
Hi Mimi! That makes us so happy, thank you!
Darlene
Great ideas- you are very creative!
Robin Wilkins
I love the title and this site. Thank you for sharing soo many crafty tips and ideas with us. My creative juices are on overload now. I can't wait to take my little Dollbaby's Sugah Treats to a new level. My friends are always telling me I take simplicity and dress it up in formal attire. Less is more and more is definitely too much! You take the cake - or is it cupcake? I can't wait to share with them that I ran across the sweetest little strawberry ever today!
Jessie
Thank you so much! So happy you liked the post!
Debarati
Hi, I found your blog amazing....learnt a lot from the tips shared as I was looking for perfect cupcakes and storage solutions. Thanks.
Zarz
Hi, I wanted to ask how you exactly twisted the ribbons to look like they do in the pictures. I've been practicing with this recipe and method but I haven't been able to grasp how to bend the sugar exactly to give it the shape you've made. I'm asking for a competition piece so a quick reply would be appreciated, thanks!
Jessie
It's really just trial and error! I generally use both hands to bend the ribbons and just kind of twist the piece around until I like the look of it. I'll also sometimes twist a long piece and then use scissors to snip it into shorter sections before it's cooled. Hope that helps!
A
OMG my mom and I were having a competition and this website helped me to think of a nice design .and I WON thank you so much best website EVER
THANK YOU
wink
Ankita Gupta
I fell in love with your cupcake how tos... ??? And the pictures you captured. They are so pretty ... Can I ask something like where these cool cupcake liners would be available especially that purple and sea green ... I am scrolling your pictures at play again mode sort of ???
Jessie
Thanks, Ankita! The liners are from Wilton.
Hadja
grea tips thanxx for sharing
gg
Thank you for sharing your ideas!!!! =)
Sobheidy Urbina
So I must admit my first time visiting ur site but am totally in love with it..n baking of course..altho I don't binge on eating them..I enjoy making them n getting a reaction out of it..just had a question completely unrelated to cupcakes but saw the bubble wrap chocolate n thought how cool it would look to do a chocolate bubble wrap layer around a classic or mocha cheesecake..u think if I have it less time on d freezer if it will be able to bend around d cheesecake? N hold?
lovelifemagazine
Such great ideas. Thanks for sharing your tips with everyone.
confection connection
truly awesome
Phyllis Haxton
Hi there, don't worry about your hands, which are fine. Any hands which let you produce works of art like this can't be all that bad. Mine are knarled with arthritis so horribly but I can still sew, patchwork, knit and decorate cakes, altered paper art and in fact do most crafts I have turned my hands to and for that fact, I love them and don't give a fig what others think of them. Your hands are lovely.