

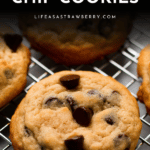
These easy small batch chocolate chip cookies are perfect when you're baking for just a few people! Makes 6 cookies.

Craving something sweet, but don't want to deal with a ton of leftovers? This small batch chocolate chip cookie recipe is about to be your new BFF.
This is a riff on our fan-favorite chocolate chip cookies - although if you've made that recipe, you'll definitely notice a few changes! We scaled everything down and tweaked a few things in order to make the best small batch cookies without losing that perfect, chewy chocolate chip cookie texture.
Our team tested more than a dozen variations of this recipe over several months to get the texture juuuuuust right. As a result, you'll notice this small batch recipe has a few quirks (but don't worry: We'll walk you through everything you need to know!)
Ingredients
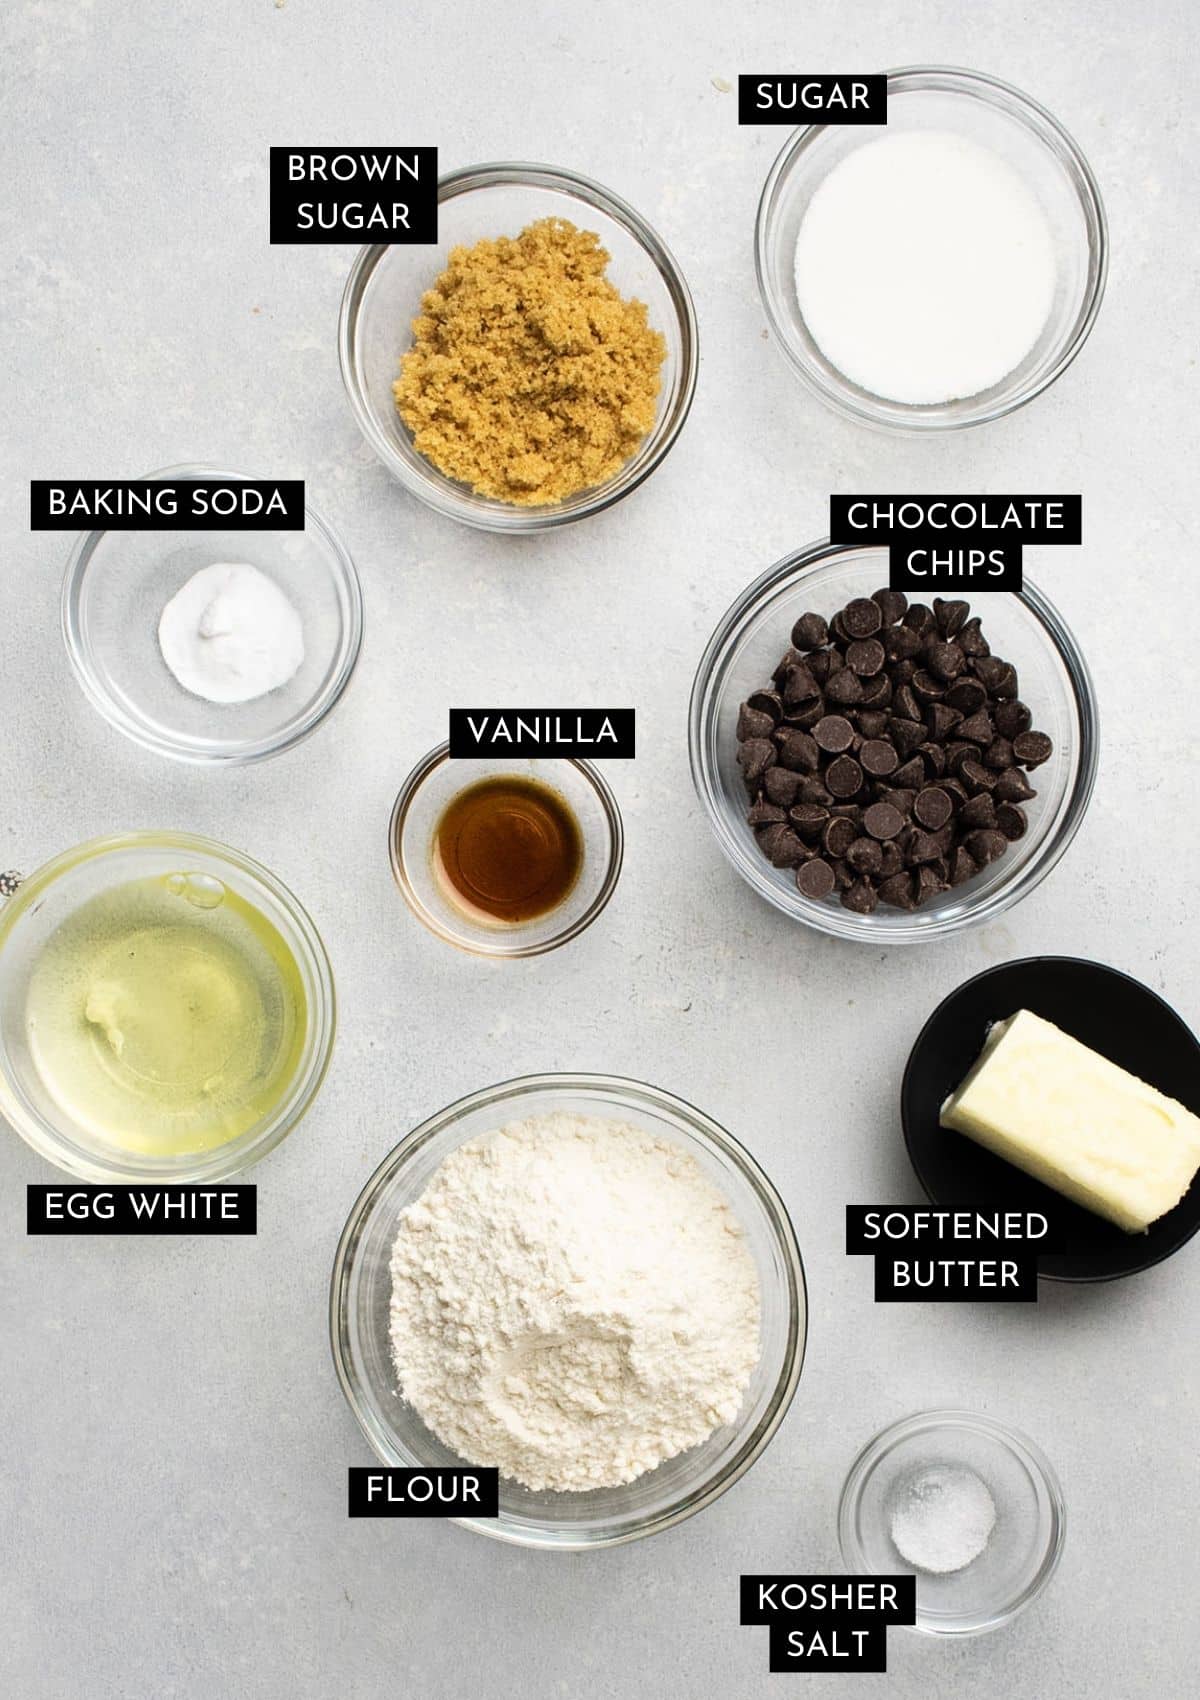
Scroll to the recipe card below for a full ingredients list with exact quantities.
This recipe is pretty straightforward, but we want to highlight a few things before you jump in:
- Bring the butter and egg white to room temperature before mixing the cookie dough. Your butter should be soft enough to spread easily, but it shouldn't be shiny or melty. We also recommend letting your egg white warm up on the counter for 30 minutes to an hour before baking: it will incorporate more smoothly into the batter this way and you'll get a better final texture. Read more: Butter Temperature in Baking.
- The most annoying - and most crucial - part of this recipe is beating the butter, sugars, and eggs into a smooth batter before you add the rest of the dry ingredients. In our recipe testing, the egg turned out to be a bit of a wild card when you make a small batch of cookies: if it isn't whisked or beaten thoroughly enough, it won't melt into the cookie dough and your cookies will have an odd, grainy surface texture. We recommend using a hand mixer (or hand beater) for this step, but you can also do it with a whisk and a bit of elbow grease!
Riffs and Substitutions
- Swap the chocolate chips for white chocolate chips or chopped baking chocolate chunks. You can also add extra chopped chocolate to make double chocolate chip cookies!
- Add mix-ins! A handful of toasted nuts (walnuts, pecans, pistachios), oatmeal, or dried cranberries will dress up this recipe - see our kitchen sink cookies for inspo!
- Press this cookie dough into a small baking dish or bread tin for easy chocolate chip cookie bars. Note: You will likely need to extend the cook time if you bake this cookie dough into bar form.
- No butter? Use coconut oil in its solid, room-temperature state, and make sure to chill the cookie dough for half an hour before you bake it.
Step by Step Instructions
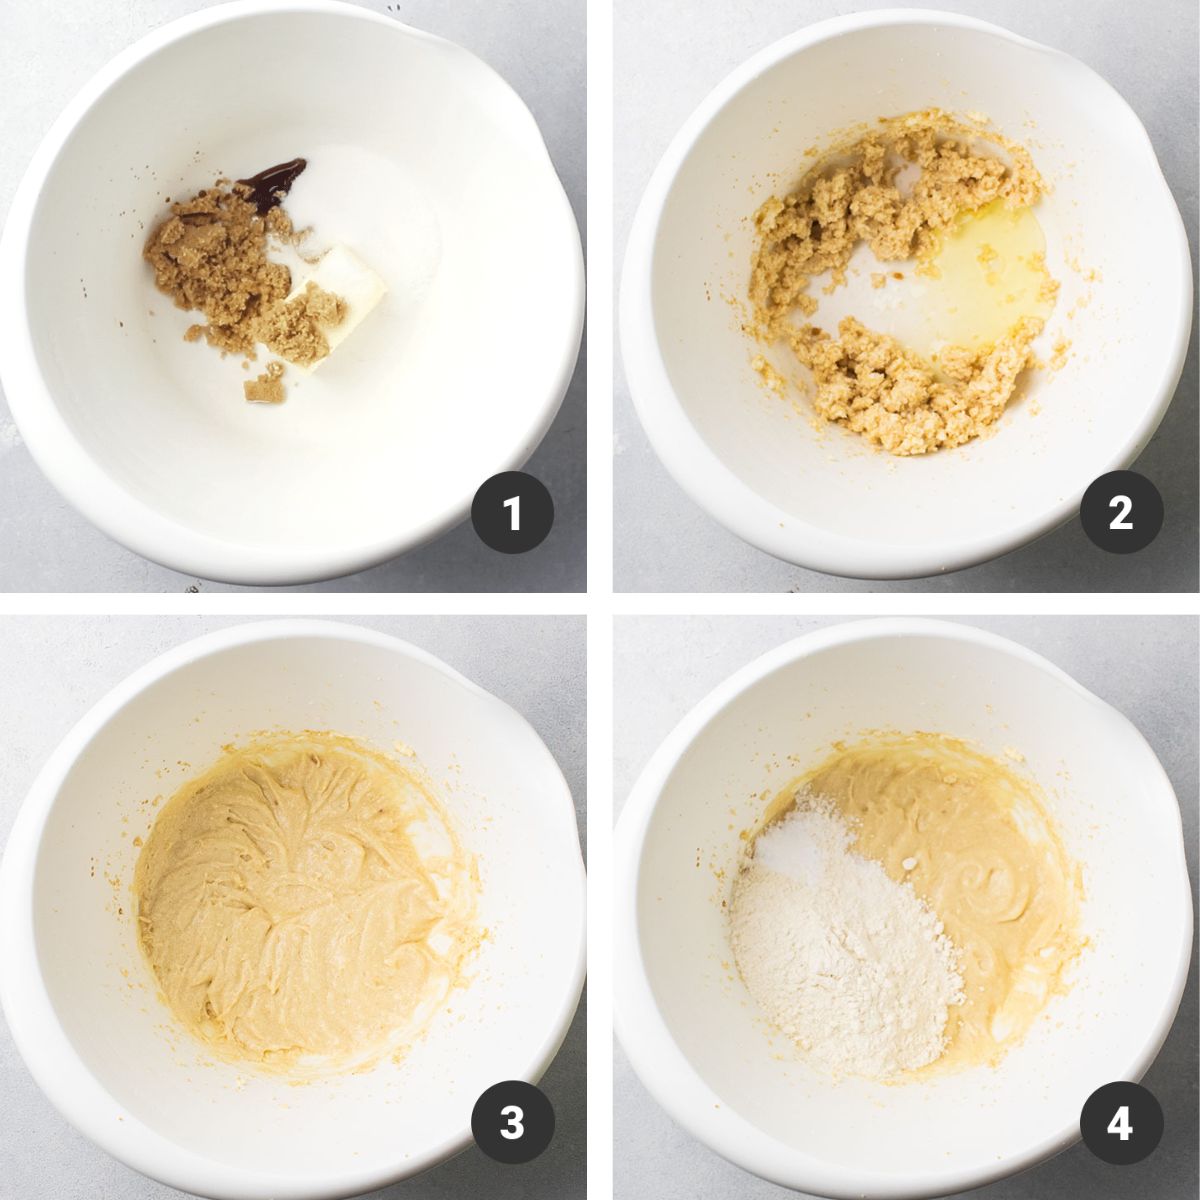
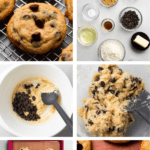
- Cream butter and sugars together with a bit of vanilla extract until you have a smooth, fluffy mixture (this takes about a minute with a hand mixer). Because we're working with so few ingredients, this mixture might look a little crumbly or clumpy - that's ok! The goal here is just to whip the butter and sugars together so they are very well combined.
- Add the egg white! This is the important part: Whip the egg white in with the butter/sugar mixture until you have a light, fluffy batter with no grainy texture. As you blend the egg white in, you'll notice the mixture starts off looking very grainy (like it's separating a bit) - just keep beating it until it smooths out! If you're using a hand mixer, this will only take a few seconds. If you're whisking it together by hand, it can take 2-3 minutes. Pro tip: Save your egg yolk for our small batch chocolate cupcakes!
- Note: This mixture should be fluffy, but not whipped-cream fluffy or meringue fluffy - you're just beating the egg white in until the batter is smooth.
- Stir in dry ingredients. When the egg white mixture is nice and smooth, fold in your flour along with a bit of baking soda and a pinch of salt. Set the hand mixer aside and just use a spoon or rubber spatula for this part - we don't want to overmix the flour or deflate the fluffy mixture we just made.
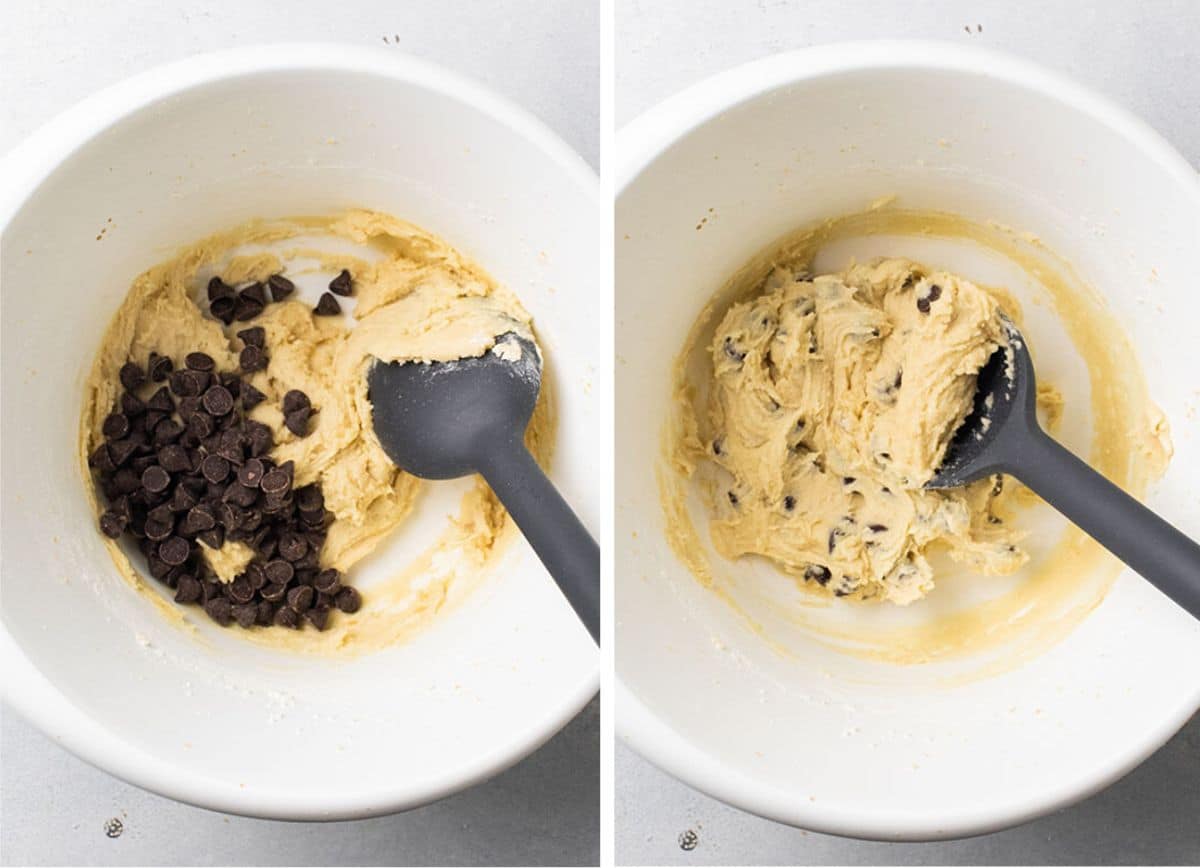
Once the batter is mixed, fold in your chocolate chips, then scoop your cookies and bake away!
Three tips for perfect chocolate chip cookies
Use a kitchen scale
Measuring ingredients by volume (with a measuring cup) is notoriously unreliable; we always recommend following our weight (grams) measurements to be as accurate as possible. Too much flour can make cookies dry and cakey instead of soft and chewy. If you don't have a kitchen scale, measure your dry ingredients (especially flour, which is the most finicky) with the scoop-and-level flour measurement method for best results.
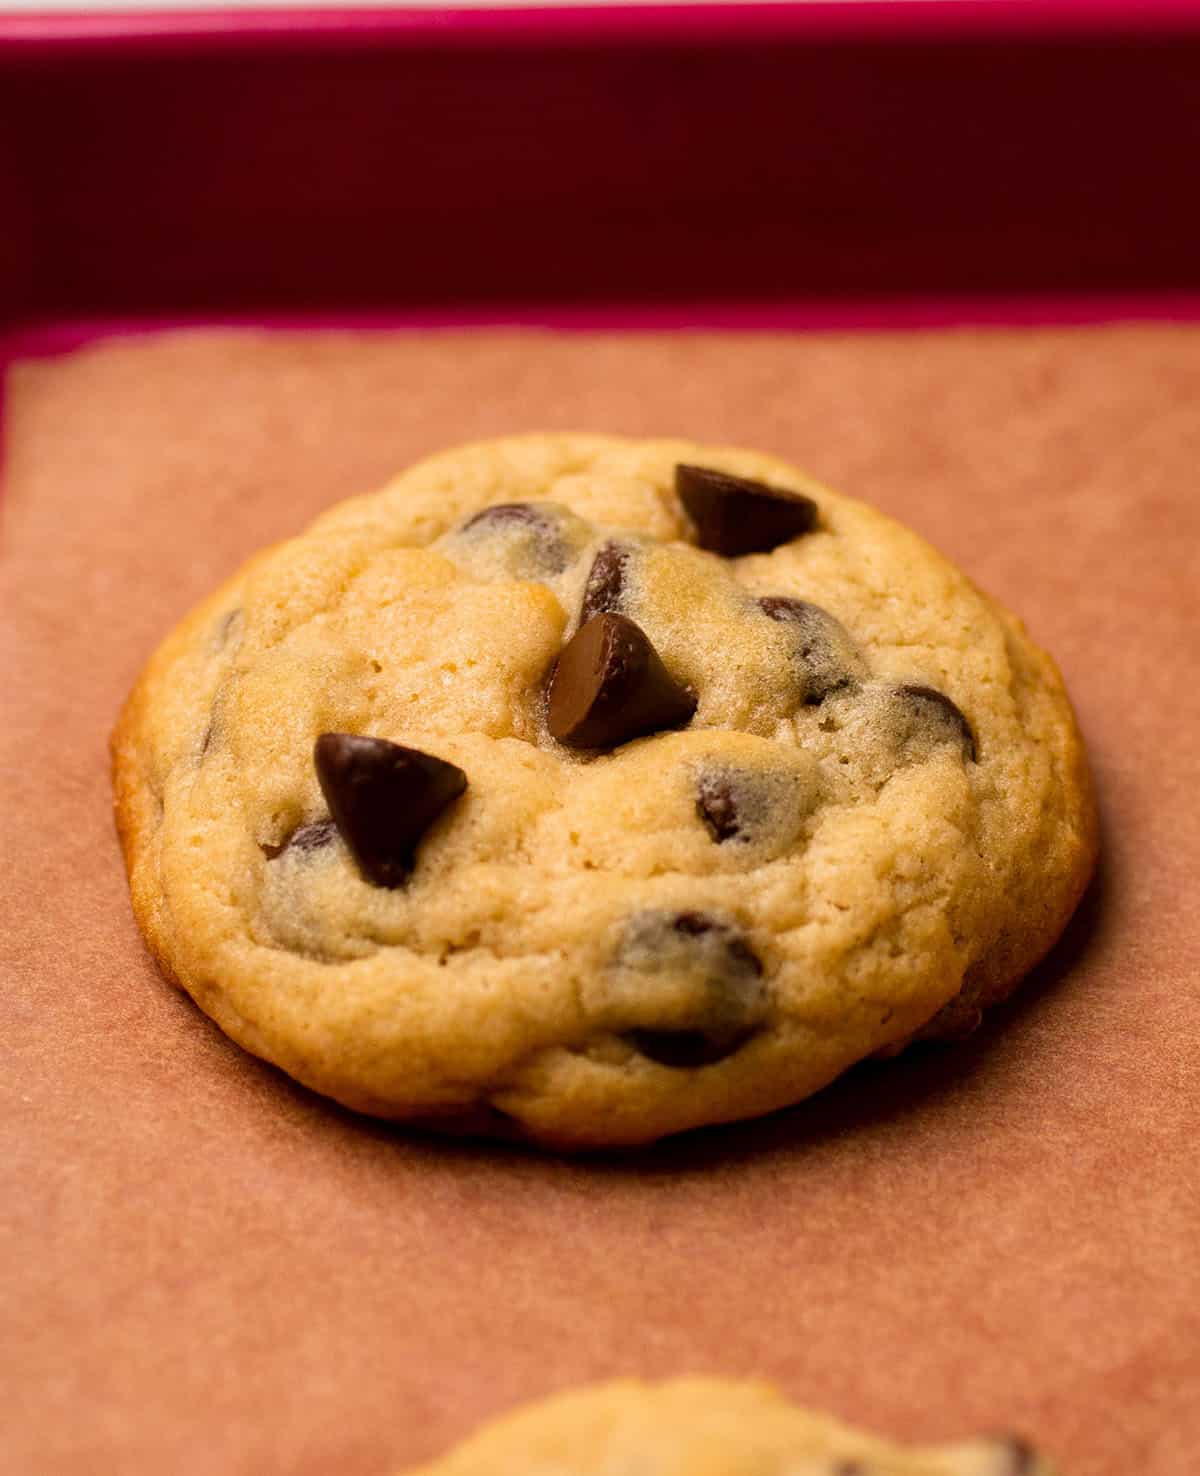
Add a few chocolate chips to the surface for prettier cookies
Chocolate chips can sink into cookies as they bake - resulting in a plain-looking cookie where you can barely even see the chocolate! If you're going for an insta-worthy wow factor, press a few extra chocolate chips onto the very top of each cookie dough scoop before baking. They'll stay on top as the cookie bakes, giving you a more classic, *aesthetic* chocolate chip cookie.

Chill the cookie dough before baking
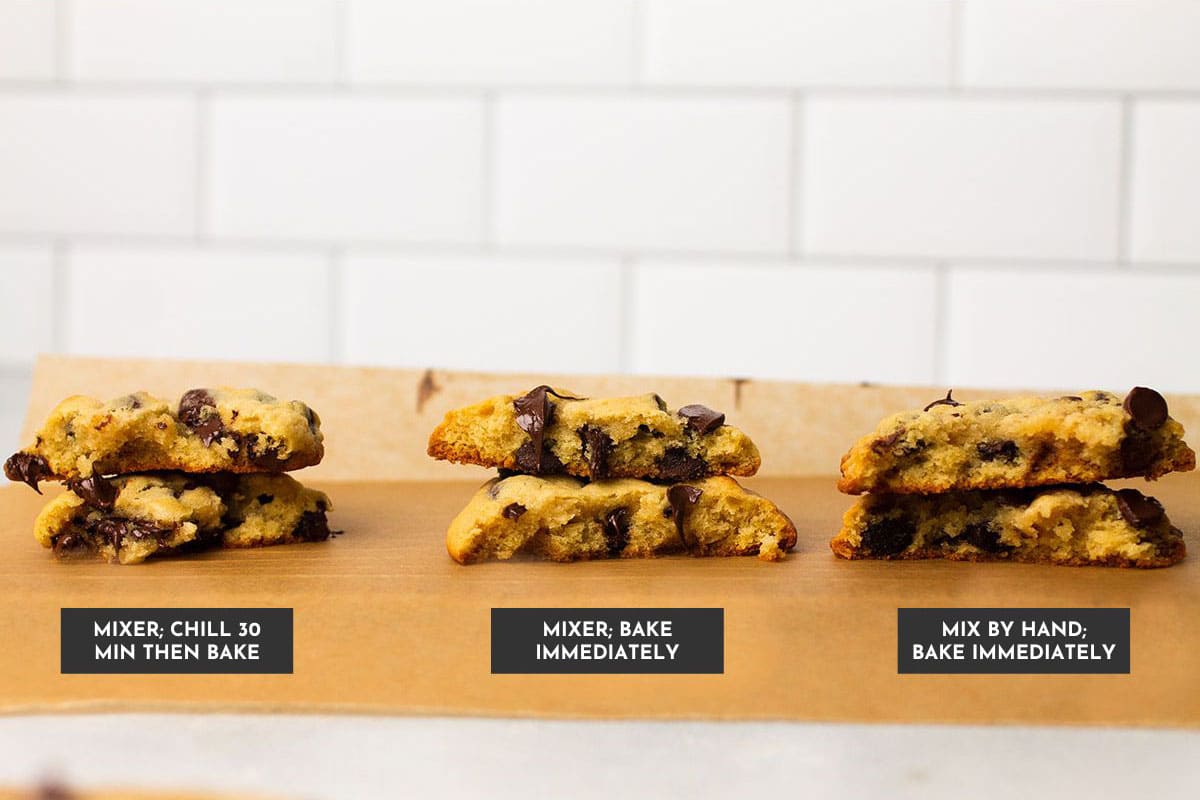
This is a completely optional (but delicious!) step. If you have some extra time, make the cookie dough as directed, then pop it into the fridge for half an hour before scooping and baking. A quick stint in the fridge lets the butter seize up a bit, which means it melts more slowly in the oven - giving you a more uniform cookie with a lighter color and a chewier center.
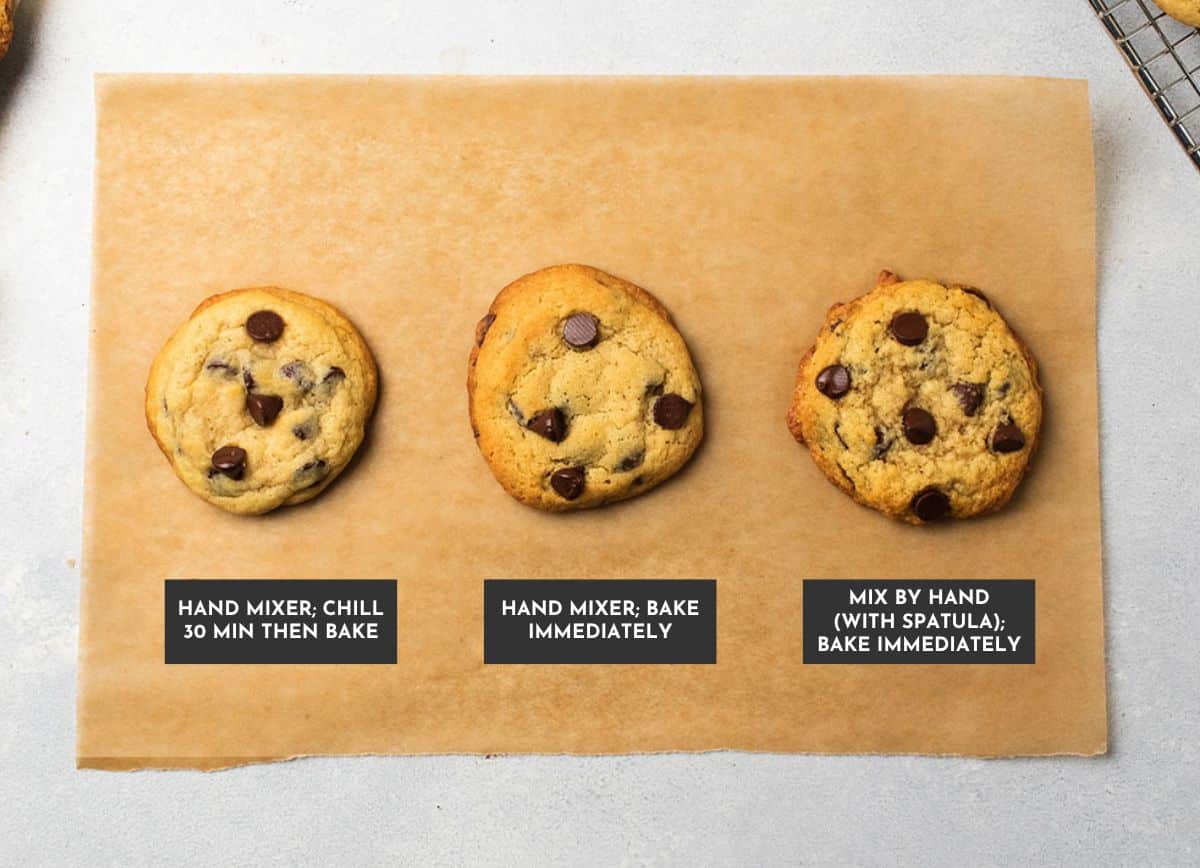
Use a hand mixer for best results
It's important to properly whip the egg white into our butter and sugar mixture here to ensure a smooth, chewy cookie. In the photo above, you can see the difference in texture between cookies where the egg and butter mixture was beaten with a hand mixer vs. a cookie where the ingredients were simply stirred together with a spatula!
Cookies mixed entirely with a spatula look grainier and rougher, whereas those that whipped the egg into the butter mixture with a hand mixer are much smoother and softer looking.
That said, this is really more of a visual difference than anything - even the rougher-looking cookies taste good and have a lovely chew to them! (The photo below shows a cross-section of each of these cookies - you can see the interior texture difference isn't as dramatic as the exterior view!)
No hand mixer? No problem!
Just use a regular whisk and put some muscle into it. You'll have to whisk for a few full minutes to properly mix the egg and butter together, but your cookies will work just as well as those mixed with a hand mixer. Whisk vigorously until the egg/butter/sugar mixture is smooth and fluffy, with very little noticeable grain-y-ness or separation.
Can I use a stand mixer instead?
We don't recommend using a stand mixer (like a KitchenAid) for these quick chocolate chip cookies: Because we're working with such small quantities, we find the big stand mixers don't do a great job of working all the ingredients together. There just isn't enough cookie dough to allow the stand mixer paddle to get a good grip, so you end up having to scrape down the sides of the bowl a million times and it doesn't end up saving you any time or work.
These cookies will look puffy right after baking
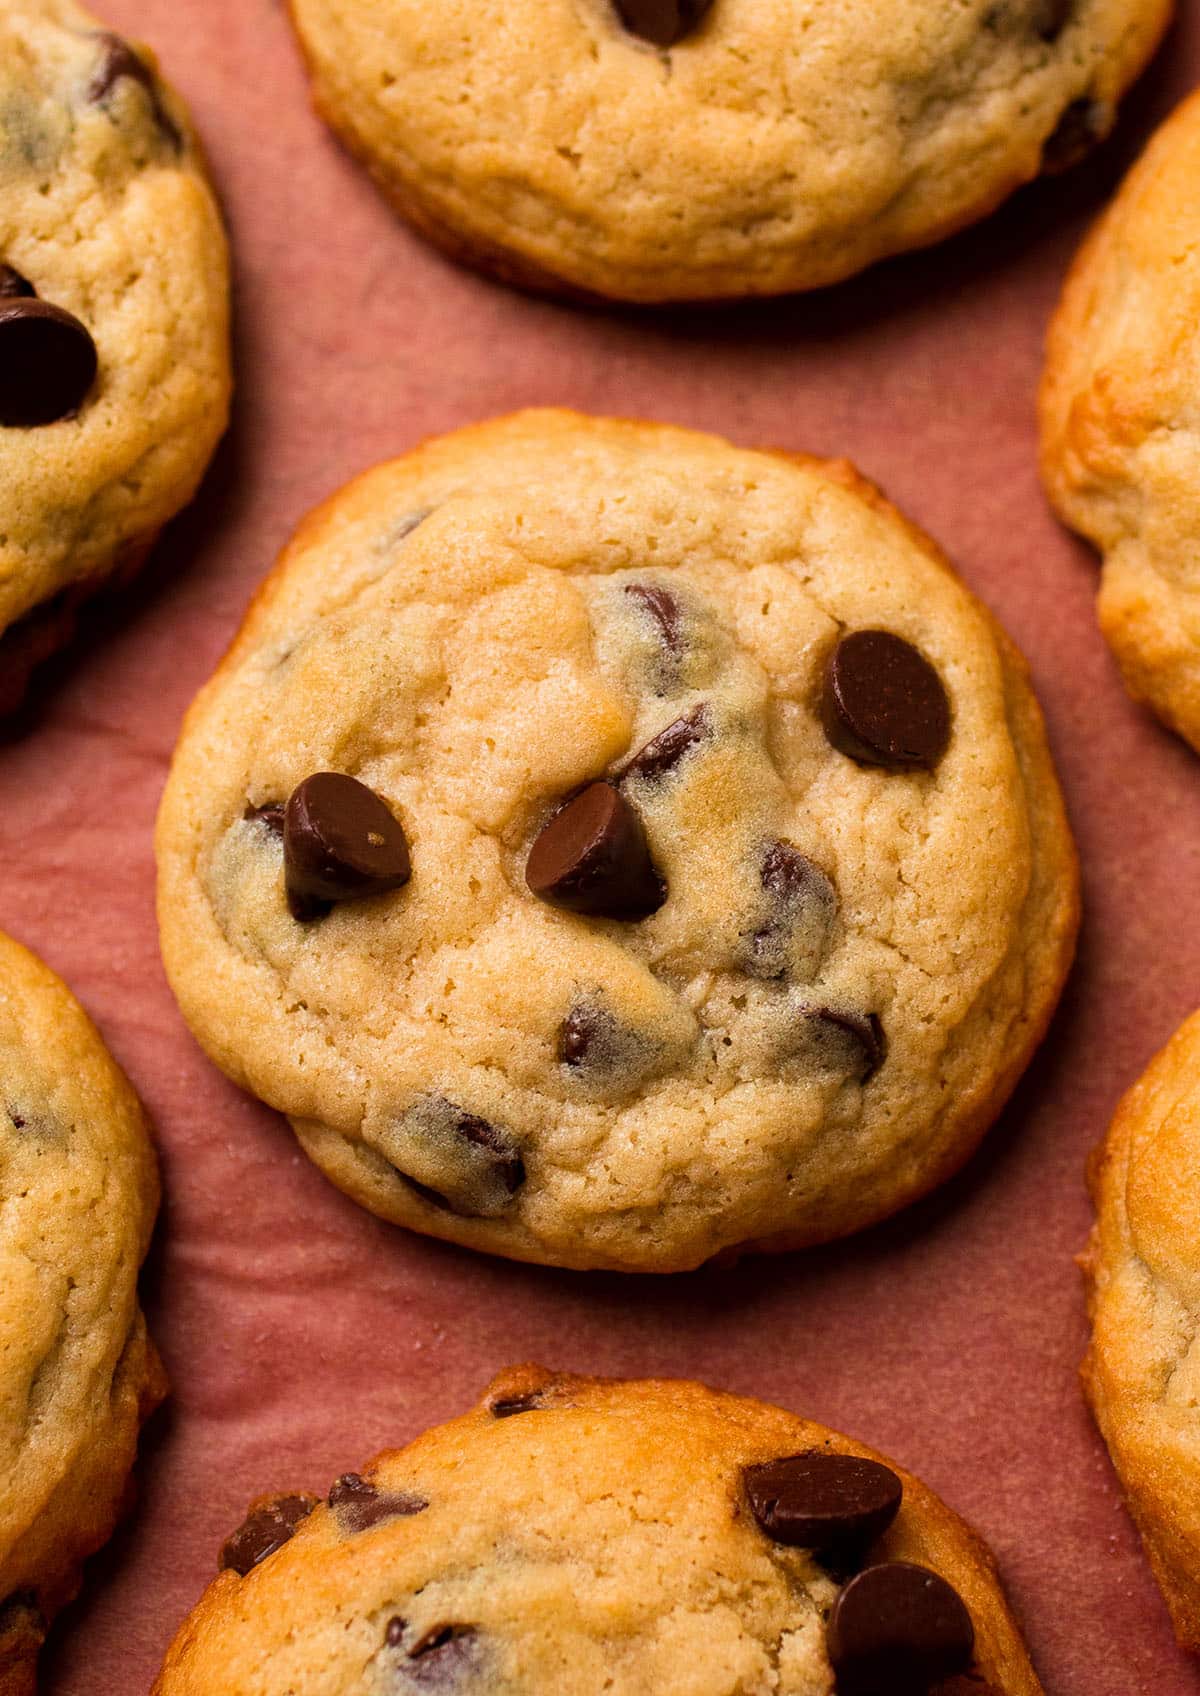
Right out of the oven, your chocolate chip cookies might look a little bit domed on top. Don't worry! Let them cool on the baking sheet for a few minutes, and the centers will fall down into a beautiful, wrinkly cookie.
A few FAQs
Yes - these cookies freeze very well! Let cookies cool completely, then store in an airtight container in the freezer for up to 4 months. You can also freeze the cookie dough on its own!
Technically, yes - you can double or even triple this recipe without altering the texture too much. But because this recipe was developed specifically to make a small number of cookies, it doesn't scale especially well, and can be a bit annoying to measure when you multiply it for a larger quantity. If you'd like more cookies, we recommend using our butterless chocolate chip cookie recipe, chocolate chip pecan cookies, chocolate chip cookies with melted butter, or our salted olive oil dark chocolate cookie recipe, which were developed to make a larger number of cookies.
If you're low on supplies, you can replace the white sugar in this recipe with additional brown sugar - your cookies will be a tiny bit denser and won't spread quite as much, but they will still taste great! We do not recommend making chocolate chip cookies without brown sugar: there's a little bit of acid in brown sugar, which is important here because it activates our baking soda to help these cookies rise. (If you're out of brown sugar, you can make your own by stirring one Tablespoon of molasses into one cup of plain white sugar!)
🎥 How-To Video
More Small Batch Recipes


Did you make this recipe? Leave a comment and star rating below to let us know how it turned out!
📖 Recipe

Small Batch Chocolate Chip Cookies
- Prep Time: 10 mins
- Cook Time: 15 mins
- Total Time: 25 minutes
- Yield: Makes 6
- Category: Cookies
- Cuisine: American
- Diet: Vegetarian
Description
These easy small batch chocolate chip cookies are perfect for one or two people!
Ingredients
- ¼ cup unsalted butter (½ stick), at room temperature
- 1 gram vanilla extract (about ½ teaspoon)
- 30 grams granulated sugar (about 2 Tablespoons)
- 30 grams brown sugar (about 2 packed Tablespoons)
- 1 egg white, at room temperature
- 90 grams all purpose flour (about ¾ cup)
- Pinch of kosher salt
- 3 grams baking soda (about ½ teaspoon)
- 65 grams chocolate chips (about ⅓ cup)
Instructions
- Heat oven to 375° Fahrenheit.
- Use a hand mixer to cream butter, vanilla, sugar, and brown sugar together for 1-2 minutes, until soft and well combined.
- Add the egg white; beat for a minute or so until mixture is smooth, fluffy, and no longer grainy.
- Add flour, salt, and baking soda to the egg mixture. Stir with a spoon or spatula until dough is just combined, then stir in chocolate chips. Optional: Chill mixed cookie dough for 30 minutes before scooping if you would like even softer, chewier cookies.
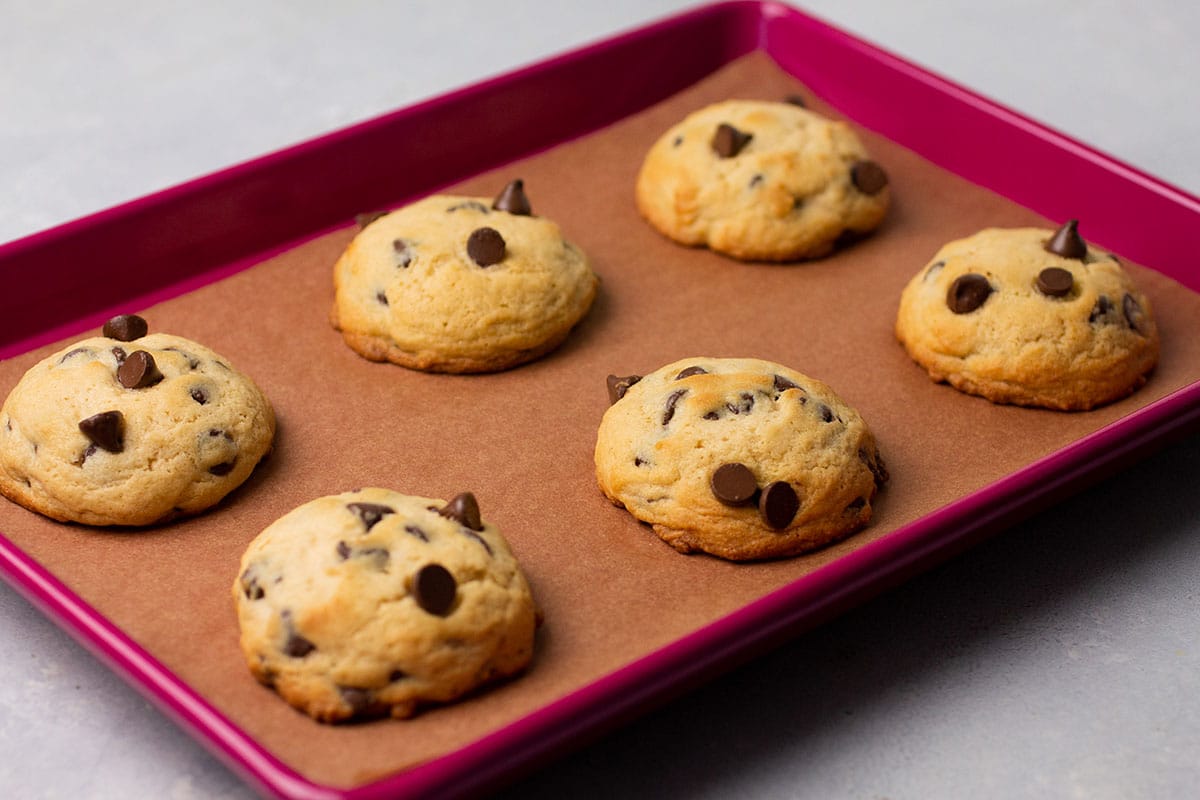
- Use a cookie scoop to scoop dough into balls; place at least 1 inch apart on a baking sheet lined with parchment paper or a nonstick baking mat.
- Bake at 375° F for 8-10 minutes, until cookies are lightly browned around the edges. Remove from the oven and let them cool completely right on the baking sheet. Cookies may look a little puffy at first, but they will settle and flatten as they cool.
Notes
Take your time whipping the egg white into the butter and sugar mixture! Because we’re using such small quantities of everything in this recipe, it’s especially important to thoroughly combine the egg white with the butter mixture. We recommend using a hand mixer here to keep things easy, but you can also use a whisk and some elbow grease (if you use a whisk, we recommend beating the butter, vanilla, sugar, and egg white together all at once, instead of first creaming the butter and sugar together. It’s easier to whisk by hand when you have the extra moisture from the egg white!) You want to beat the egg white and butter mixture together until the mixture is smooth, fluffy, and no longer grainy or separated. This will give you the smoothest cookie with the best texture!
Equipment notes. We recommend using a hand mixer to cream the butter and sugar, and again to whip the egg white into the butter mixture. Once the egg white is properly mixed, switch to a plain spoon or spatula to fold in the remaining dry ingredients. We use a 2-3 Tablespoon cookie scoop to portion out the cookie dough, which yields about 6 cookies. Feel free to use a different size cookie scoop if you like (just remember to adjust the baking time for larger or smaller cookie sizes).
Please use a kitchen scale! Measuring ingredients by volume (with cups) is notoriously unreliable: For best results, use a kitchen scale and measure your ingredients by weight using the gram measurements above. If you don’t have a scale, measure your flour with the scoop-and-level method for best results. We recommend this kitchen scale.
Additions and Substitutions. Use white chocolate chips or chopped baking chocolate in place of the chocolate chips. Add a small handful of nuts, dried cranberries, or extra chocolate if you like. Swap the butter for coconut oil in its solid, room-temperature state (if you use coconut oil, be sure to chill the cookie dough for half an hour before baking for the best texture).
For prettier cookies, press a few extra chocolate chips into each cookie dough ball just before baking. The chips will stay on the surface of the cookies so you can see plenty of chocolate even after baking!
Optional: Chill the cookie dough. Mix the dough as directed, then pop it in the fridge (uncovered is fine) for 30 minutes before scooping and baking the cookies. This quick chill lets the butter set a bit so that it melts more slowly in the oven, giving you a chewier cookie with lighter color.
Store cooled cookies in an airtight container on the counter for up to 4 days, or freeze for up to 4 months.
Nutrition
- Serving Size: 1 cookie
- Calories: 218
- Sugar: 16.1 g
- Sodium: 169.4 mg
- Fat: 10.9 g
- Carbohydrates: 28.4 g
- Protein: 3 g
- Cholesterol: 20.3 mg


Chenee
So moist and chocolatey - I'll definitely be making these again soon!
Rhonda @ Life As A Strawberry
So glad you like them!
Casey
I love the idea of small batch cookies. Since there are only a few, it's easier to avoid the temptation to eat them all!
Rhonda @ Life As A Strawberry
One of the reasons we made this recipe - we also love to eat the entire batch of cookies. Glad you think also this size is perfect!
Beth
These are some of the best cookies I've ever made. I love their texture the most. It's absolute perfection.
Rhonda @ Life As A Strawberry
So glad you love them!
Sharon
Sometimes you want homemade chocolate chips without taking a lot of time to make many batches, and this recipe makes that happen!
Rhonda @ Life As A Strawberry
One of the reasons we developed this recipe - so glad you like it!
Hayley Dhanecha
My niece had great fun making these utterly delicious chocolate chip cookies! So happy with the results
Rhonda @ Life As A Strawberry
We love cooking with our niece and nephew! So glad you liked the cookies.
Jessie @ Life As A Strawberry
We had SO much fun developing this recipe! I've made these cookies at least four times since we published this post and am still so smitten with them. I hope you love this recipe as much as we do!