

This fudgy homemade brownie recipe is made from scratch and packed with chocolate! Stir a quick batter together, then bake in a metal pan for crispy edges and chewy centers. Includes tips for shiny, crackly brownie tops!

One recipe every baker needs in their back pocket: Excellent homemade brownies. With crackly tops, fudgy centers, and crispy edges, this recipe has quickly become one of our team's favorite desserts. You'll never need a boxed brownie mix again!
Great chocolate chip brownies really come down to two things: Technique, and quality ingredients. We're sharing plenty of tips and notes to help you with both. Be sure to read the entire post below, especially if you're new to brownie baking!
Ingredients

For a full list of ingredients with exact quantities, scroll to the recipe card below.
Quality ingredients take homemade brownies from good to GREAT. Before you start baking, we want to highlight a few things:
- Dutch Process Cocoa Powder. If you only splurge on one ingredient, make it this one. Look for dark, unsweetened cocoa powder: We used our favorite Double Dark Cocoa Powder from King Arthur here. Lighter cocoa (like Hershey's or Nestle) work too, but the brownies won't be as rich. Learn more: See side-by-side cocoa comparisons in our cupcakes guide.
- Eggs give brownies a fudgy texture and help them rise a tiny bit in the oven. If you can, let eggs come to room temperature for 30 minutes on the counter: They'll incorporate more smoothly into the batter, and your brownies will be slightly taller.
- A mix of white granulated sugar and brown sugar gives us more depth and a fudgier texture than white sugar alone.
- Melted butter helps the sugar dissolve as much as possible, which creates shiny brownie tops. You can melt butter in the microwave, but we actually prefer melting it in a small skillet or saucepan on the stovetop because you have more control over the heat. See the FAQ section below for more info on this!
- Vanilla Extract and a pinch of kosher salt help the chocolate flavor "pop": don't skip them!
- Chocolate chips. We like bittersweet or semi-sweet chocolate chips here: Ghirardelli Bittersweet Chocolate Chips are by far our favorite.
Please use a kitchen scale!
Measuring ingredients like flour by volume (with a measuring cup) is notoriously unreliable. Because each person measures a cup of all purpose flour (or sugar, or cocoa) a little bit differently, it's easy to accidentally use too much of something and end up with dry, dense brownies.
When you use a kitchen scale to measure by weight (in grams), you get a perfect measurement every time. For best results, please follow the weight measurements (written in grams) in the recipe below!
(No kitchen scale? Measure your flour with the scoop and level method for best results!)
Variations and Substitutions
There isn't a ton of wiggle room here: Big changes (like reducing the sugar or using gluten-free flour) will significantly affect the texture of these brownies. That said, there are still a few customizations you can make:
- Add mix-ins! Stir chopped nuts (walnuts, pistachios, peanuts, pecans), butterscotch chips, white chocolate chips, M&Ms, or your other favorite mix-ins into the batter before baking.
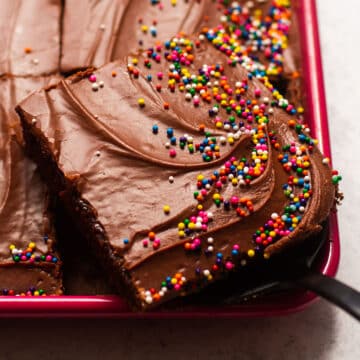
- Add toppings! Sprinkle flakey sea salt across the brownies right when they come out of the oven. You can also drizzle melted chocolate or white chocolate over cooled brownies, or add a layer of chocolate fudge frosting.
- Swirl some peanut butter or chocolate hazelnut spread into the brownie batter just before baking for a marbled look.
- Swap the butter for melted coconut oil (à la our favorite coconut oil cookies!)
The best pan for brownies

We recommend an 8x8 metal baking pan for best results. In our testing, metal pans yielded the tallest, most consistent brownies. Line your pan with parchment paper (this makes it easy to lift the brownies in and out of the pan, and helps with cleanup!)
What if I don't have a metal pan?
We've also tested these brownies in an 8-inch cast iron skillet and a 7-inch square ceramic casserole dish. While both work well, the crispy edges do tend to extend farther into the center of the brownies than they do with a metal pan.
Keep in mind that if you use a different type of pan, you may need to adjust the bake time: Glass pans, in particular, generally need some extra time in the oven because they conduct heat differently than metal.
Note: Every pan - and every oven! - will behave a little bit differently. It might take a few tries to figure out which of your pans works best for this recipe!
Step by Step Instructions

Add white sugar, brown sugar, and hot melted butter to a large mixing bowl (Image 1, above). Mix until the sugar is fully saturated with butter and resembles very wet sand (2) and then KEEP MIXING!
As you work the mixture, it will look less grainy, and will begin to hold its shape for a moment (3) before slipping back into a rough blob. It should look like a very loose, coarse, greasy dough (4).
Mix the sugar and butter thoroughly
The goal here is to dissolve as much sugar as possible using the heat (and water content) of the melted butter. We recommend mixing for a full minute, until the "graininess" of the initial mixture has softened a bit. Mixing the butter and sugar thoroughly determines how shiny and glossy the tops of our chocolate chip brownies will be:


When sugar and butter are thoroughly mixed, add eggs (Image 5, above). Stir until you have a smooth mixture (6). Once again, we recommend stirring this mixture very thoroughly to make sure everything is fully incorporated.

Add flour, cocoa powder, vanilla extract, and kosher salt to the bowl (7), then stir until everything is just barely combined (8).

Add the chocolate chips (9), reserving a handful for topping the brownies in the next step. Stir until they're evenly distributed throughout the batter, and no pockets of dry flour or cocoa remain (10).

Transfer brownie batter to an 8x8 metal pan lined with parchment paper (Image 11, above). Use a spatula to spread the batter into the corners of the pan, until you have an even layer (12).

Scatter remaining chocolate chips across the surface of the brownies (13). Transfer to a hot oven and bake for 40-50 minutes, until the tops are crinkly and thin cracks have begun to form across the surface (14).
Let the brownies cool for at least 30 minutes before you lift them out of the pan, and let them cool completely before you slice them (they'll slice more cleanly this way). Serve brownies on their own or with a scoop of ice cream!

Storing and Freezing Brownies
Let brownies cool completely, then store them in an airtight container on the counter for up to 3 days. (These chocolate chip brownies are excellent the day after they're baked - maybe even better than when they're fresh from the oven?? - but after a few days on the counter, they'll start to dry out a bit).
You can also freeze these brownies! Pop cooled, sliced brownies into an airtight container (we love using a Stasher Bag for this) and freeze for up to 2 months. Thaw frozen brownies on the counter, or pop them in a warm oven for a few minutes to heat through.

Frequently Asked Questions
Not really. The sugar in this recipe is essential to achieving the rich, fudgy texture of these brownies. We tested this recipe with varying amounts of sugar, and the recipe below produced the best texture! If you reduce the sugar, the brownies won't be as fudgy and chewy (they'll be drier, more puffy, and cakey).
We've tested this batch fudge brownies recipe in several different pans. A metal 8x8-inch pan is our top choice; our favorite alternatives were a 7-inch square ceramic baking dish and an 8" cast iron skillet. If you use a different pan, you will likely need to adjust the cook time of this recipe, so keep an eye on the brownies as they bake! Glass pans, in particular, often require an extra 5-10 minutes in the oven. Different types of pans will also conduct heat differently: A cast iron skillet, for example, yields brownies with much thicker, crispier edges than a metal pan.
We prefer dark, unsweetened, Dutch process cocoa powders for our homemade brownies. We love this recipe with King Arthur's Double Dark Cocoa Powder or Black Cocoa Powder. You can use a lighter cocoa powder (like Hershey's, Nestle, or ALDI brands), but the brownies won't be as rich and complex, and they'll be a bit lighter in color (they'll still taste great, though!) If you prefer milk chocolate or very sweet chocolate to bittersweet or dark chocolate flavors, you can use a lighter cocoa powder and milk chocolate chips here.
Brownies are notoriously finicky when it comes to judging done-ness, but there are a few key signs to look for!
When these chocolate chip brownies are ready, the edges will be slightly puffed up and just beginning to pull away from the sides of the pan. The top will be somewhat shiny and crinkly, with a few thin cracks running across the surface (similar to gingersnaps or brown sugar cookies).
In this recipe, those hairline cracks are fairly easy to spot because they tend to radiate out from the chocolate chips along the surface. See the image below for a close up of what you're looking for!
These brownies are meant to be quite chewy, so even when they're fully cooked, they will still be fairly soft and moist in the center! Fudgy brownies will also set up as they cool - after a few hours at room temperature, the centers will be much firmer than they are when they're fresh out of the oven.
Generally, yes: We recommend letting eggs for sweets like brownies or cakes/cupcakes come to room temperature for an hour or two before mixing them into the batter.
A room temperature egg will "shock" the batter less and incorporate more evenly, keeping the temperature more consistent and resulting in a taller, more even rise (see this in action in our post on making the best homemade cupcakes!)
That said, the impact in this particular recipe is pretty negligible: In our testing, brownies baked with a room temperature egg rose slightly more than brownies baked with a cold egg, but we couldn't tell a difference in a blind taste test.
If you have the time, go ahead and let your egg come to room temp on the counter before making this recipe (just like you would in other desserts, like cakes or cupcakes).
But if you don't have time to bring the egg to room temperature here, don't worry about it too much — the chocolate chip brownies will turn out just fine!
If your brownies turn out cakey, it may be because too much flour was added to the batter. If you measure your ingredients - especially dry ingredients like flour and cocoa - by volume (with measuring cups) instead of by weight (with a kitchen scale), it's easy to over-measure and end up with a too-thick batter. For perfect-every-time brownies, we recommend using a kitchen scale and following our weight measurements!
Cakey brownies can also result if you make any changes to the recipe. If you reduce the sugar, if you use all white sugar (instead of the brown sugar), or if you add extra components that aren't listed in the recipe (like stirring some chocolate syrup or melted chocolate into the batter, or adding cornstarch), this recipe can turn out fluffy and cakey, rather than fudgy.
We recommend our small batch brownies recipe if you want just a few brownies!
Yes! Use the handy 1x, 2x, 3x buttons in the recipe card below to double or triple this recipe. We recommend using a larger baking dish if you double the recipe (like a 9x13 cake pan).
More Easy Chocolate Dessert Recipes

🎥 Step by step video
Did you make this recipe? Leave a comment and star rating below to let us know how it turned out!
📖 Recipe

Fudgy Chocolate Chip Brownies
- Prep Time: 15 minutes
- Cook Time: 45 minutes
- Total Time: 1 hour
- Yield: 16 2-inch brownies 1x
- Category: Dessert
- Cuisine: American
Description
These rich chocolate chip brownies are easy to make and have a beautiful shiny, crackly finish.
Ingredients
- 113 grams unsalted butter, melted (1 stick)
- 150 grams sugar (⅔ cup)
- 150 grams brown sugar (⅔ cup)
- 2 eggs (if you have time, let eggs come to room temperature on the counter for half an hour first!)
- 80 grams all purpose flour (⅔ cup)
- 80 grams cocoa powder (⅔ cup)
- 2 gram kosher salt (½ teaspoon)
- 4 grams vanilla extract (1 teaspoon)
- 160 grams bittersweet or semi-sweet chocolate chips (1 cup), divided
Instructions
- Heat oven to 325° Fahrenheit and line a metal 8 x 8 pan with parchment paper.
- In a large mixing bowl, combine melted butter, sugar, and brown sugar. Mix vigorously for one minute, until the initial graininess of the mixture has softened slightly. Take your time with this step: Thorough mixing helps the sugar dissolve as much as possible, which creates shiny, glossy, crackly brownie tops.
- Add eggs and stir until you have a smooth mixture. Give this mixture a few extra stirs to ensure the egg is fully incorporated.
- Add flour, cocoa powder, kosher salt, and vanilla extract to batter; stir until just combined.
- Reserve a handful of chocolate chips for topping the brownies later. Add remaining chocolate chips to the brownie batter and stir until no dry pockets of flour or cocoa powder remain.
- Transfer batter to your prepared pan. Use a spatula or offset spatula to smooth batter out towards the edges of the pan, until you have an even layer. Scatter reserved chocolate chips over the top of the brownies.
- Bake at 325° F for 45-50 minutes. When they're done, the brownies should have a glossy finish and you should see several small, hairline cracks across the surface.
- Let brownies cool in the pan for at least 30 minutes, then transfer them to a cutting board or wire cooling rack and let cool completely before slicing.
Notes
Please use a kitchen scale! Measuring ingredients by volume (with cups) is notoriously unreliable; For best results, use a kitchen scale to measure your ingredients by weight using the gram measurements provided above. If you don’t have a scale, measure your dry ingredients with the scoop-and-level method for best results.
A note on measuring salt. Some kitchen scales aren't sensitive enough to measure in small, 1-2 gram increments. While we recommend following the gram measurements for all other ingredients, you may want to measure the kosher salt by volume with a ½ teaspoon measuring spoon.
A note on chocolate. We recommend using a dark, dutch process cocoa powder for best results (our favorite is the King Arthur Double Dark Cocoa). A rich cocoa powder gives these brownies a deep, complex flavor that takes them from good to great. Our go-to chocolate chips are the Ghirardelli 60% baking chips, available at most major grocery stores.
Use hot melted butter for best results. You can melt the butter in the microwave, but we actually prefer to melt it in a small skillet or saucepan on the stovetop. Heat the butter until it reaches a very low simmer, then immediately mix it with the sugars (don't let it sit and cool down). Using very hot melted butter helps the sugar dissolve into this batter more effectively, which determines how shiny and glossy the crackly brownie tops will be.
Equipment. This recipe works best with a metal 8x8 pan. If you don't have a metal pan, you can use a medium (8-10") cast iron skillet or a ceramic baking dish. Brownies baked in cast iron will have a slightly tougher, more pronounced crispy edge; brownies baked in a ceramic dish will be a bit fudgier throughout. You can use a glass baking dish if you need to, though you may need to extend the cook time; in a glass baking dish, the brownies also won't rise quite as much.
Additions and Substitutions. Use white chocolate chips or chopped nuts (walnuts, almonds, pistachios) in place of some or all of the chocolate chips. Use melted coconut oil in place of the melted butter if you like.
Store extra brownies in an airtight container on the counter for up to 3 days, or in the freezer for up to 2 months.
How do you know when brownies are done? When brownies are cooked through, they'll be slightly puffed up at the edges, and wrinkly and crackly on top, with some small cracks just beginning to form across the surface.
Nutrition
- Serving Size: 1 brownie
- Calories: 211
- Sugar: 24.3 g
- Sodium: 61.9 mg
- Fat: 9.9 g
- Carbohydrates: 31.8 g
- Protein: 3 g
- Cholesterol: 38.4 mg


Chloe M.
Tried these brownies today; they were incredible!!! Like some other reviews, the shine on top was a bit negligible, but I think it's because I was a bit too liberal with the chocolate chips on top. But they're fudgy, rich, and delicious, and I love how thorough the instructions are at explaining why each step was important. I would absolutely use this recipe again.
Rhonda @ Life As A Strawberry
Thank you for loving our recipe as much as we do!
Sage
I'm sure this recipe is fine and I've overall quite new to baking, I've mastered a cookie recipe but that's it. My brownies ended up grainy and didn't get the general shine and wrinkles on top. Mine were pretty rich which I'm okay with. No modifications were made to the recipe so I'm unsure of what happened here.
Baker 25
Absolutely LOVE these! They are delicious as well as soft and fudgy! This is really a nice and easy recipe that doesn't require alot of special ingredients like different types of chocolate. I brought these to a big party, and they were the first dessert gone! Thank you so much, Jessie. I've been searching for the perfect brownie recipe and found it!
Rhonda @ Life As A Strawberry
So glad you love them!
Jessie @ Life As A Strawberry
If you're looking for a perfect homemade brownie recipe, THIS IS IT. The dark cocoa powder + chocolate chips + shiny, crackly tops are just *chef's kiss*. Be sure to read the whole post - there are a ton of testing notes and how-to photos in there to help you along. And don't forget to use a kitchen scale!