

This eggy, hearty challah bread is easy to make and sure to be a hit! Tastes amazing straight out of the oven or as french toast the next day!
It was a bread-bakin', pasta-makin' weekend, folks. I made what felt like a zillion rigatonis (read: 10 servings or so) and a billion buckets of bread (read: 3 loaves + a batch of biscuits), not to MENTION a gigantic breakfast of everything I could think of on Saturday just.because.I.could.

Among the masses of bread I whipped up this weekend was my favorite challah recipe, adapted from Deb at Smitten Kitchen. And FRIENDS. It is THE BEST. So I decided to share it with the world (well...the part of the world that doesn't already creepily stalk Smitten Kitchen's recipe archives, anyway) (not that I do that, whatever) and also with a few select friends who came to dinner yesterday.
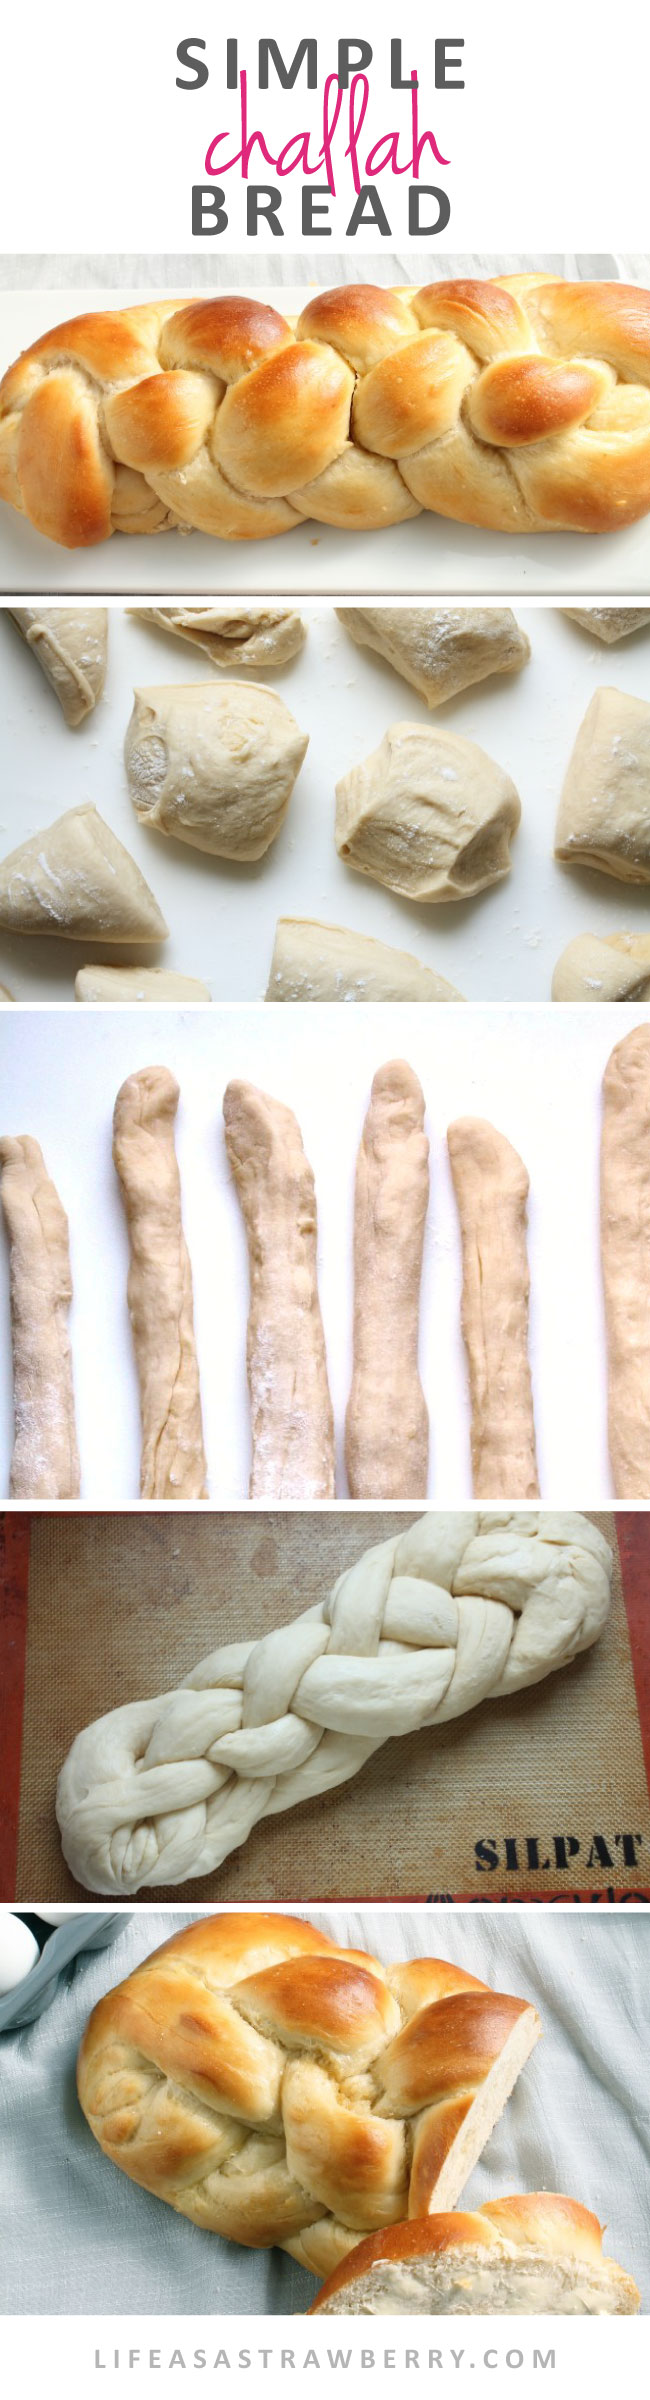
The braiding part is tricky, folks - I won't lie to you. It took me a few tries and several batches of challah before I got it to look somewhat right. There's a good tutorial on six strand braiding here - I won't try to explain it myself, because I will fail. But watch the video - it helps! She starts braiding around the 1:40 mark.
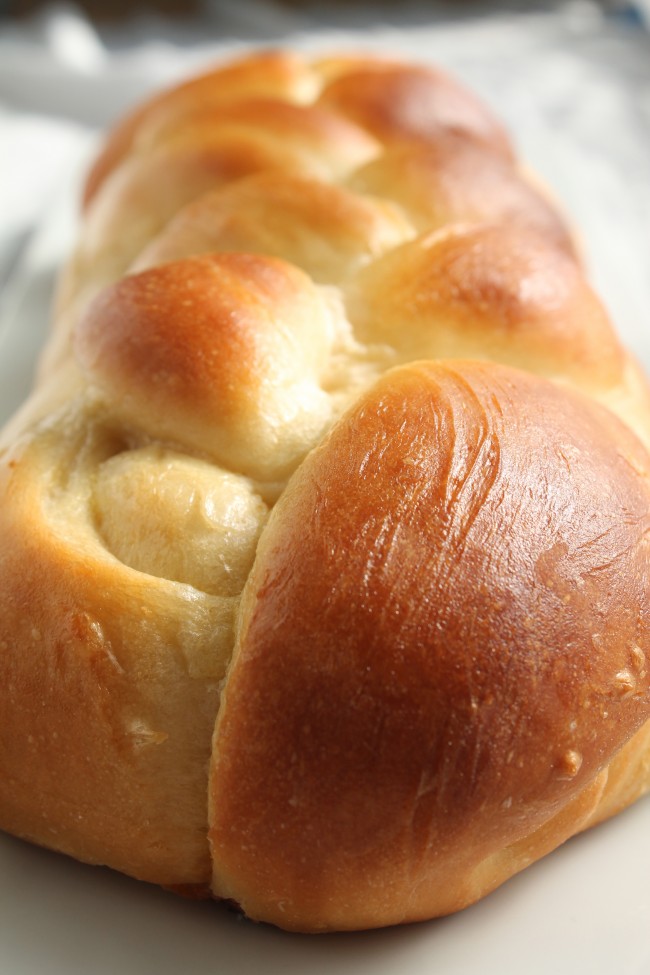
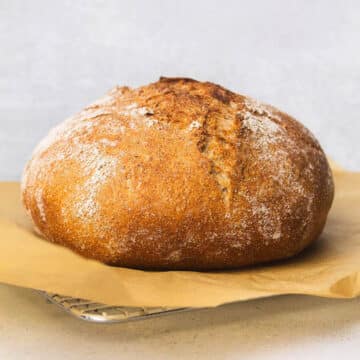
Here's what my braided loaf looked like:
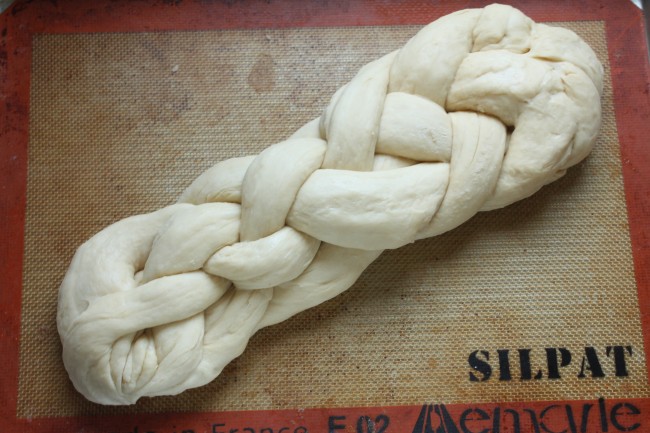
WINNING.
 I actually started making challah because of a restaurant in Portland called Gravy that makes the BOMB DIGGITY-EST french toast on the planet. (On the PLANET, folks.) They make it with challah bread and a super secret custard-y egg batter recipe that I have been determined to recreate for YEARS. Seriously - I know a lot of places make custardy french toast with challah bread.
But there's something magical about the one at Gravy. It's one-of-a-kind and will never be bested. Stay tuned for my copycat version of their super-duper french toast, though - I'm close to a breakthrough, I can feel it!
And now that I have fresh challah on my counter, I'm pretty sure it's about to be french-toast-o'clock in my apartment (friends and/or french-toast-testing-guinea-pigs welcome).

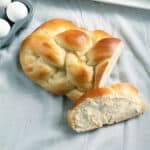
But until then, make yourself some of this bread. Slice yourself off a piece and butter it up real nice. Sit on your couch, eat your challah, and pat yourself on the back for being so bread-savvy. Refusing to share is totally acceptable - this bread just does that to people.
📖 Recipe
Simple Challah Bread
- Prep Time: 30 minutes
- Inactive Time: 2 hours
- Cook Time: 30 minutes
- Total Time: 3 hours
- Yield: 2 loaves 1x
- Category: Bread
- Cuisine: Bread
- Diet: Vegetarian
Description
This easy challah recipe is perfect for weekend or holiday baking!
Ingredients
- 5 tsp. active dry yeast
- 1 ¾ cup warm water
- ⅔ cup sugar
- ½ cup olive oil, plus extra to grease a bowl
- 5 eggs, plus 1 extra for an egg wash before baking (6 eggs total)
- 1-2 Tbsp. salt, depending on your taste (I use 1-½ Tbsp. or so)
- 8 to 8-½ cups flour, plus extra for kneading/dusting
Instructions
- In a large bowl or the bowl of your stand mixer, dissolve the yeast in the warm water. Let sit for 5 minutes or until yeast begins to foam.
- Mix oil, sugar, and salt into yeast.
- Add 5 eggs, one at a time.
- Add 8 cups of flour in 1-cup increments, mixing the dough a bit between each flour addition. (If you're using a stand mixer, use the dough hook attachment here. If you're working without a mixer, stir in as much flour as you can with a wooden spoon and then knead the rest in by hand).
- When you've added 8 cups of flour, take a look at your dough. It should be slightly sticky but should still hold together and pull away from the sides of your bowl as you mix. If the dough is too wet, add more flour in ¼-cup increments until dough reaches the right consistency.
- If you're working with a stand mixer, add an additional 1 Tbsp. of flour to the mixer and continue to knead the dough with your dough hook attachment until the dough is smooth and holds together. If you're working without a mixer, turn the dough out of the bowl onto a floured surface and knead it by hand until it reaches a smooth consistency.
- Oil a large bowl and place your dough inside. Cover with plastic wrap or a clean towel and let it rise in a warm place for 1-½ hours or until it has doubled in size.
- When dough has doubled, punch it down and turn it over in your bowl. At this point, you can either let it rise again on the counter or let it rise slowly in the fridge overnight. I ALWAYS do one rise overnight in the fridge, no matter what kind of bread I'm baking. It gives the flavors more time to develop and makes for a much richer end product. If you're in a hurry, though, re-cover the dough and let it rise again for 45 minutes on the counter. If you have the time to wait, re-cover the dough and place it in the fridge for 7-8 hours or overnight. After the dough has risen in the fridge, take it out and allow it to come back to room temperature before you proceed with the next step (about 3-4 hours).
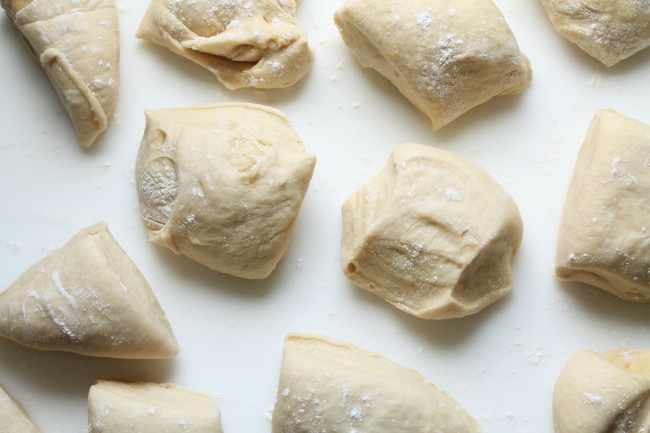
- Turn the dough out onto a floured surface, punch it down slightly, and cut it into 12 equal pieces. (Each loaf will use 6 of those pieces). Set 6 pieces aside while you form the first loaf.
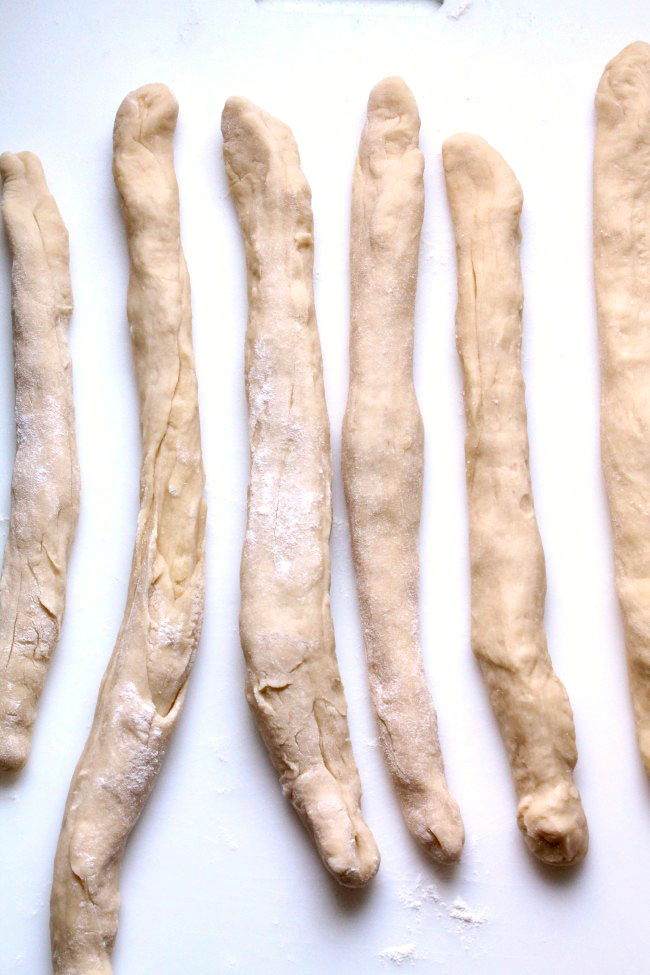
- Roll each piece of dough out into a long rope, about 12-14", and place the ropes parallel to each other on your floured surface. See this video for great instruction on how to braid the pieces. Braid one loaf, set aside, and repeat the process with your remaining 6 pieces of dough. Transfer the loaves to a large baking sheet.
- At this point, you can freeze one or both loaves for baking later or you can let them rise a final time. If you freeze a loaf, remember to let it come back to room temperature and rise before you bake it. If you're moving straight onto baking, cover each braided loaf and let it rise a final time - in a warm place for 1-½ hours or until the loaves have nearly doubled in size (they should be puffed up pretty significantly).
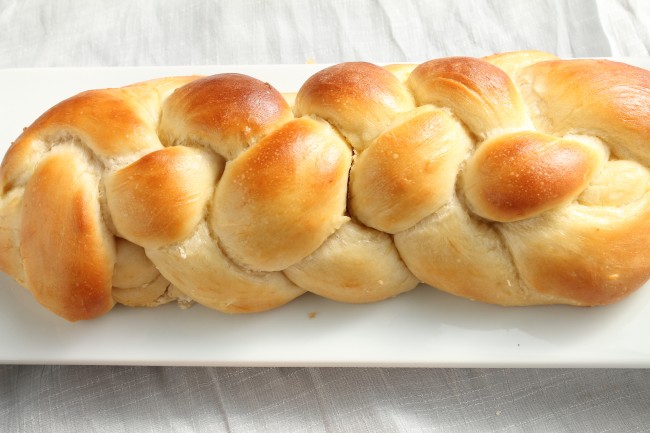
- Beat your remaining 1 egg with 1 Tbsp. of water to make an egg wash. Brush it liberally on each loaf. Place loaves into a 375 degree oven and bake for 20 minutes. After 20 minutes have passed, pull the baking sheet slightly out of your oven and give each loaf another liberal brush of egg wash.
- Return loaves to the oven for 10-20 minutes or until loaves have developed a deep golden color. Fully cooked loaves should make a hollow sound when you tap them and will have a sturdy outer crust. (Don't worry, the inside will be soft!)
- Let loaves cool for 15-20 minutes. This bread tastes UN.BE.LIEVEABLE. when you eat it warm, but it's pretty dang delicious at room temperature, too. Enjoy!
Notes
*Note: I make challah in my stand mixer, a KitchenAid Professional 600 Series 6-quart-er, but even my supercharged motor slows down and pulls a bit with the amount of dough this recipe produces. If you have a smaller, standard mixer, I’d recommend cutting the recipe in half or foregoing technology and kneading this by hand.
Adapted from Smitten Kitchen
Nutrition
- Serving Size: ⅙ of a loaf
- Calories: 462
- Sugar: 11.4 g
- Sodium: 615 mg
- Fat: 12.3 g
- Carbohydrates: 75.5 g
- Protein: 11.9 g
- Cholesterol: 77.5 mg


Anna Viola-Goodman
I have never made challah successfully before and this is my 3rd attempt. I am so happy I found your recipe. This challah is perfection. Made it for Shabbat tonight! Shabbat shalom!
Jessie @ Life As A Strawberry
Yay! We're so happy you like the recipe, Anna! Thanks!
Christina
I decided to freeze one of the loaves. When I defrost it, do I do so on the kitchen counter? Does i it need to be covered with a towel or plastic wrap? Or do I only cover it when it’s rising?
Jessie @ Life As A Strawberry
I like to cover the bread with a towel and let it defrost on the counter just do it doesn't dry out! It also works well to pop the defrosted bread back in a hot oven (just directly on the oven rack!) for a couple of minutes to crisp up the exterior again and bring it back to life. Hope that helps!
P.J.Smith
Hi,
I'm Phyllis,I'm taking your advice on the "ovrnte" option for developing flavor of the challah I'm a foodie too, thanks for the tip.
Malina Layne
Jessie,
I can't wait to try making this challa. I was sad to see prep and cook time at 20 minutes, only to discover it's actually hours. Could you updated that
Alli
This is THE BEST. I have some round challahs doing their final rise right now for Yom Kippur. I screwed up the freezing of this once so I will not try that again but the fresh challahs are so good.
Jessie @ Life As A Strawberry
Wahoo! So happy you like the bread, Alli!
Ilana
I loved this recipe! My challah turned out wonderfully! The only thing is that I love my challah a little sweeter, any ideas on how I can manipulate the recipe?
Shantel
Honey! I add honey or natural agave and it turns out perfectly sweet!
Ilana Heisler
Thank you! Added 1/3 cup honey this time around
Noa
I made it but I modified the recipe by using 50% of whole wheat flour and the rest was just white flour.
I doubled the recipe and I added 2 more eggs.
By the end it came out excellent!!
Thanks
Jackie @ Life As A Strawberry
Hi Noa, wonderful! Thank you for posting and letting us know about the changes you made...it's always helpful for other readers to see different ways to make a recipe!
Sherron
There is just the two of us so how do I cut this recipe in half. Can you email me the exact measurements for half of the ingredients for this bread.
Marsha Boswell
I am always looking for challah recipes, since I make them all the time (including chocolate chip, peanut butter, cinnamon, etc). I just wanted to tell you and your readers, that it isn't necessary to do a six braid. A three bread is so easy, like braiding a girl's hair. There are also one, two, four, five, eight, and twelve braid, but I never do that! So for anyone scared by the six strand, they can go to You Tube and find tons of videos on how to braid challah.
Jackie @ Life As A Strawberry
Hi Marsha, thank you for sharing! It's very helpful to our readers.
G
I made this for the first time and oh my god it is absolutely amazing. I walked into the kitchen as it was baking and I was greeted with the most glorious scent of gluten-y carbohydrates. I added cinnamon sugar and raisins into some of the strands but other than that I followed the recipe exactly. (My Jewish friends all approved)
Jackie @ Life As A Strawberry
Hi! Wow...those add-ins sound great! Thank you for sharing.
Kelsie
I grew up making Challah bread with my mother every Easter and since I am living on my own in a separate city this year, I wanted to still make it. I didn't have her recipe so I found yours! Boy am I glad I did! I followed the recipe to the "T" and it turned out delicious! Easily much better than my mother's (that's a rare compliment). The only two points I will say is that 1.) It makes A LOT. I will be halving this recipe next time. 2.) It does definitely get quite black on the bottom as some other commenters mentioned. I used one tray with parchment paper and the other tray with a silicone baking mat. The loaf with the baking mat helped with the bottom, but it still got quite burnt looking. However, just cut off the bottom portion and voila: THE BEST TASTING CHALLAH BREAD. Side Note: Thank you for posting the video tutorial for the 6 braid loaves - mine turned out so pretty! They will be a hit tomorrow night at dinner!
Jessie
I'm so glad you liked it, Kelsie! Thanks for letting me know how it turned out! As far as the dark bottoms of the loaves go, I recommend first playing around with the oven settings - you could move the oven racks further from the heat source or baking at a slightly lower temperature. I also definitely recommend getting an oven thermometer - one reader whose recipe kept burning got a thermometer and discovered her oven was actually a lot hotter than it said on the dial! A really thick, sturdy pan also makes a big difference here to help prevent burning. Thanks again for letting me know how it turned out - I hope you guys love the bread!
Sandi
The recipe calls for 1- 2TABLESPOONS of salt. That’s 1.5-3 teaspoons per loaf. Mine was WAY too salty.
Jessie
So sorry to hear that, Sandi! You can certainly reduce the amount of salt to taste as mentioned in the recipe if you know you like less seasoning.
Ceci
This looks beautiful! I love challah and want to try making this recipe for the first Easter dinner I am ever hosting this year. I would like to make the dough, do the first rise, braid it, and then pop it in the fridge overnight ready to put in the oven so it can be fresh-baked on Easter but all I have to do is the egg wash and baking portion.... Anyone know if this method will work? I just don't want it to over-rise or anything.
Ceci
Update: I made this and it was so good! I decided to basically just stick to the recipe. However, I did accidentally let it rise for over 14 hours in the fridge, and it got HUGE, so much so that it exploded out of the sides of the plastic wrap. I needed to bring it to room temp pretty quickly to fit with the schedule for my day, so I turned my oven to 170 (the lowest setting it goes) and put the dough in for about 20 minutes until it came to room temp, then rolled out and braided the loaves like instructed (I only did 3 strands and it looked kinda wonky but baked just fine.)
I then froze one, baked the other for 20 minutes, pulled it out and brushed it with more egg wash, then only baked it for about 5 minutes. The top and inside were perfect, but the bottom was just a tiny bit hard - not burned or anything, just a little too tough. Next time, I think I will take it out after 15 minutes to put a little more egg wash on it, and then bake it for another 5-8 minutes and I think it will be perfect!!
So if you're wondering whether you should make this, YES, and even if you think you have messed up, keep going, the recipe is pretty forgiving! 🙂
Jessie
Thanks for letting me know how it turned out, Ceci! 🙂
Sarah
Delicious and beautiful! I ended up cooking it for 30 minutes instead of 40, I would probably cook for even less next time.
Asnat
Is it possible to make more smaller loaves than 2 big ones?
Jessie
Certainly! Just divide the dough into smaller pieces and follow the same braiding instructions. You may also need to reduce the bake time with smaller loaves.
Lydia Bauman
Are you using all purpose flour or bread flour or a combination of both?
Thanks,
Jessie
I use all purpose flour, but you can certainly try it with bread flour if you like!