This simple asiago bread is ready in just a few hours! Easy no knead asiago cheese bread baked in a Dutch Oven for a crispy crust and chewy interior.
STEP ASIDE, plain ol' easy crusty bread. There's a new game in town, and it's packed with sweet, buttery, nutty asiago cheese.
(but also jk original crusty bread, you know I can't live without you).
We love playing with different bread flavor combinations (check out our Everyday Artisan Bread course for even more recipes!), and this asiago bread is always at the top of our "favorites" list.
If you've made our Dutch Oven bread before, you'll recognize this baking technique, but we're amping up the flavor here by adding a dash of fresh ground pepper and a boatload (<-- actual measurement. sort of) of asiago cheese.
This bread packs a punch (grilled cheese sandwiches with this cheese bread? They are NEXT. LEVEL) but is still ready in just under three hours. No waiting for anything to rise overnight, and no kneading necessary!
How to make asiago cheese bread
This bread is ready in about 2 ½ hours (and most of this is inactive time!) Here's what to expect:
Mix the dough (15 minutes)
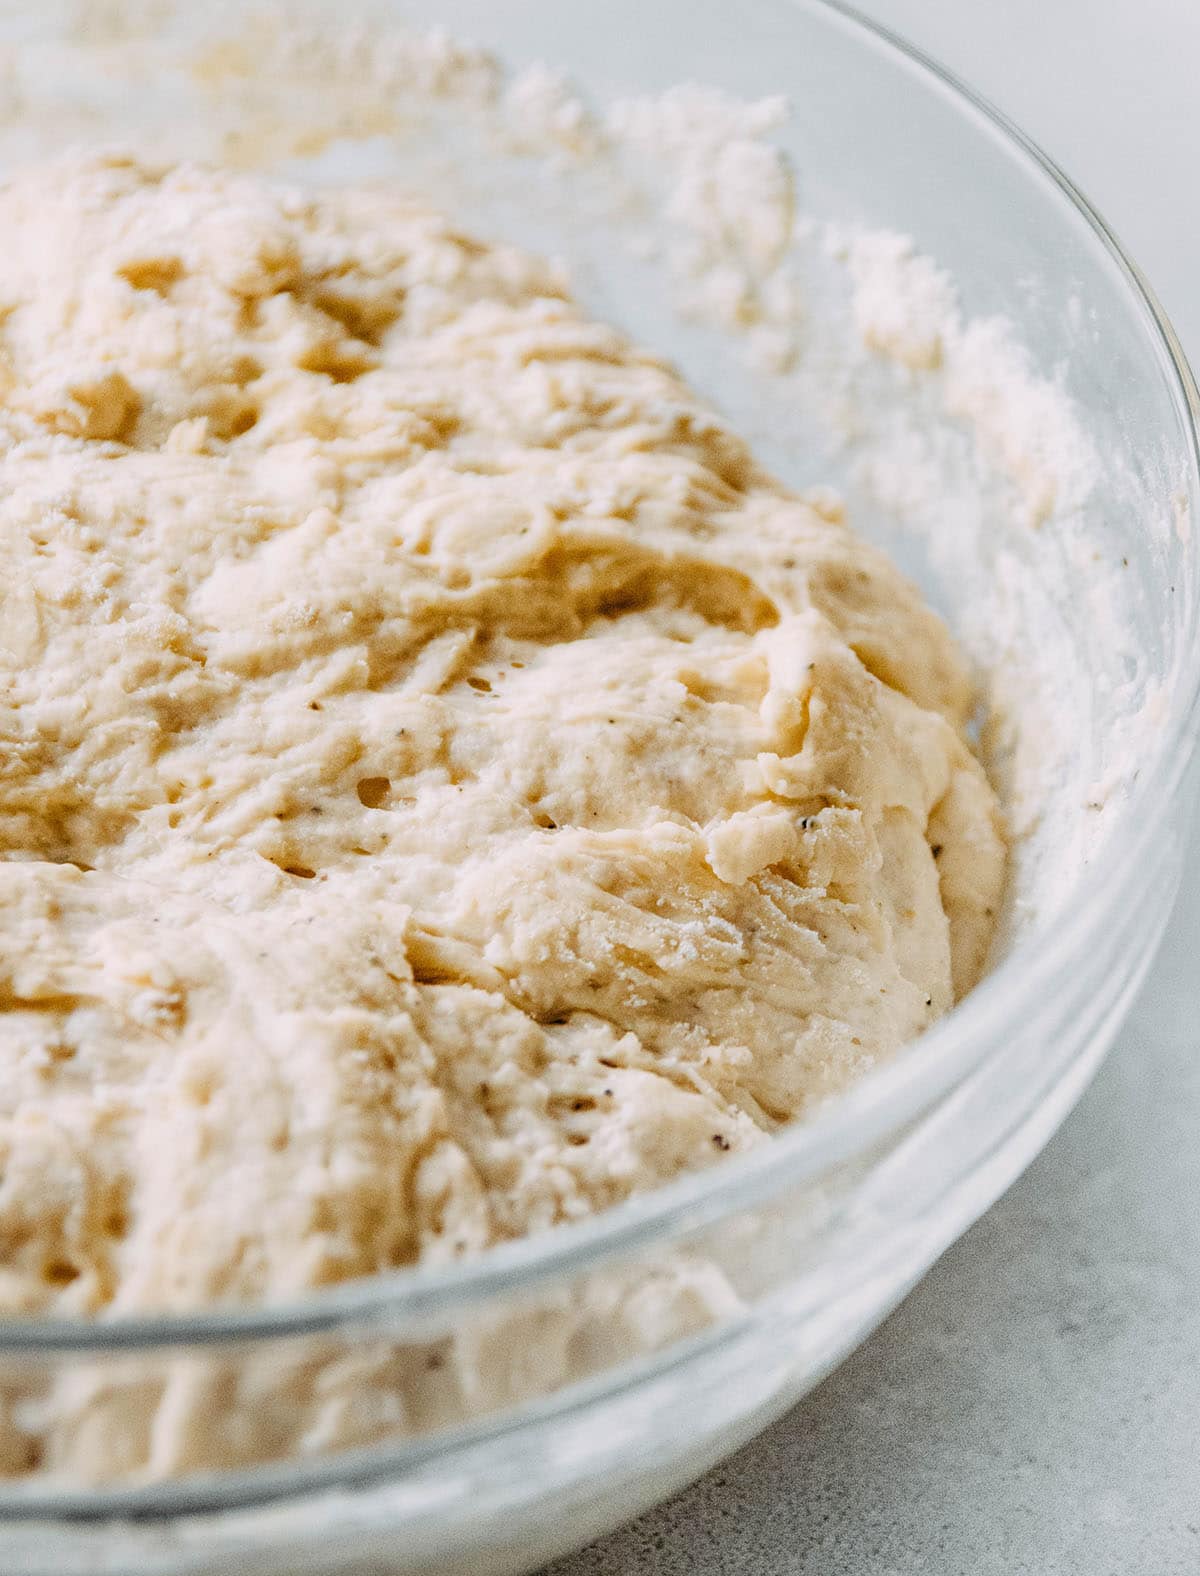
Mix active dry yeast with a bit of sugar and warm water, let the yeast proof until it's nice and foamy, and then stir in the rest of your dough ingredients (flour, salt, pepper, and plenty of asiago cheese). Mix until no dry flour remains - the dough should be a bit shaggy and slightly sticky, but that's ok!
Let it rise (1 hour)
When the dough is mixed, cover it with a clean tea towel and let it rise in a warm place for about an hour or until it's doubled in size.
Shape your loaf & rise again (30 minutes)
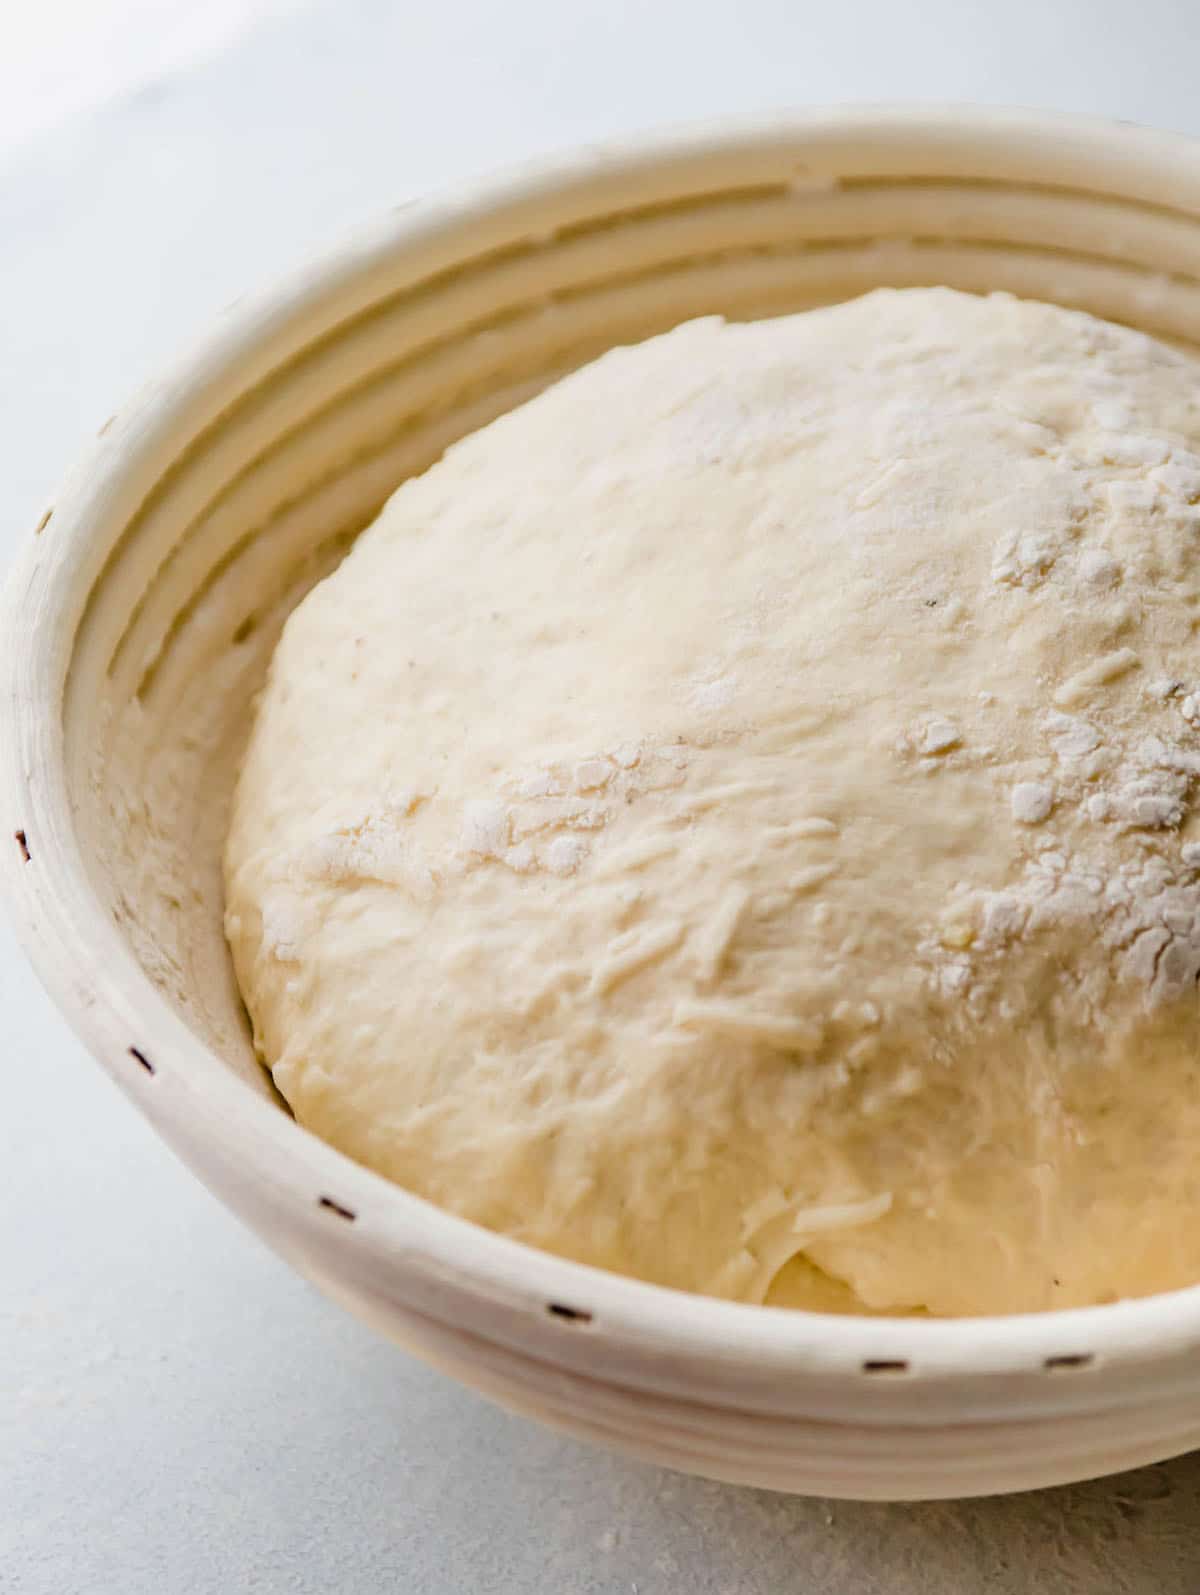
Shape the dough into a round boule (see the video below for a tutorial on shaping!) and let it rise for another 30 minutes or so in a small mixing bowl or proofing basket while you preheat the oven and your Dutch oven.
Top with cheese & bake! (40 minutes)
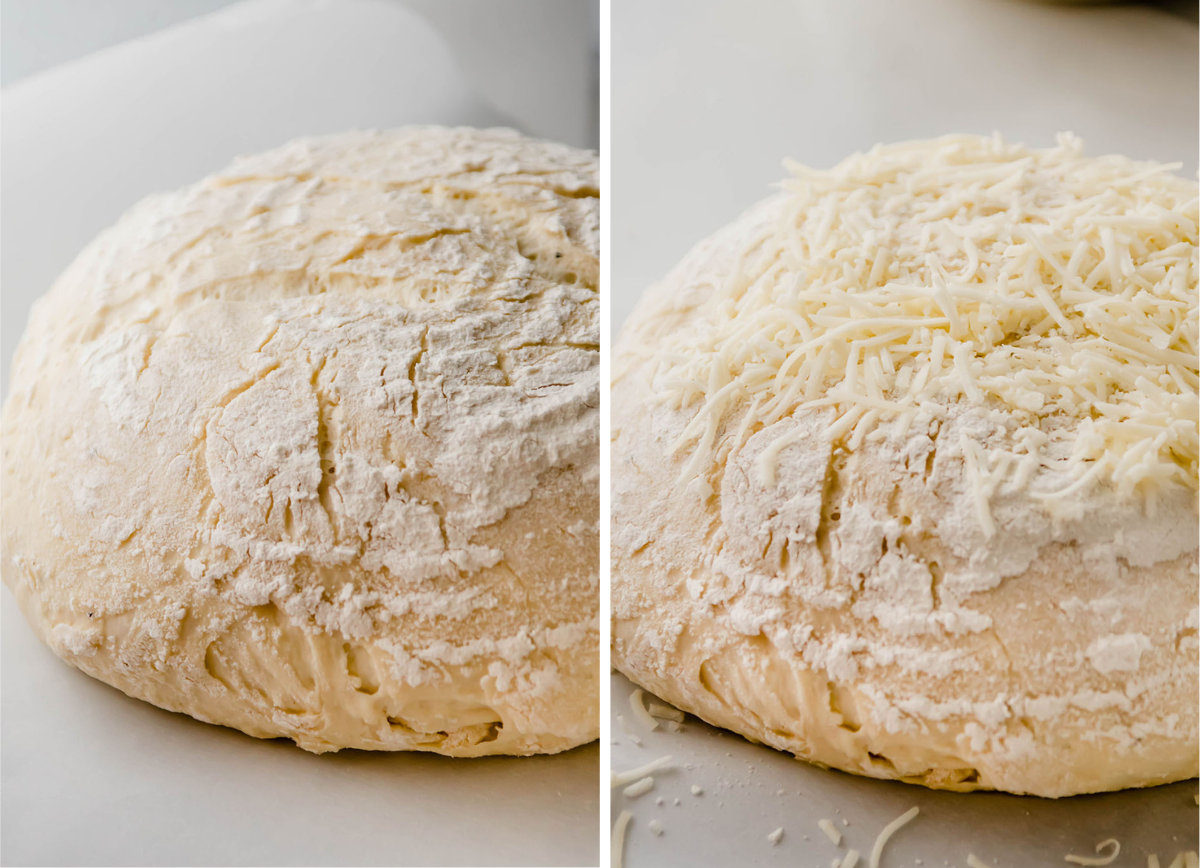
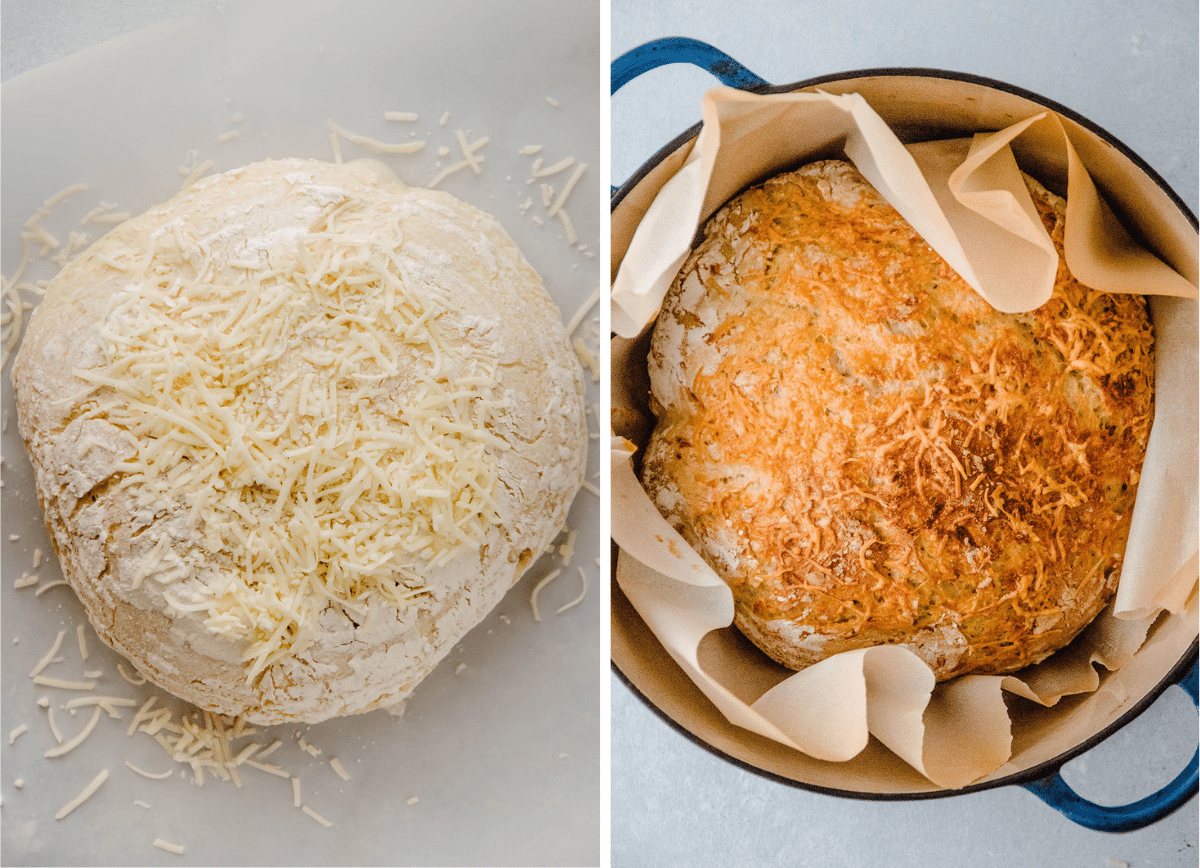
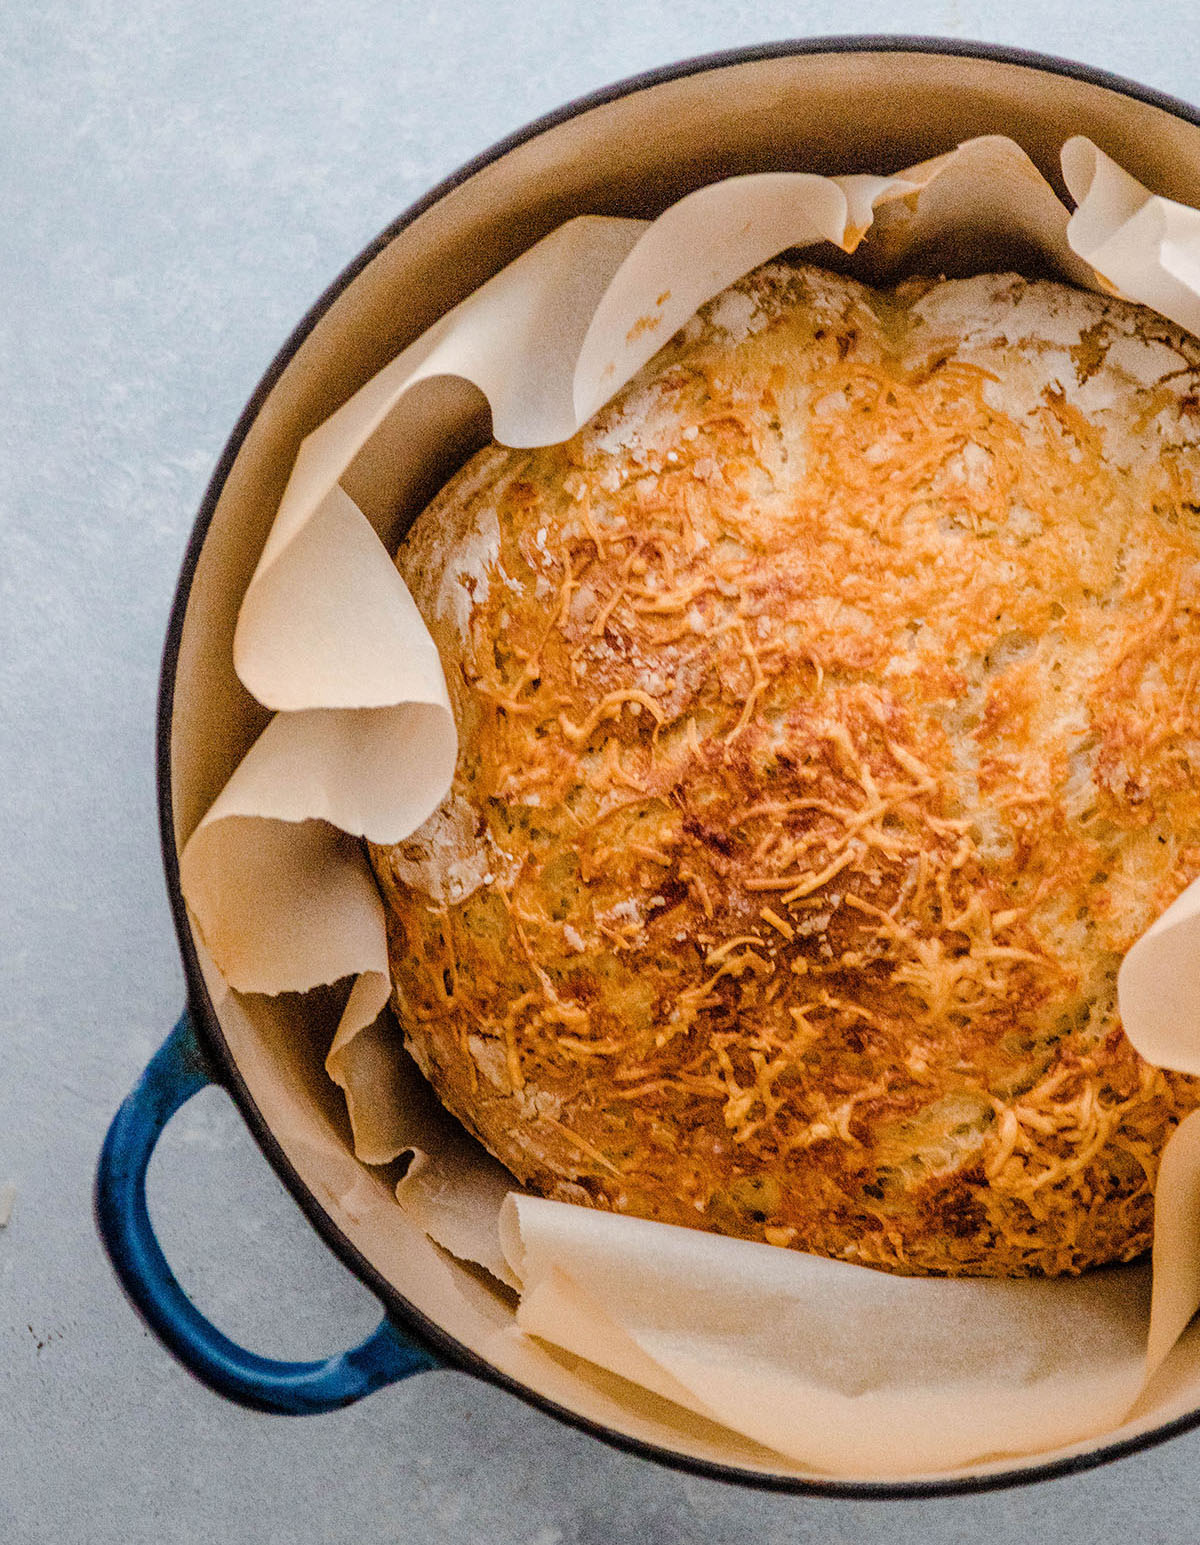
Turn your dough out onto a piece of parchment paper (this makes it easier to lift the bread in and out of a hot pot!) and top it with another handful of asiago cheese.
Transfer the loaf to your hot dutch oven (or use one of our other methods!) and bake for 30 minutes with the lid on, then remove the lid and bake another 10-20 minutes to give the crust some deeper color.
Tips for the best homemade bread
Our #1 tip: Use a kitchen scale!
Measuring by weight with a kitchen scale is much more accurate than measuring by volume (with cups). Because each person measures a cup of flour a little bit differently, it’s easy to end up using too much flour in a recipe – which results in dry, dense bread!
When you measure your flour in grams with a kitchen scale, you can measure flour perfectly every time. So if you have a kitchen scale, please use it!
No kitchen scale? Measure your flour with the scoop and level method for best results!
Use high-quality flour.
The type of flour you use matters. A LOT.
We recommend King Arthur Flour or Bob’s Red Mill flour for best results – these flours are the most consistent, and they both have a high protein content (which gives you a stronger, more elastic, less sticky dough!) All purpose flour and bread flour are both great in this recipe.
Make adjustments if you need to.
Bread baking is notorious for having a ton of different variables that can affect your final loaf: don't be afraid to trust your instincts and adjust for your own kitchen!
If your kitchen is especially chilly, you may need to extend the rise time for your bread (and if it's especially warm, it may not take the full hour!)
This cheesy french bread uses a slacker (wetter) dough than many folks are used to, but that's what makes it so light and chewy! If you're brand new to bread baking or a little nervous about working with such a slack dough, feel free to add a little bit of extra flour (it will still taste great!)
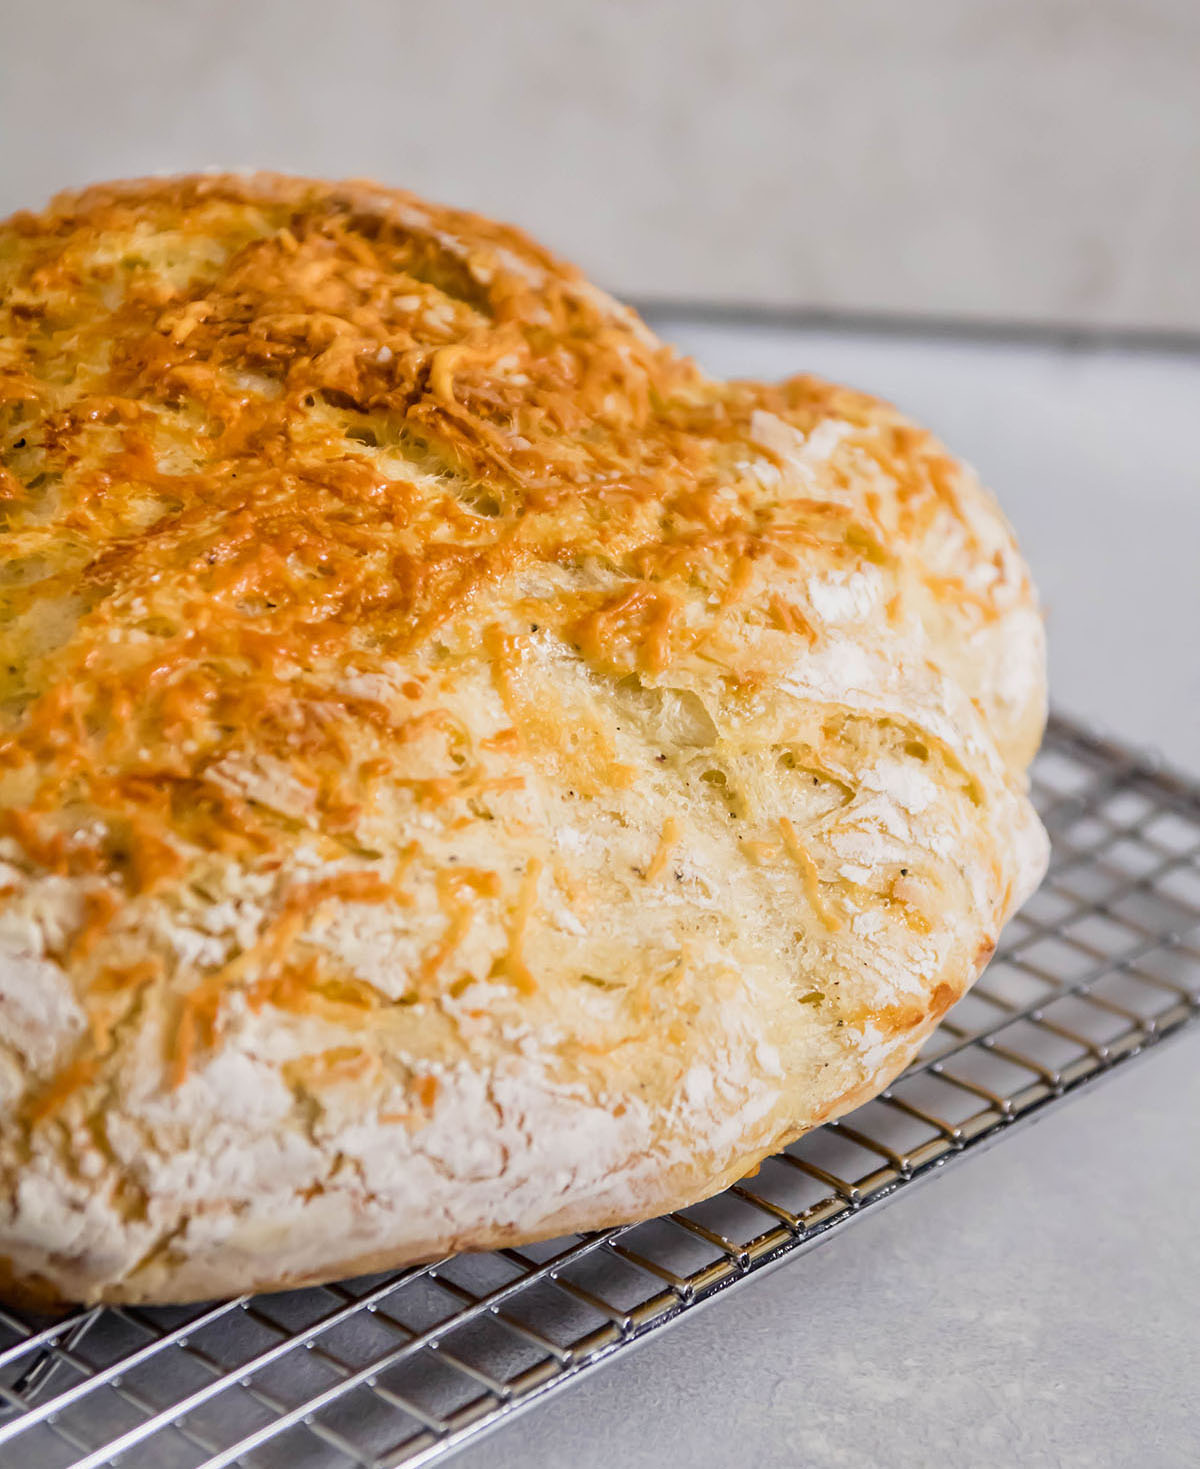
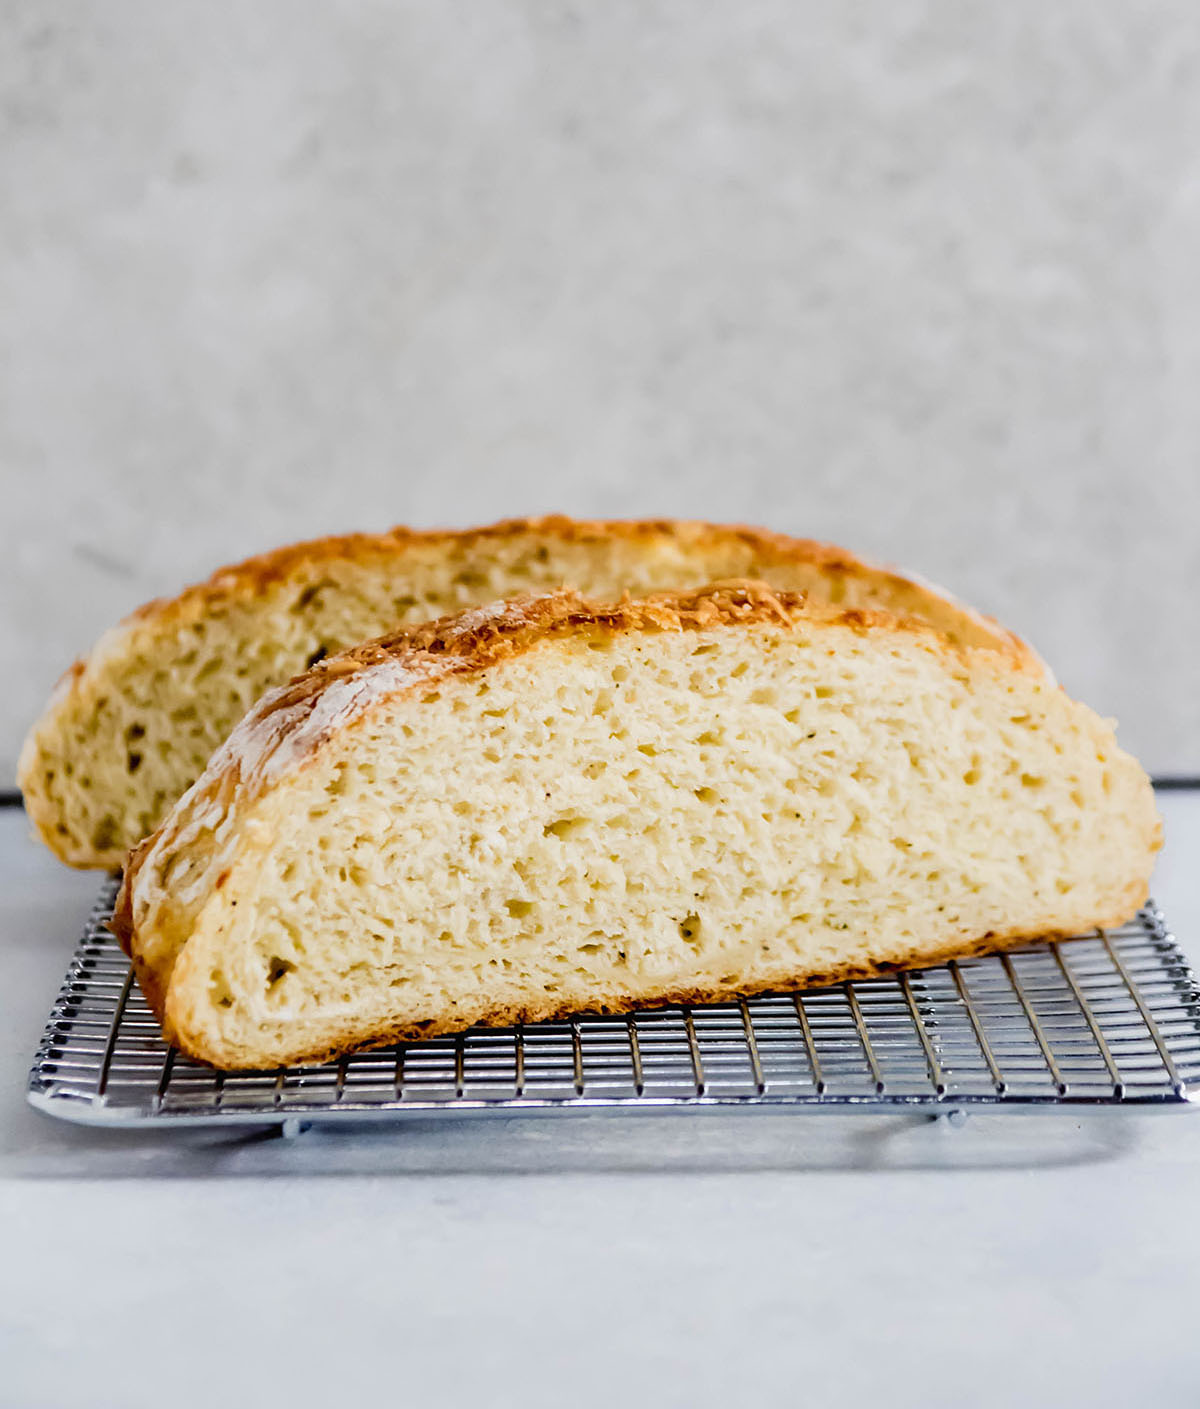
These photos should give you a general idea of what you're looking for, and be sure to read through our full FAQs and notes for best results!
More tips and FAQs
Read through our baking tips in this post or join our Everyday Artisan Bread course for extra help!
Additions and Substitutions
We recommend making this recipe at least one time as written so you can get a feel for what the dough should look and feel like at every step. That said, there are a few fun ways to customize this crusty bread if you like!
- For extra flavor, add fresh or dried herbs, roasted garlic, olives, or sun-dried tomatoes to the mix.
- Adjust the flours. We call for All Purpose Flour in this recipe because that's what most people tend to have on hand, but you can replace some or all of the AP flour with Bread Flour if you like. Bread flour is a little bit higher in protein, which means it will give you a smoother, more elastic dough and a slightly taller loaf. You can also replace up to 100 grams of the flour in this recipe with whole wheat flour if you like. We don't recommend using more whole wheat flour than that, because it will change the texture of the loaf and give you a denser crumb.
- Tweak the shape of your loaf. While we love using a Dutch Oven for a crispy crust in this recipe, you could also totally shape this bread into baguettes or bread bowls. (Side note: an asiago bread bowl? YES, PLEASE).
- Switch up the cheese. Use parmesan, white cheddar, or gruyere instead of asiago if you like!
Asiago Bread FAQs
Definitely! We love using a Dutch oven to create a crispy, crackly crust on our bread, but it’s not the only way to bake great bread at home. Check out this post about baking bread without a Dutch oven for our favorite alternative methods.
Store leftover bread in an airtight container in the fridge for 2-3 days. To reheat, pop bread into a 350°F oven for 5-10 minutes until it is crisp and warmed through. You can also pop individual slices right from the fridge into a toaster or toaster oven. (You might remember we usually don't recommend storing bread in the fridge, but we make an exception for this loaf: it needs to stay cold since it's packed with cheese!)
Yes! Store sliced bread in an airtight container (we love using Stasher Bags for this!) and freeze for 2-3 months. When you're ready to use it, let bread defrost on the counter for a few hours or in the fridge overnight. You can also pop frozen bread slices directly into a toaster or oven.
See even more detailed FAQs about bread baking in our Easy Crusty French Bread post, or enroll in our Everyday Artisan Bread course for step-by-step training lessons that take you through every technique, buzzword, and more!
More of our favorite bread recipes:
- Cheesy Jalapeño Bread
- Cranberry Pecan Bread
- Roasted Garlic & Rosemary Bread
- Whole Wheat Bread Bowls
- Small Batch Crusty Bread (perfect for two people!)

How to shape a loaf of bread (video)
This video is an excerpt from our Everyday Artisan Bread online course, which houses dozens of exclusive recipes and training videos for our favorite loaves and techniques.
📖 Recipe
Easy Crusty Asiago Bread
- Prep Time: 15 min
- Inactive Time: 90 minutes
- Cook Time: 40 min
- Total Time: 2 hours, 30 minutes
- Yield: Makes 1 loaf (about 8-12 slices, depending on how thick you cut it) 1x
- Category: Bread
- Cuisine: American
- Diet: Vegetarian
Description
This simple asiago cheese bread is ready in just a few hours! No-knead asiago bread loaf baked in a Dutch Oven for a crispy crust and chewy interior.
Ingredients
- 9 grams active dry yeast (2 ¼ teaspoons)
- 4 grams sugar or honey (1 teaspoon)
- 300 grams warm water (about 1 ¼ cups)
- 8 grams kosher salt (1 ¼ teaspoon)
- ¼ teaspoon fresh ground black pepper
- 1 cup shredded Asiago cheese, divided (you'll save some for topping the bread)
- 400 grams all purpose flour (2 ½ to 3 ½ cups) plus extra for dusting (see recipe notes)
Instructions
MIX THE DOUGH & FIRST RISE (1 HOUR):
- Combine yeast, sugar, and warm water in a large mixing bowl.
- Let the yeast proof for about 5 minutes, until the mixture looks nice and foamy.
- Add kosher salt and pepper to bowl.
- Add ¾ cup of the asiago cheese to the bowl - save the extra ¼ cup of cheese for topping the bread later!
- Add flour a bit at a time and stir gently with your hand or a sturdy spatula until all flour is incorporated and dough has come together and pulled away from the sides of the bowl. The dough won't be completely smooth and may even look slightly shaggy - that's ok!
- Cover dough with a tea towel and let rise on the counter for about 1 hour or until doubled in size.
SHAPE THE DOUGH & FINAL RISE (30 MIN):
- When dough has doubled in size, lightly flour a large cutting board.
- Tip the dough out of the bowl and onto the cutting board. DON'T PUNCH THE DOUGH DOWN – you want to keep all those nice air bubbles intact so you have an airy, delicious loaf of bread. (Tip: If the dough is sticking to the bowl a little bit, just wet your hand with a bit of cold water and gently separate the dough from the bowl to get it all out).
- Begin shaping the dough into a round loaf. I like to pull each corner of the dough in towards the center (like I’m folding an envelope) a few times, then flip the dough over and tap it into a nice round loaf. (Watch the video above to see exactly how to do this!)
- Flour a proofing basket or a small mixing bowl and place your loaf into it seam-side down. Cover with a tea towel and let rise another 30 minutes or so, until not quite doubled in size.
HEAT THE OVEN:
- While bread does its final rise, place an empty dutch oven (with the lid on) in your oven and heat to 460° Fahrenheit.
BAKE!
- When the oven is hot, you’re ready to go! Use oven mitts to pull the dutch oven out and remove the lid.
- Tip your bread dough gently out of the proofing basket back onto your floured cutting board. The seam side should face up this time - that's what gives it a nice crackly look on top! If you'd like, you can tip the bread onto a piece of parchment paper to help you lift it in and out of the pot easily.
- Sprinkle the remaining asiago cheese over the top of the bread.
- VERY CAREFULLY (without burning yourself!) lift the bread loaf and place it into the hot dutch oven.
- Put your oven mitts back on, put the dutch oven lid back on the pot, and slide the whole thing back into the centermost rack of your hot oven.
- Cook bread for 30 minutes.
- After 30 minutes, remove the lid from your dutch oven. The bread should be crusty and very lightly browned.
- Continue cooking the bread, uncovered, for 10-20 minutes more until the bread has deepened in color and you have a beautiful brown crust.
- When bread is done, use oven mitts to pull the pot out of your oven.
- Use a long spatula to lift the bread out of the dutch oven and onto a cooling rack.
- Let cool for at least 30 minutes before cutting into it.
- Slice, slather with butter, and enjoy!
Notes
How to measure flour: If you have a kitchen scale, please use it! If you don't have a scale, use a large spoon to stir and aerate your flour, then scoop it into a measuring cup and use a knife to level off any excess.
Equipment. We recommend a 4 to 5 quart dutch oven for best results. Please make sure that your Dutch oven is fitted with a metal (rather than plastic) knob on its lid, and always check the care instructions for your unique equipment before baking.
If you don't have a Dutch oven, you can still make great bread! See this post on baking without a dutch oven for our favorite alternatives.
Additions and substitutions. Replace some or all of the AP flour with Bread Flour if you like. You can also replace up to 100 grams of the flour in this recipe with whole wheat flour. Use parmesan, gruyere, or white cheddar in place of asiago. Add herbs, olives, roasted garlic, or sun-dried tomatoes when you mix the dough for an extra pop of flavor.
The cheese on top of this loaf can get very crispy. If you don't like extra crispy cheese, you can fold all of the cheese into the dough when you mix it, or you can add the cheese topping during the last 10 minutes of cooking so that it just barely melts.
Adjustments. If your kitchen is cold, you may need to extend the rising/proofing time by a few minutes. If your kitchen is especially warm, you may need to reduce the rising time. If you're baking at high altitude, add an extra 7-14 grams of flour (1-2 Tablespoons) to your dough for best results.
Nutrition
- Serving Size: 1 thick slice
- Calories: 196
- Sugar: 0.7 g
- Sodium: 662.5 mg
- Fat: 6.7 g
- Carbohydrates: 23.2 g
- Protein: 12.5 g
- Cholesterol: 15.4 mg





Susan
Is 460 a typo or is that the temp
Team Life As A Strawberry
Hi Susan! Yes, 460 is the accurate temperature for the entire baking process. Enjoy!!
Sharon M
I have this bread twice and the third is in the oven now. It is fabulous. Can I add jarred sun dried tomatoes in oi to the batterl? How small do I chop the tomatoes? If so, how much and when do I put them in? Thank you.
Erick
This recipe was actually awful and I followed it step by step.
Gaby
What kind of olives do you recommend using? And at what stage to add them in? Do you recommend drying them out at all??
Wispyfern
This bread is amazing!!! Absolutely perfect on 1st try! I will make this many times more ❤️
Cara
Wow, just made this recipe for my family and it was delicious. Thanks.
Jackie @ Life As A Strawberry
Thank you Cara!
Bec
Forgot to mention that I've made this once before and had the same 'problem.' It baked up wonderfully and was delicious, but just didn't seem like the right consistency...? Thanks!
Bec
The dough is very very soft and doesn't come to a ball...?? I added correct amount of flour and used extra to mix a bit more before proofing, What am I doing wrong? Measurements are right on...,
Jessie @ Life As A Strawberry
Hi Bec! It’s hard to say without being in the kitchen with you, but I would guess that it just needs a bit more flour! When we measure flour in cups, it’s much less accurate than measuring by weight, so you may occasionally have to add more or less depending on how heavily you measure your cups of flour. You can certainly add more flour if you like a stiffer dough - don’t be afraid to go with your gut and add more or less until the dough looks right to you.
This IS a very slack (wet) dough, so it’s not as stiff or thick as a lot of people are used to. You’ll also notice that as the dough proofs/rises, it will stay together more easily and get “stretchier” rather than “stickier,” and when you fold into your loaf you’ll notice it stiffen up quite a bit as well! If your dough still feels loose, I recommend giving it a few extra folds before proofing to help the dough build up some extra strength. I hope that helps!
Lauren
Hi! I made this a few weeks ago (along with some Herb de Provance thrown in) and it was delicious!!
I want to take it to my work meeting in the am. Can you make this dough one day and bake it the next morning or would that totally mess up the rise?
Jessie @ Life As A Strawberry
I'm so glad you liked it, Lauren - LOVE the herbs de provence addition!
You can definitely make the dough a day in advance if you like. I'd recommend letting it do its first rise as instructed, then folding it over on itself a few times, covering it, and letting it do an extra rise in the fridge overnight. Let it come to room temperature on the counter the next morning (this can take a couple of hours depending on how warm your kitchen is) and then shape and bake as directed. You may also want to reduce the amount of yeast in the dough by 1/2 teaspoon or so since it will have so much extra rise time.
Alternatively, you can make and bake the bread all in one day - just cover the fully cooked loaf with a tea towel overnight and pop it back in the oven (you can put the baked loaf straight onto the rack) for a few minutes the next morning to crisp it back up! I hope that helps!
Lauren
Thank you so much! The bake one day, re-heat the next was really what I was hoping for so this is great! Trying again now, as we've had crazy storms in Texas and my work meetings cancelled. I appreciate the response!
Dee
When do you add the pepper?
Jessie @ Life As A Strawberry
You can add it along with the salt when first mixing the dough!
Amy
Is there a reason you use flour instead of olive oil when rising for sticking?
Jessie @ Life As A Strawberry
Primarily to slim down the ingredients list (and just a personal flavor preference - too much oil in the bowl when the dough rises can affect the final taste/texture!) You can definitely use olive oil on the first rise if you like, though!
Gabriella Guerra
Can olives be added to this dough to make olive bread it would that ruin it? 🥰
Jessie @ Life As A Strawberry
You can definitely add olives! It's also great with some roasted garlic folded in!
Jen
Made this yesterday and it was so easy and so good. Thanks so much for this!
Jackie @ Life As A Strawberry
Hi Jen, it is quite tasty!
Gabi
I tried this bright in the Dutch oven it came out wunderful just like you said.
Jackie @ Life As A Strawberry
Hello Gabi - WONDERFUL!!!!
Bob
The recipe doesn't say when to add the pepper...
Jessie @ Life As A Strawberry
Good catch - fixed now! Add the pepper along with the salt and flour when mixing the dough. Thanks!
Logansver Iline
Thank you so much for this..
I had tried this...and this is really tasty one..
i like this very much..
Looking for more posts like this!!!1