

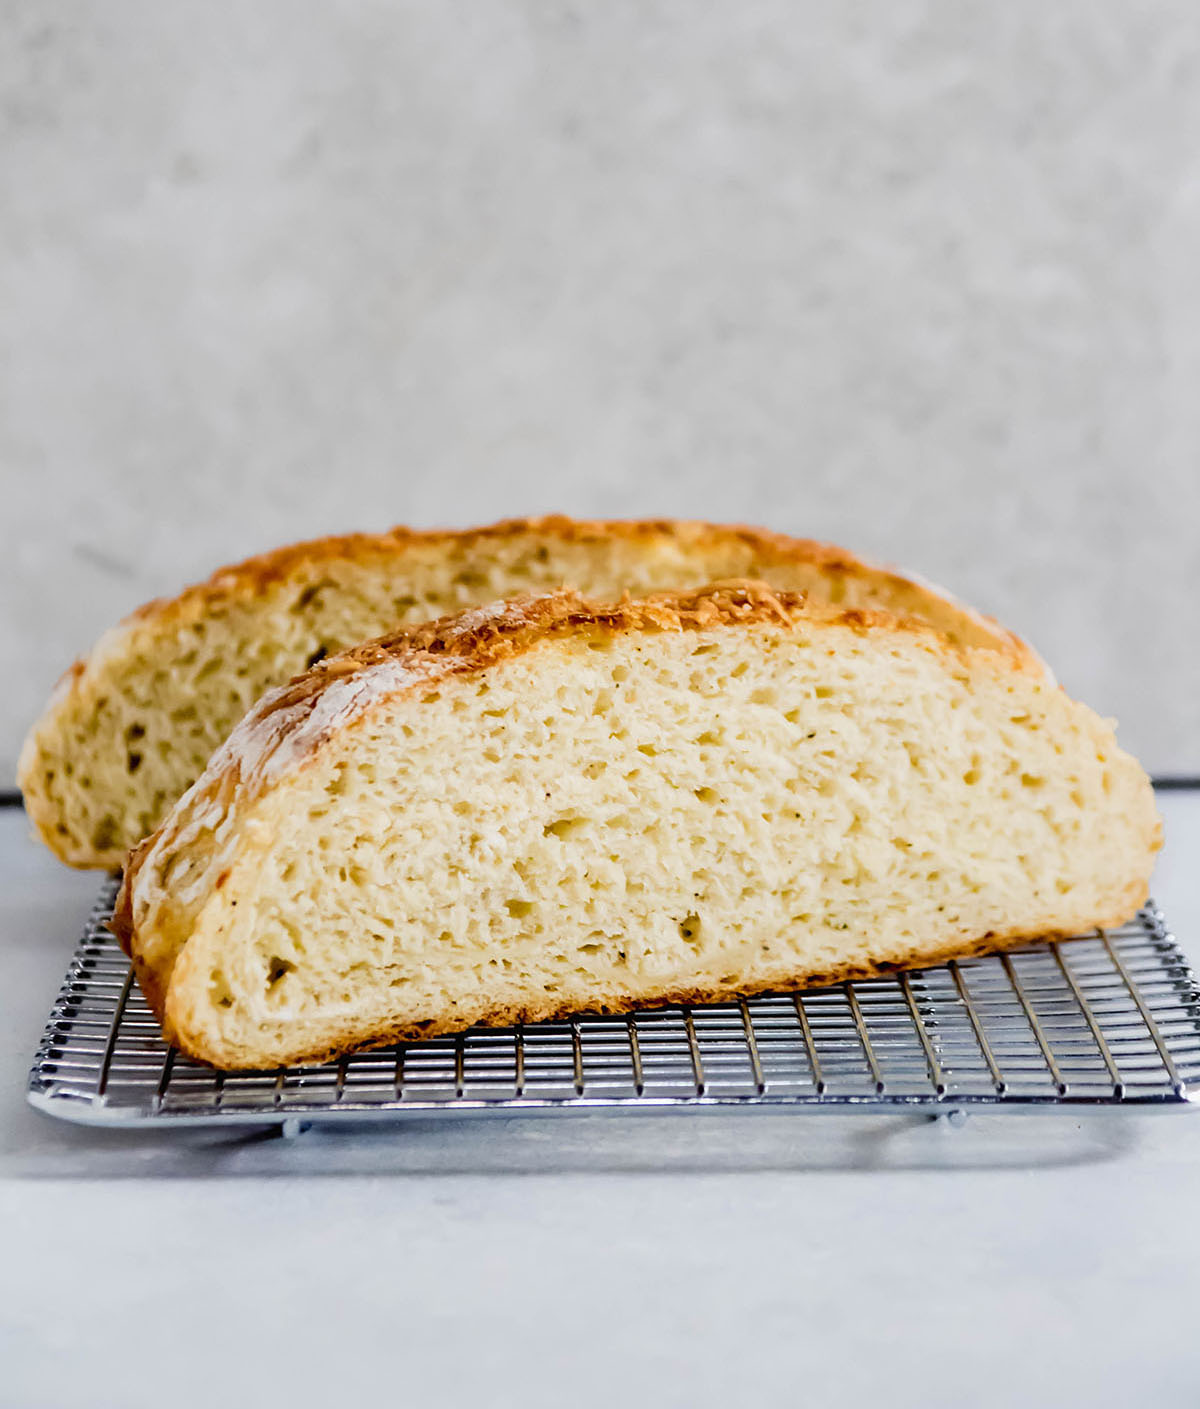
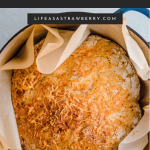
This simple, no knead asiago bread is ready in just a few hours! Baked in a Dutch Oven for a crispy crust and chewy interior.

Editor's Note: This no knead asiago cheese bread recipe was originally published in 2018. It was updated in 2025 to include additional notes and step-by-step photos.
STEP ASIDE, plain ol' easy crusty bread. There's a new game in town, and it's packed with sweet, buttery, nutty asiago cheese.
We love playing with different bread flavor combinations (check out our Everyday Artisan Bread course for more recipes!), and this asiago bread is always at the top of our "favorites" list. It's ready in under 3 hours (and most of that is inactive time!)
If you've made our Dutch Oven bread before, you'll recognize this baking technique, but we're amping up the flavor here by adding a dash of fresh cracked black pepper and a boatload (← actual measurement. sort of) of asiago cheese.
This bread packs a punch (grilled cheese sandwiches with this cheese bread? plus a bowl of apple tomato soup? NEXT. LEVEL) but is still ready in just under three hours. No waiting for anything to rise overnight, and no kneading necessary!
Ingredients

For a full ingredients list with exact quantities, scroll to the recipe card below.
If you've made our Easy Crusty Bread before, this asiago bread recipe should feel nice and familiar. Still, we want to highlight a few things before you start baking:
- Active Dry Yeast gives you a reliable, quick rise without compromising on flavor development.
- Warm Water. Use water that is "warm to the touch", between 95°-110° Fahrenheit. (Too-hot water will kill the yeast, and your bread won't rise).
- All Purpose Flour. After extensive testing, we use and recommend King Arthur All Purpose Flour. Its high protein content encourages gluten development for a taller, airier loaf (we cover this in much more detail in Everyday Artisan Bread).
- Shredded asiago cheese melts into the dough as it bakes for a smooth, buttery texture. Extra cheese on top of the loaf gives it a gorgeous crust!
Variations and substitutions
- Instead of honey, use granulated sugar.
- For extra flavor, add fresh or dried herbs, roasted garlic, olives, or sun-dried tomatoes.
- Try a different shape. We love crispy Dutch oven bread, but you can also shape this dough into baguettes, bread bowls, or homemade pizza dough.
- Swap the asiago for parmesan cheese, white cheddar, or gruyere.
Use a kitchen scale
Measuring dry ingredients by volume (with cups) is notoriously unreliable. Because each person measures one cup a bit differently, it's easy to accidentally use too much flour and alter the texture of your bread.
For accurate results, use a kitchen scale to follow the gram measurements in the recipe below. No kitchen scale? Measure your flour with the scoop and level method!
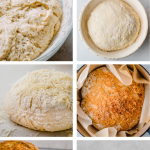
Step by step instructions
Mix the dough (10 minutes)

In a large bowl, mix active dry yeast with a bit of honey and warm water. Let the yeast proof for 5 minutes or so until it's nice and foamy, then stir in flour, pepper, kosher salt, and most of the asiago cheese.
Note: Reserve ¼ cup of shredded asiago cheese for topping the loaf before baking.

Mix well, until no dry flour remains. You should be left with a shaggy, sticky dough!
Note: This cheesy french bread uses a slacker (wetter) dough than some folks are used to. The dough will smooth out and become more elastic as it rises, and again as you shape it. But if you're brand new to bread baking or a little nervous about working with such a slack dough, feel free to add a little bit of extra flour (it will still taste great!)
First rise (1 hour)

Cover dough with a clean tea towel. Let it rise in a warm place for about an hour, until it's roughly doubled in size.
Keep in mind that the temperature of your kitchen will affect the rise time here: Dough rises faster in a warm kitchen and slower in a cool kitchen. If it's chilly and your dough is slow to rise, you can give it an extra 15-20 minutes on the counter.
If the dough hasn't fully "doubled in size", even after a few extra minutes of rise time, don't panic! You can still move forward with shaping the loaf.
Food safety note: Because this dough contains cheese, limit its time at room temperature to no more than 2 hours total (including the first rise and the final rise). If you're new to baking, we recommend starting with our basic crusty bread, which helps you get a feel for the rising process without the time constraints imposed by the cheese!
Preheat the oven
Once the dough has risen, place an empty Dutch oven (with the lid on) in your oven and heat to 460° Fahrenheit. Shape the dough and let it do its final rise while the oven preheats!
Shape your loaf (10 minutes)

When the dough has risen, tip it out onto a lightly floured cutting board. Gently fold the dough into shape by pulling each side in towards the center (think of it like folding an envelope!)
Pro Tip: If your dough is sticking to the bowl, wet your hand with a bit of cold water (this makes it easier to coax the dough out of the bowl without sticking).

Continue folding the dough - pulling one edge at a time in towards the center - until it begins to resist your folds.
As you work, you should notice the dough feels stiffer and more difficult to stretch.

When you have a round boule that resists additional folds, flip the loaf over and gently pull it towards yourself, letting the underside drag slightly along the cutting board.
This tightens up the seams you created by folding the dough over on itself, and helps the loaf hold its shape.
Final rise (30 minutes)

Line a proofing basket or a small mixing bowl with a linen napkin, and lightly dust with flour. Place your loaf seam-side down into the proofing basket, then cover and rest for 30 minutes.
Top with cheese and bake! (40 minutes)

Turn your dough out onto a piece of parchment paper (this makes it easier to lift the bread in and out of a hot Dutch oven!) and top it with your remaining asiago cheese.
Carefully transfer the loaf to your preheated dutch oven.
No Dutch oven? Try one of our recipe tester-approved methods to bake bread without special equipment!

Bake for 30 minutes with the lid on, then remove the lid and bake another few minutes to give the crust some deeper color.

3 tips for the best homemade bread
- Use a kitchen scale! Measuring ingredients - especially flour - by weight with a kitchen scale (using gram measurements) is much more reliable than measuring by volume (with cups).
- Use high quality flour. We recommend King Arthur Flour for best results. This brand is remarkably consistent, and their All Purpose Flour has a high protein content (which gives you a stronger, more elastic, less sticky dough!)
- Be flexible and make adjustments. There are a ton of variables that can affect your final loaf, from temperature to equipment to the brand of flour you use. Don't be afraid to trust your instincts and adjust for your own kitchen!
And remember: With homemade bread - as with many things - the most important ingredient is practice.

FAQs
Definitely! We love using a Dutch oven to create a crispy, crackly crust on our bread, but it’s not the only way to bake great bread at home. Check out this post about baking bread without a Dutch oven for our favorite alternative methods.
Store leftover bread in an airtight container in the fridge for 2-3 days. To reheat, pop bread into a 350°F oven for 5-10 minutes until it is crisp and warmed through. You can also pop individual slices right from the fridge into a toaster or toaster oven. (You might remember we usually don't recommend storing bread in the fridge, but we make an exception for this loaf: it needs to stay cold since it's packed with cheese!)
Yes! We recommend slicing bread for easier storage, as opposed to freezing an entire loaf.
Store sliced bread in an airtight container (we love using Stasher Bags for this!) and freeze for 2-3 months. When you're ready to use it, let bread defrost on the counter for an hour, or in the fridge overnight. You can also pop frozen bread slices directly into a hot oven or toaster oven to reheat.
Yes. If you want to use instant yeast, reduce the total amount of yeast by 25% and keep an eye on the dough since it may rise more quickly.
See even more detailed FAQs about bread baking in our Easy Crusty French Bread post, or enroll in our Everyday Artisan Bread course for step-by-step training lessons that take you through every technique, buzzword, and more!
There's quite a bit of cheese in this dough, which gives us a slightly denser loaf and makes it even more important to build strength into our dough.
In this recipe, we primarily do that by folding the dough over on itself while shaping, until the dough feels stiff and begins to resist our folds. This can take some practice, so don't worry if the bread is on the flatter side the first few times!
If you're new to baking, we recommend starting with our Easy Crusty Bread to get a feel for the shaping technique.
We also share some of our favorite techniques for taller, stronger loaves in our free Bread Bootcamp Webinar.
And of course, you can skip the learning curve entirely and let us take you through homemade bread A to Z in our Everyday Artisan Bread course - we share a ton of recipes and best practices in that course to help you get tall, airy loaves of bread!
We love mixing this dough by hand in a large bowl, but you can certainly use an electric mixer (like a KitchenAid stand mixer) fitted with the dough hook if you prefer!
Just keep an eye on it as the mixer runs: Stand mixers can often trap pockets of flour on the very bottom of the bowl, which makes the mixing process take a lot longer.
If your mixer feels like it's not really making progress, turn it off, remove the bowl, and flip the dough over a few times by hand to help it get back on track!
More of our favorite bread recipes:
🎥 How to shape a loaf of bread
This video is an excerpt from our Everyday Artisan Bread online course, which houses dozens of exclusive recipes and training videos for our favorite loaves and techniques.
📖 Recipe

No Knead Asiago Bread
- Prep Time: 30 minutes
- Cook Time: 40 min
- Total Time: 2 hours 40 minutes
- Yield: Makes 1 loaf (about 8-12 slices, depending on how thick you cut it) 1x
- Category: Bread
- Cuisine: American
Description
This simple asiago cheese bread is ready in just a few hours! No-knead asiago bread loaf baked in a Dutch Oven for a crispy crust and chewy interior.
Ingredients
- 9 grams active dry yeast (2 ¼ teaspoons)
- 4 grams honey or sugar (1 teaspoon)
- 300 grams warm water (about 1 ¼ cups)
- 8 grams kosher salt (1 ¼ teaspoon)
- ¼ teaspoon fresh ground black pepper
- 400 grams all purpose flour (2 ½ to 3 ½ cups), plus extra for dusting (see recipe notes)
- 100 grams shredded Asiago cheese (1 cup) divided (you'll save some for topping the bread)
Instructions
Mix the dough (1o minutes):
- Combine yeast, sugar, and warm water in a large mixing bowl.
- Let the yeast proof for about 5 minutes, until the mixture looks nice and foamy.
- Add kosher salt, pepper, and all purpose flour to bowl.
- Add ¾ cup of the asiago cheese to the bowl - save the extra ¼ cup of cheese for topping the bread later!
- Stir gently with your hand or a sturdy spatula until all flour is incorporated and dough has come together and pulled away from the sides of the bowl. The dough won't be completely smooth and may even look slightly shaggy - that's ok!
First rise (1 hour):
- Cover dough with a tea towel and let rise on the counter for about 1 hour or until doubled in size.
Shape the dough (10 minutes):
- Preheat the oven. Place an empty dutch oven (with the lid on) in your oven and heat to 460° Fahrenheit.
- When dough has doubled in size, lightly flour a large cutting board.
- Tip the dough out of the bowl and onto the cutting board. DON'T PUNCH THE DOUGH DOWN – you want to keep all those nice air bubbles intact so you have an airy, delicious loaf of bread. (Tip: If the dough is sticking to the bowl a little bit, just wet your hand with a bit of cold water and gently separate the dough from the bowl to get it all out).
- Begin shaping the dough into a round loaf. Pull each corner of the dough in towards the center (like folding an envelope) a few times, until you feel the dough tighten up and start to resist your folds. Flip the dough over and gently pull it towards yourself to tighten it into a nice round loaf. (Watch the video above to see exactly how to do this!)
Final rise (30 minutes):
- Line a proofing basket or a small mixing bowl with a clean linen napkin and dust with flour. Place your loaf into the basket, seam-side down.
- Cover with a tea towel and let rise another 30 minutes, until not quite doubled in size.
Bake:
- Gently tip your bread dough onto a piece of parchment paper.
- Sprinkle the remaining asiago cheese over the top of the bread.
- Use oven mitts to pull the dutch oven out and remove the lid. VERY CAREFULLY (without burning yourself!) lift the bread loaf by the edges of the parchment, and place it into the hot dutch oven.
- Put your oven mitts back on, return the dutch oven lid to the pot, and slide the whole thing back into the centermost rack of your hot oven.
- Cook bread for 30 minutes.
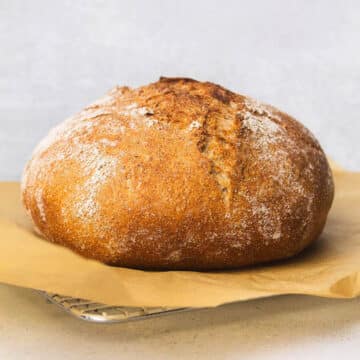
- After 30 minutes, use an oven mitt to remove the lid from your dutch oven. The bread should be crusty and very lightly browned.
- Continue cooking the bread, uncovered, for 10-15 minutes more, until the bread has deepened in color and you have a beautiful brown crust. Carefully remove bread to a cooling rack, and let cool for at least 30 minutes before slicing.
Notes
How to measure flour: If you have a kitchen scale, please use it! If you don't have a scale, use a large spoon to stir and aerate your flour, then scoop it into a measuring cup and use a knife to level off any excess.
Equipment. We recommend a 4 to 5 quart dutch oven for best results. Please make sure that your Dutch oven is fitted with a metal (rather than plastic) knob on its lid, and always check the care instructions for your unique equipment before baking.
If you don't have a Dutch oven, you can still make great bread! See this post on baking without a dutch oven for our favorite alternatives.
Additions and substitutions. Replace some or all of the AP flour with Bread Flour if you like. You can also replace up to 100 grams of the flour in this recipe with whole wheat flour. Use parmesan, gruyere, or white cheddar in place of asiago. Add herbs, olives, roasted garlic, or sun-dried tomatoes when you mix the dough for an extra pop of flavor.
The cheese on top of this loaf can get very crispy. If you don't like extra crispy cheese, you can fold all of the cheese into the dough when you mix it, or you can add the cheese topping during the last 10 minutes of cooking so that it just barely melts.
Adjustments. If your kitchen is cold, you may need to extend the rising/proofing time by a few minutes. If your kitchen is especially warm, you may need to reduce the rising time. If you're baking at high altitude, add an extra 7-14 grams of flour (1-2 Tablespoons) to your dough for best results.
Great bread takes practice. Please read through the post above before you start baking - it's packed with step by step photos and our best tips for success!
Nutrition
- Serving Size: 1 thick slice
- Calories: 196
- Sugar: 0.7 g
- Sodium: 662.5 mg
- Fat: 6.7 g
- Carbohydrates: 23.2 g
- Protein: 12.5 g
- Cholesterol: 15.4 mg


Heather
Can you make this into rolls?
Rhonda @ Life As A Strawberry
Absolutely! You may not need to bake quite as long. Keep an eye on them and you should be fine.
Tony
Best bread recipe I’ve found, so far. Crust was perfect.
Asiago is next on the list!
Thanks!!
Team Life As A Strawberry
YAY! We're so happy to hear you loved this recipe!
Patsy
I have read that placing your empty Dutch ovens in an oven to preheat can damage them. Have you had any issues preheating your Dutch ovens?
I have had my Dutch oven several years and it is a less expensive brand.
Thanks!
Team Life As A Strawberry
We have baked lots of bread and have not had any issues with preheating an empty Dutch oven! We haven't tested this recipe with a cold Dutch oven, but you could certainly give it a try without preheating and see how it works or use one of our alternative baking methods.
Lisa F.
This bread is very light and the taste of Asiago cheese is amazing.
I made a change by adding the cheese first instead of putting salt directly on the yeast mixture. I was taught that salt will kill the yeast.
You may want to mention the range of temperature of the warm water to add to the yeast. I used water that was 90 degrees.
I had the same problem as Lily did with the top burning. I set a timer for 10 minutes and was it too late. I covered the bread with foil to prevent further burning. After a total another 5 minutes, I checked the temperature of the bread and is was very done.
I will definitely make this again, but will cook it a shorter time after taking the lid off.
Thank you for sharing. This is a quick and delicious bread that doesn't take the typical 2 days to make like the Dutch oven No Knead breads do.
Team Life As A Strawberry
We're so happy to hear you enjoyed making this bread!
Christine Lovely
Hiya, when do you add the sugar/honey?
Christine Lovely
I missed it, oops! Sorry, I see it now!
Max
This was absolutely fantastic. I made one change though: I crumbled the Asiago into bigger pieces for inside the dough because my reference for Asiago bread always had big cheesy gaps in the bread, and actually next time I’ll do even bigger chunks. It turned out perfectly otherwise!
Team Life As A Strawberry
That sounds AMAZING!
Christina
Made this yesterday and it was seriously the best bread I have ever made. I used a blend of Asiago, Romano, and Parmesan cheeses and the bread flour. I think the star is really the cracked black pepper. That really is delicious in this bread. Thanks for posting this!
Team Life As A Strawberry
WAHOO! We're SO happy you loved it!
Cassandra
Just made my first loaf. It is absolutely amazing! I will be making this often. Thank you, thank you!
Team Life As A Strawberry
WAHOO! So happy to hear that you loved it!
Phil
Can you confirm the yeast quantity 9 gms (2 1/4tsp) active dry yeast. I calculate that 2 1/4 tsp ADY equals 6.38gms ADY. How much should we use? Thank you
Team Life As A Strawberry
Hi Phil! We use 9 grams of active dry yeast when making this bread recipe. Using 6 grams will still work, but will likely take longer to rise!
Carol
I made this recipe last weekend, it tasted good but my dough was not as good as I think it should but due to my prepping it wasn't great but I certainly will try again this week! Thankyou for recipe!
Team Life As A Strawberry
We're SO happy you liked your bread and are going to make it again!
Pam Schweitzer
Awesome! Thank you soooo much for your advise along the way as I am a beginner. I have to be honest, I didn't use the cheese or pepper, instead I used dried fruit and walnuts. But still, it turned out wonderful (if I must say so myself). Thanks again! Pam
Team Life As A Strawberry
AMAZING! We're so happy you loved this recipe! Our Easy Crusty French Bread recipe is a great blank canvas for your favorite additions and toppings and includes a lot of extra tips and tricks to make your perfect loaf!
Diane nicholson
I have baked many different breads in my 68 years. I’ve had a problem now and again with rising but not often. I make English muffin bread it raises perfectly I make loaf bread in a loaf pan it raises perfectly I make dinner rolls they raise perfectly but this is the third time I have tried a crusty bread recipe and it will not rise. I have tried the one where you let it sit on the counter overnight it didn’t raise I’ve tried the one where you let it sit for two hours on your counter it didn’t raise I checkedYour recipe after an hour it did not raise I let it sit another hour it’s still did not raise it is now been sitting for five hours and still has not risen. I am beginning to think I am just jinxed for crusty bread. So disappointing
Team Life As A Strawberry
Hi, Diane! We promise you're not jinxed for crusty bread - we'd love to help you troubleshoot! The first thing to know is that with these quick bread recipes, the dough may not rise as much as you might think on the counter, most of the rise happens while it's baking (that's called oven spring). We have videos for our Easy Crusty French Bread recipe that show what to expect with each rise. It's hard to say without being in the kitchen with you what is causing your bread not to rise, but the most likely culprit is a problem with yeast. If it has expired or if too hot water is used, your yeast won't work as expected. We recommend reading through all the tips and tricks in the Easy Crusty French Bread recipe to that crusty loaf of your dreams!
Chris
I love ALL her bread recipes and they are the only ones I ever use now. Never had success with others. Wish she had a Ciabatta recipe!
Team Life As A Strawberry
WOW thank you so much, Chris! We're planning to release a ciabatta recipe in a later edition of Everyday Artisan Bread!
Lily
Love this recipe but the cheese on top always seems to get burnt, any suggestions? I’ve made it 3 or 4 times now. Oven temp too hot maybe? Thanks!
Team Life As A Strawberry
Hi Lily! A few things could help keep the cheese on top from burning! First, try moving the rack in your oven lower, because the top of the oven is often the hottest. It may also be worth getting an oven thermometer in case your oven temperature could be hotter than you intend! Another strategy is to keep a close eye on your bread during the last 10-20 minutes when the bread bakes with the lid off. We hope that helps!
Craig
My wife and I enjoy this recipe very much. I will start making it for guests!
Team Life As A Strawberry
We're SO happy to hear you both enjoyed it!
Lydia Neufeld
I love this recipe and have made this bread, with great success, several times. However - the bottom crust is very dark and hard. Any suggestions on how to change that? I tried a pizza stone on the oven rack below the dutch oven and that did not have an impact.
Team Life As A Strawberry
Hi Lydia! There are a bunch of ways to adjust if the bottom of your bread is burning and we're happy you help you troubleshoot! First, be sure to use parchment to lift the bread in and out, which creates a barrier between the bread and hot Dutch oven. Other things to try are:
1. Use an oven thermometer to check the true temperature of your oven (we’ve had ovens that are off by as much as 40 degrees in one direction!)
2. Preheat your Dutch oven for half the time.
3. Dust the bottom of your loaf with a thin layer of cornmeal before placing it into the Dutch oven to form a barrier between the dough and the hot surface.
4. Try preheating and baking at a slightly lower temperature (between 425 and 450 degrees F) OR preheating at the suggested temperature of 460 and then turning the oven down to 425 degrees F once you put the bread in.
Don’t worry if it takes a few tries to find your sweet spot – ovens and equipment can vary wildly when it comes to heat distribution, and a big part of bread baking is figuring out your oven’s own unique quirks so you can consistently get the results you want!